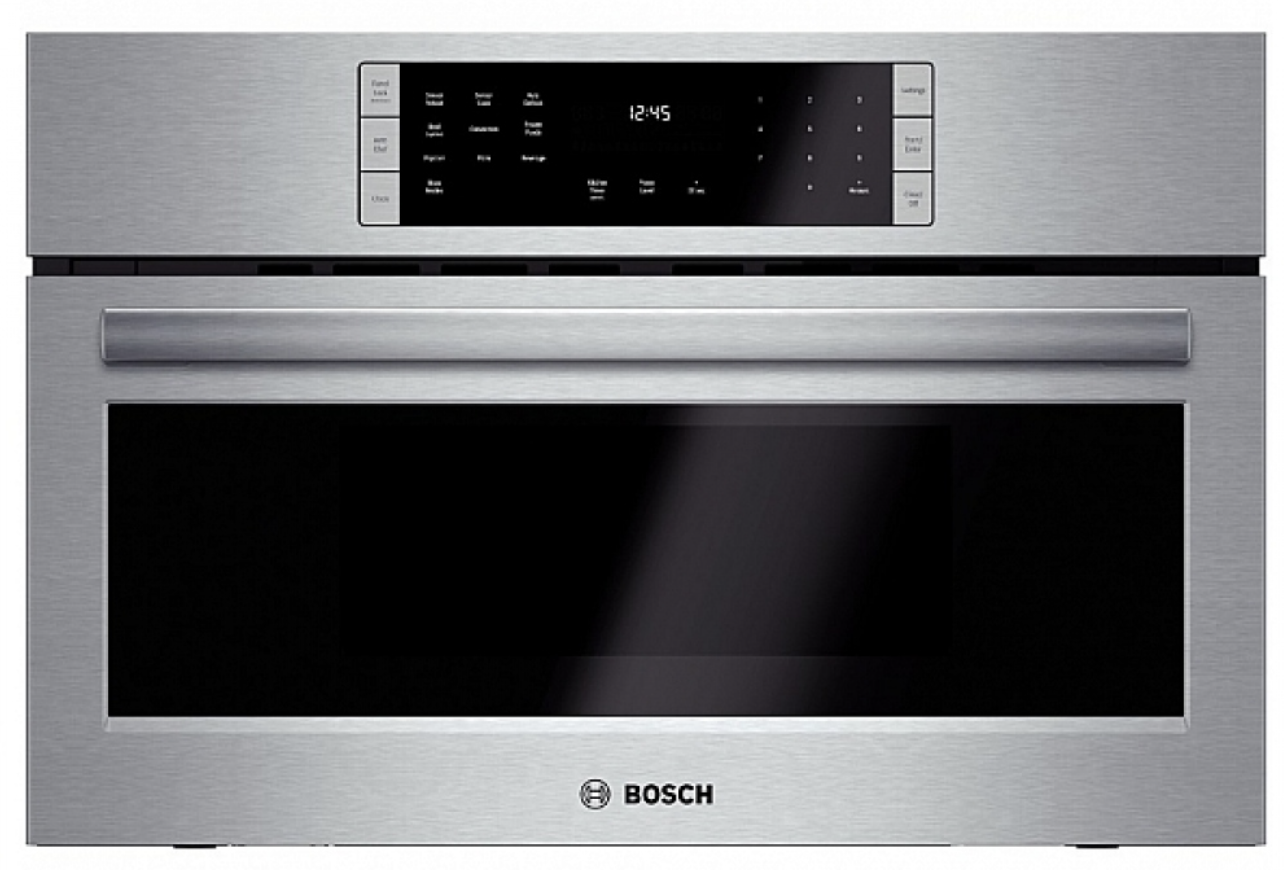
| Make | Bosch |
|---|---|
| Model | HMC80251UC/01 |

 426205387_7527400627291098_7803030672429322677_n.mp4
Problem
Door hinge - No tension.
Solution
Replace broken hinge(s)
https://www.youtube.com/watch?v=m4NXclx93lY
Note!
When removing the plastic casing, you can avoid breaking the top tabs by unlocking the sides and bottom first, and then tapping the top latches from the inside.
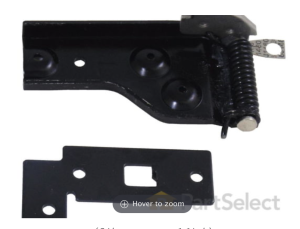
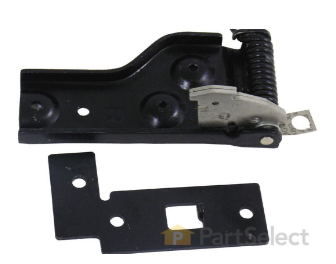
PartSelect Solution - Right hinge failed - return spring broken
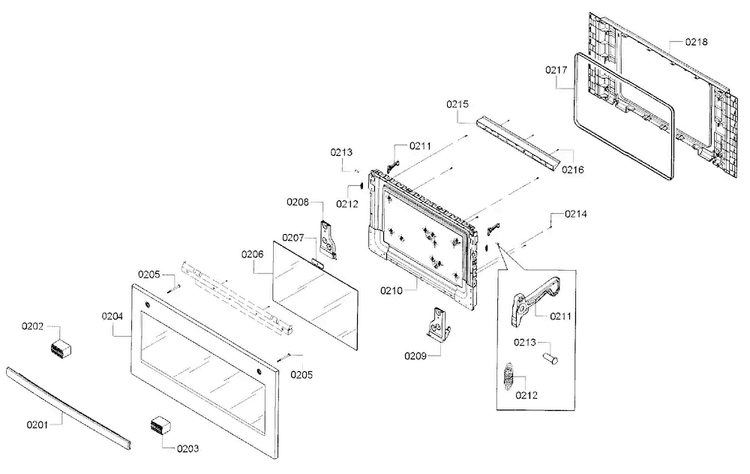
I installed a new right hinge (PartSelect part number 00631518 - #209), since the integrated return spring failed.
Remove the Door
To remove the door, I made two of the special tools required in the Bosch repair manual. I fabricated two square pieces of aluminum, about 30mm on a side and ¼” thick. With the door open (it is horizontal) you place one square in each of the cavities that the hinges close into and close the door far enough that the squares take up the force of the springs and allow you to lift the door out. Of course, if one spring is broken, you will not need a square on that side to remove the door but will need it later to install the door with the new hinge. In fact, I installed the square in the replacement hinge before I installed the hinge in the door.
Remove the Ventilation Duct
Next remove the ventilation duct (Part number 00676002 - #215). There are three screws. When re-installing the duct later, do not overtighten the screws, because they can pull through the duct. This will require longer screws and small flat washers to repair (‘don’t ask me how I know’).
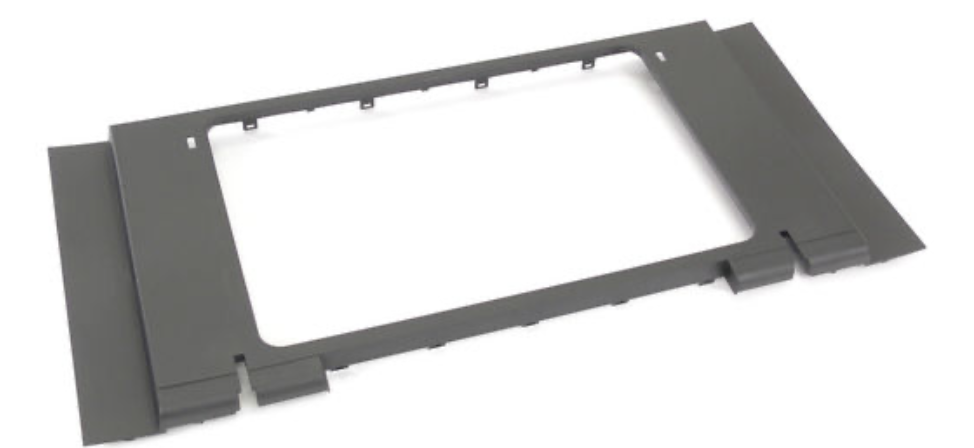
Remove Plastic Cover
The next step is to remove the plastic cover (PartSelect part number 00771186 - #218). It will be impossible to save the plastic cover (‘don’t ask me how I know’).
Purchase a new one ahead of time. It will be easier to not scratch the door if you recognize that you are going to destroy the cover.
When removing the plastic cover, pieces of some of the tabs that hold the cover in place will break off. The broken-off pieces of the tabs that fit into cavities at the top of the door may remain in the cavities. IF YOU DO NOT PICK OUT THOSE PIECES, THE NEW COVER WILL NOT SNAP HOME DUE TO THE PRESENCE OF THE BROKEN PIECES. You will break the new cover in removing it to figure out why it wouldn’t snap home and will have the pleasure of purchasing a second new cover (‘don’t ask me now I know’).
Also, when removing the cover try not to bend the metal fingers of the frame (part number 00683691 - #210), particularly along the top of the door. It is important that the gap between the metal fingers and the frame holding the glass be correct, since that is where the seal (part number 00771184 - #217 ) must fit when replacing the cover. On the other hand, if the metal fingers are bent too far away from the frame holding the glass, the cover will not line up with the cavities along the top where the tabs go home. It will be easier to protect the metal fingers if you recognize that you will be destroying the cover when you remove it.
I did pinch and damage the seal when trying to force the first new cover in place (it didn’t go home, as described above), and had the pleasure of purchasing another seal (currently unavailable). You only get one chance per cover.
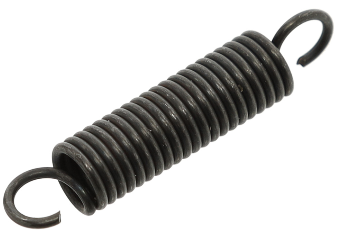
Replace Spring
Once the cover is removed the frame can be removed from the outer door by removing the screws holding the two parts together.
Next, replace the spring.
Re-Assemble
Next re-attach the frame to the outer door.
Next, be sure the seal is positioned correctly on the cover. The seal has a flap that holds it in place on the cover, such that the seal will be pulled into place when installing the cover. This is essential, since you will not be able to reposition the seal once the cover snaps home (particularly along the top of the door).
Now, carefully position the cover so that it is going to remain parallel with the door when you push it home. You do not want the cover to be cocked, since the seal may not install correctly. Be sure all the tabs are falling into place as you install the cover. Hopefully, the tabs will all snap into place and the seal will stay in place.
Replace the door by feeding the hinges into place with the squares still installed. Open the door fully and remove the squares. The door will close correctly if the hinges are placed correctly. This may take several tries.
Done
Finally, microwave yourself a fresh cup of coffee or other beverage.
This door is not meant to be repaired, in my opinion. I believe Bosch offers only the option of buying a new door. A DIY repair is not risk free.
Parts
https://www.partselect.ca/Models/HMC80251UC/
| # | Mft Part# | Description | Image | Link |
|---|---|---|---|---|
| 208 | 00631517 | HINGE-DOOR - Left |
| |
| 209 | 00631518 | HINGE-DOOR - Right |
| |
| 218 | 00771186 | Cover |
| |
| 212 | 10001587 | Spring Curious if this could be used as a replacement for the spring in the hinge? |
| PartSelect ~$9 |