...
Disconnect GPIO-0 from ground and toggle power to boot
Re-assemble
Version 2
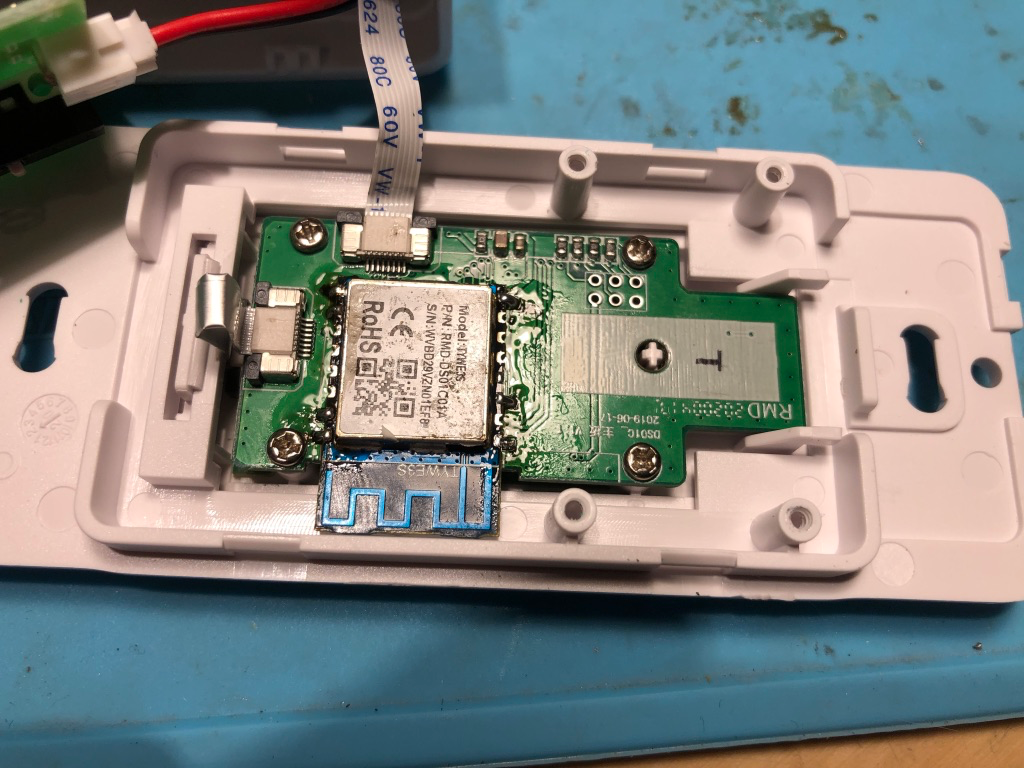
A newer version uses a custom chip which is not an ESP8266
...
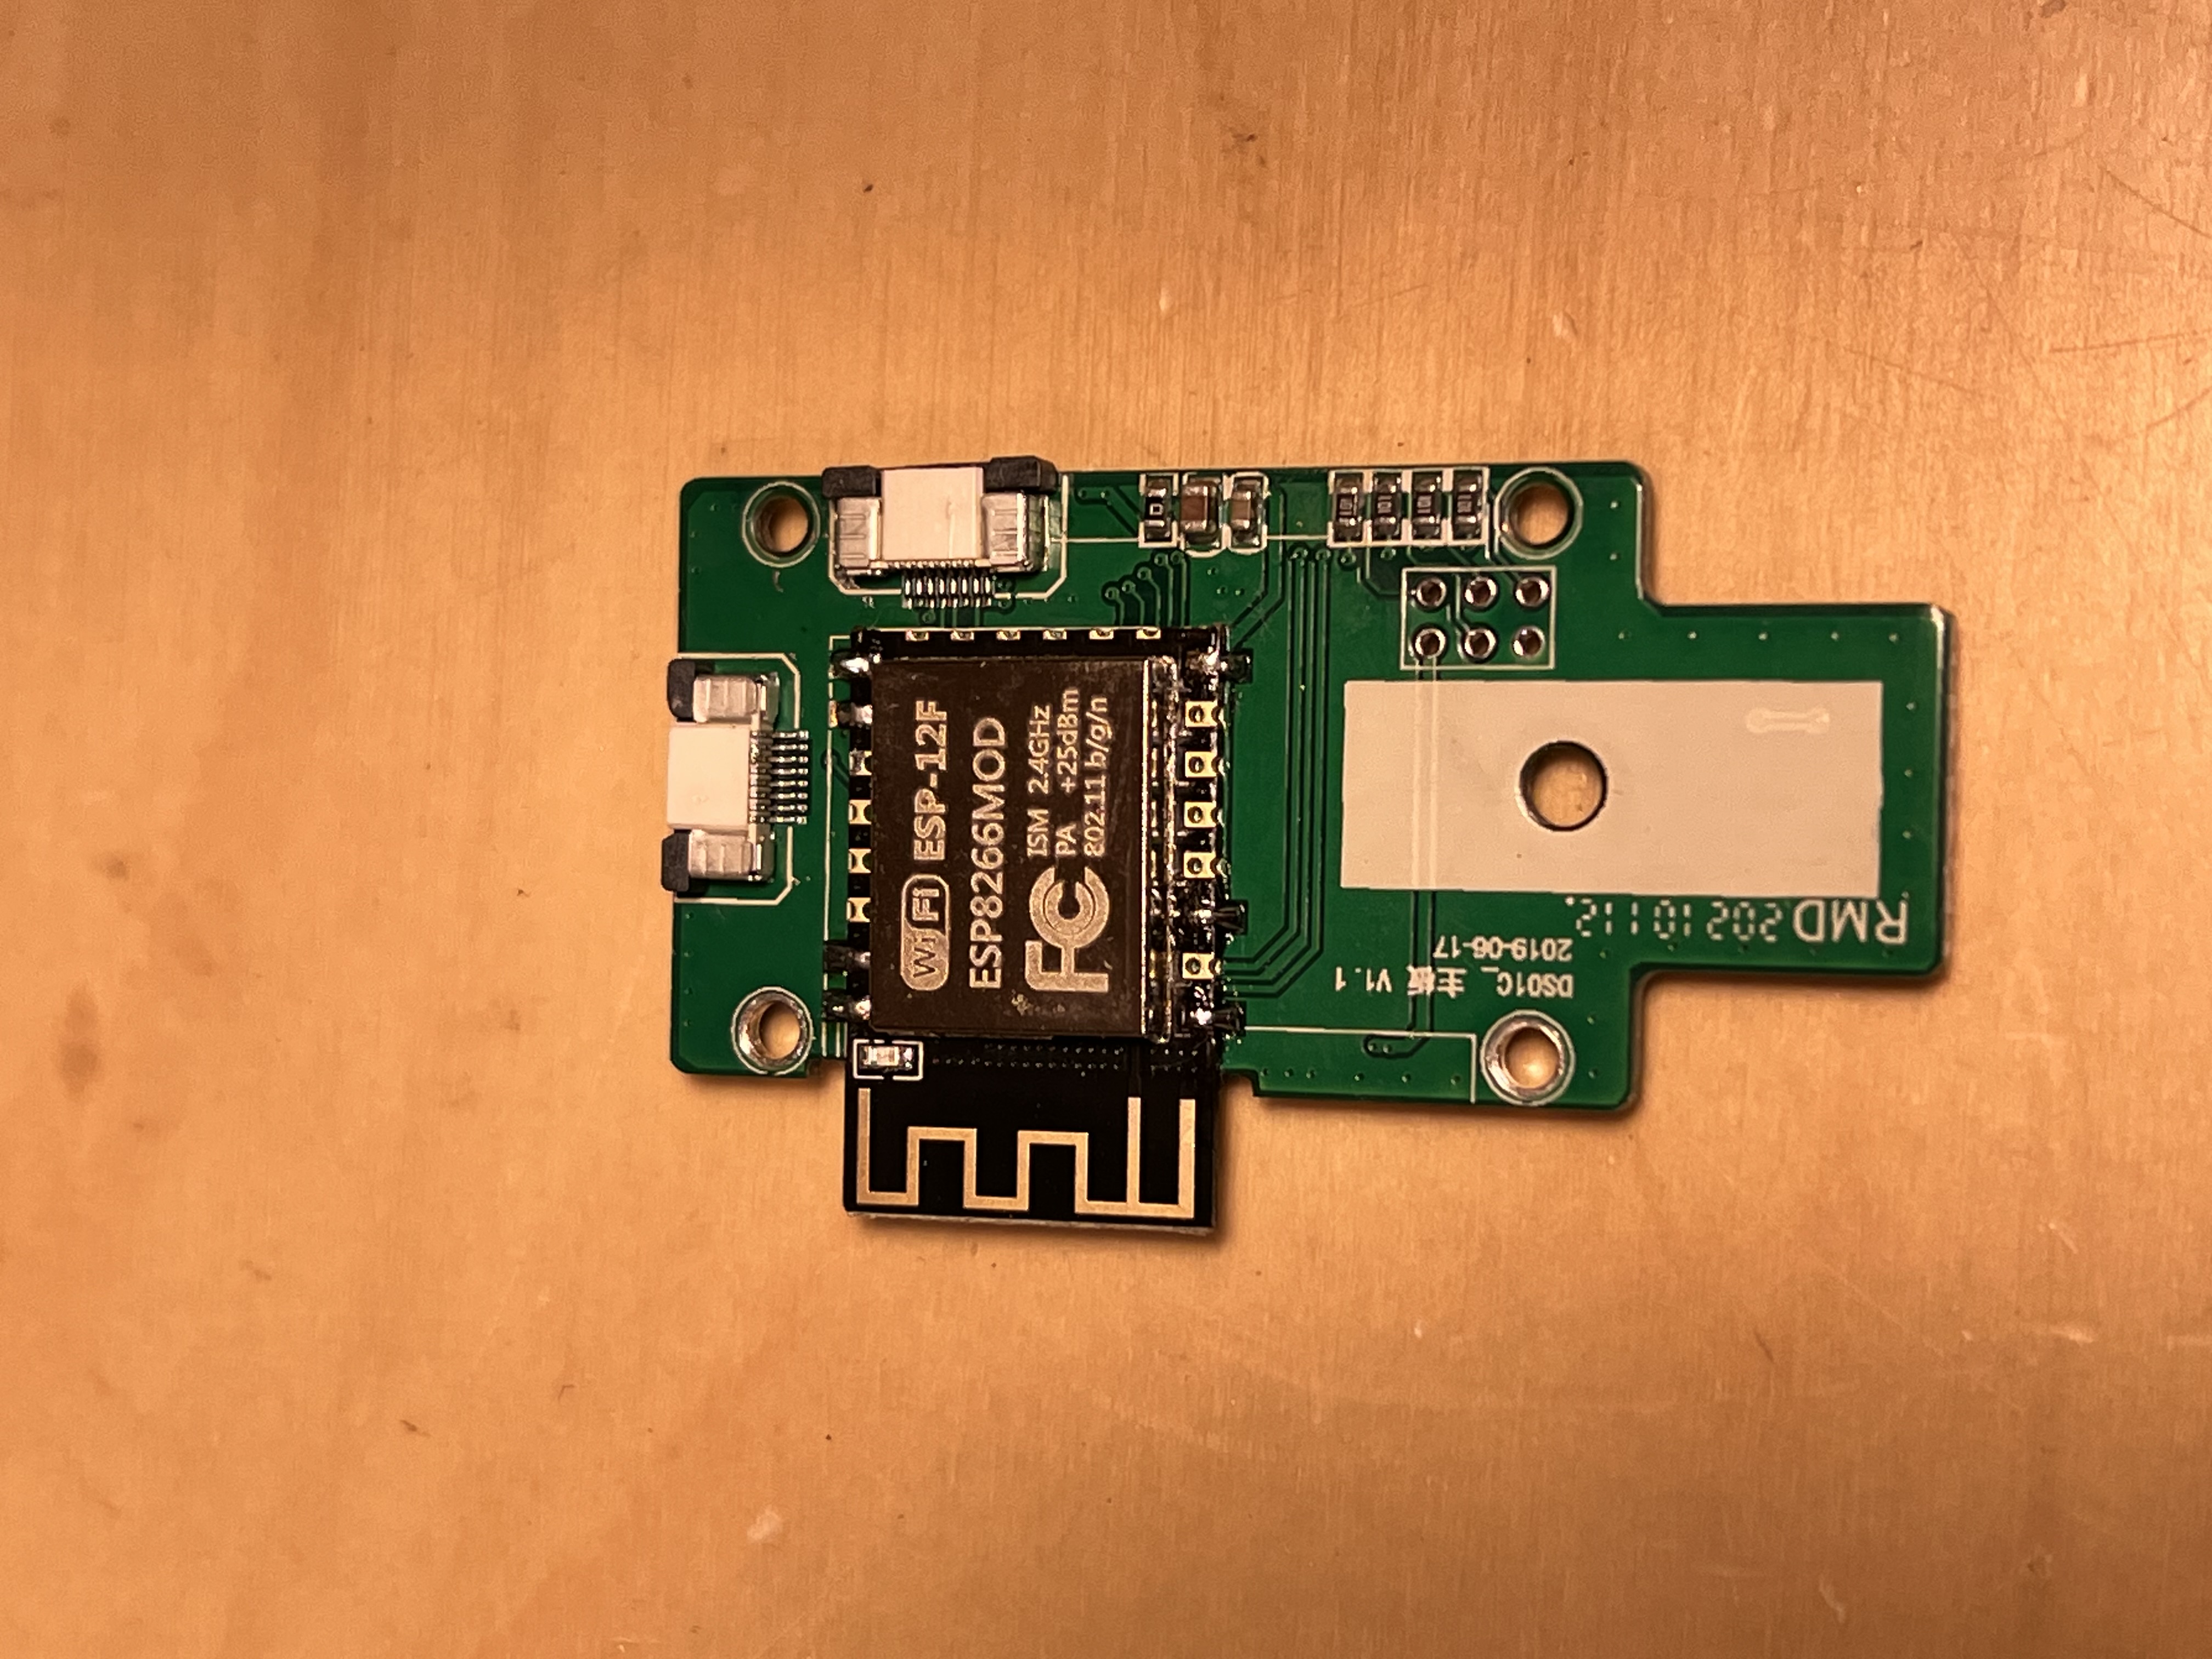
For this version we will de-solder the chip and replace it with an ESP8266 (ESP-12F)
Flashing
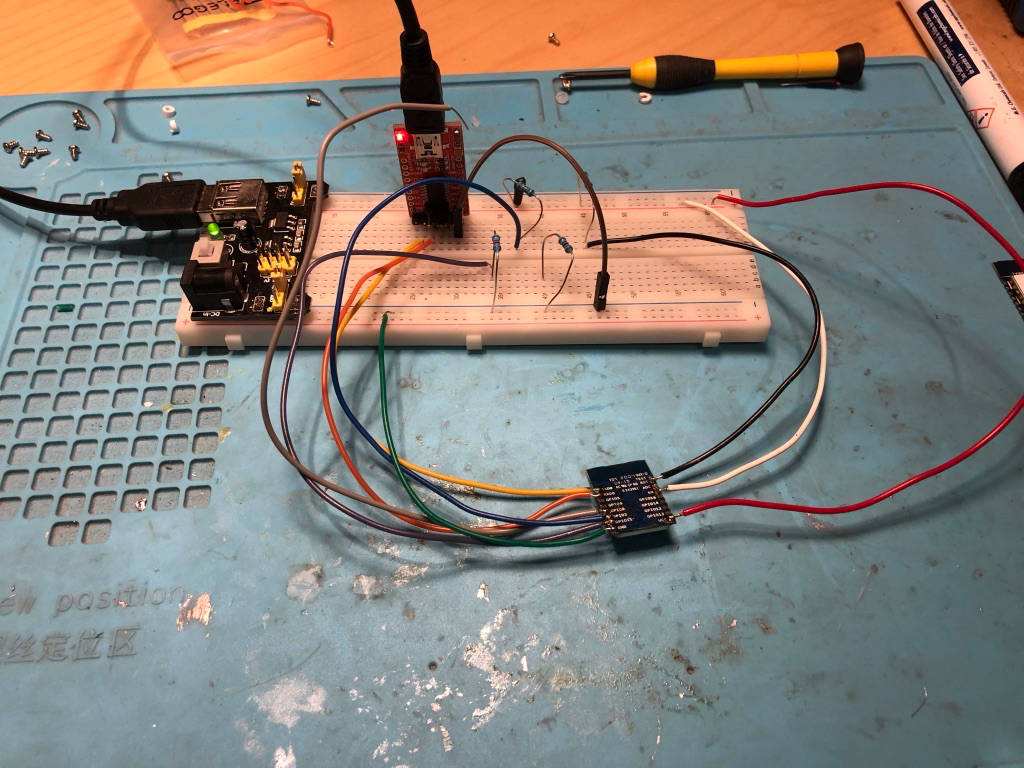
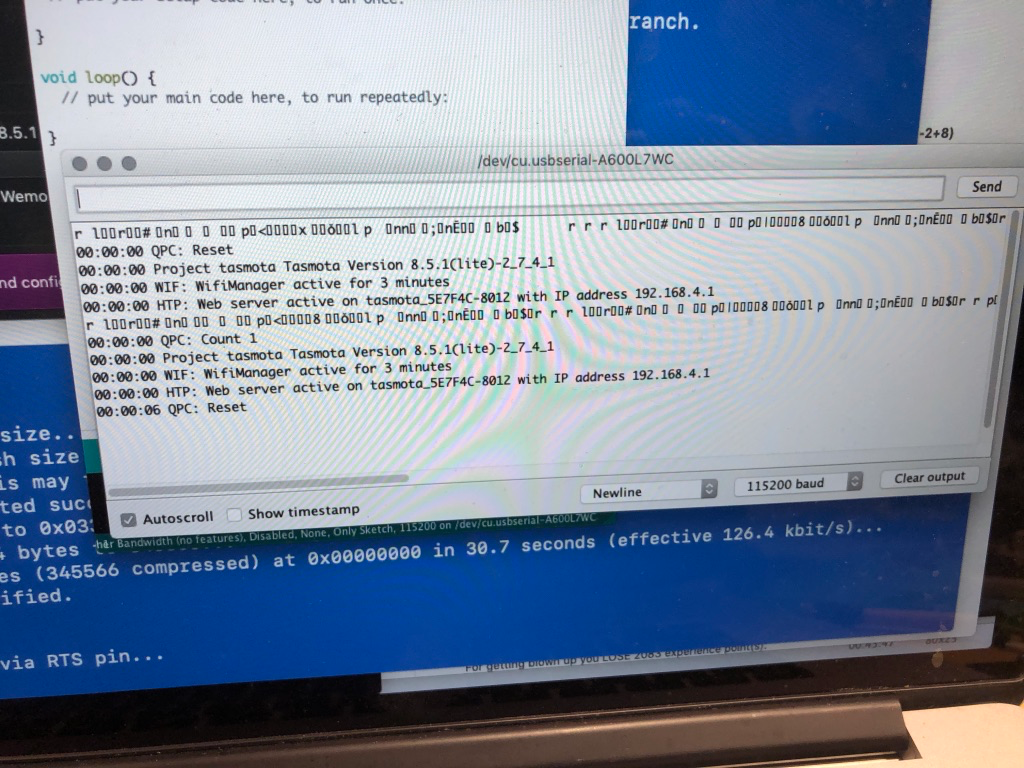
We can flash the board using the same procedure outlined for version 1. However, I decided to buy a new product to make flashing easier.
Wishiot ESP8266 Burning Fixture Development Board Micro USB Port Onboard CP2102 Chip Support ESP-01S ESP-07 ESP-07S ESP-12E ESP-12F ESP-12S ESP-C2 Easy Programer
https://www.amazon.ca/dp/B08BXMGVNM?psc=1&ref=ppx_yo2ov_dt_b_product_details
Just pop your ESP-12F into the board and flash using Tasmotizer.
After flashing, solder the board back onto the board.
Finished Board with new ESP-12F chip installed.
Configuring
Configuration is the same for both versions.
...
From the console, issue the following commands:
| Code Block |
|---|
TuyaMCU 21,2 DimmerRangedimmerrange 150,1000 Rule1 on system#boot do SerialSend5 55AA00060005040400010114 endon Rule 1 1 |
...