
Details
Serial: SDS1EDEX5R4250
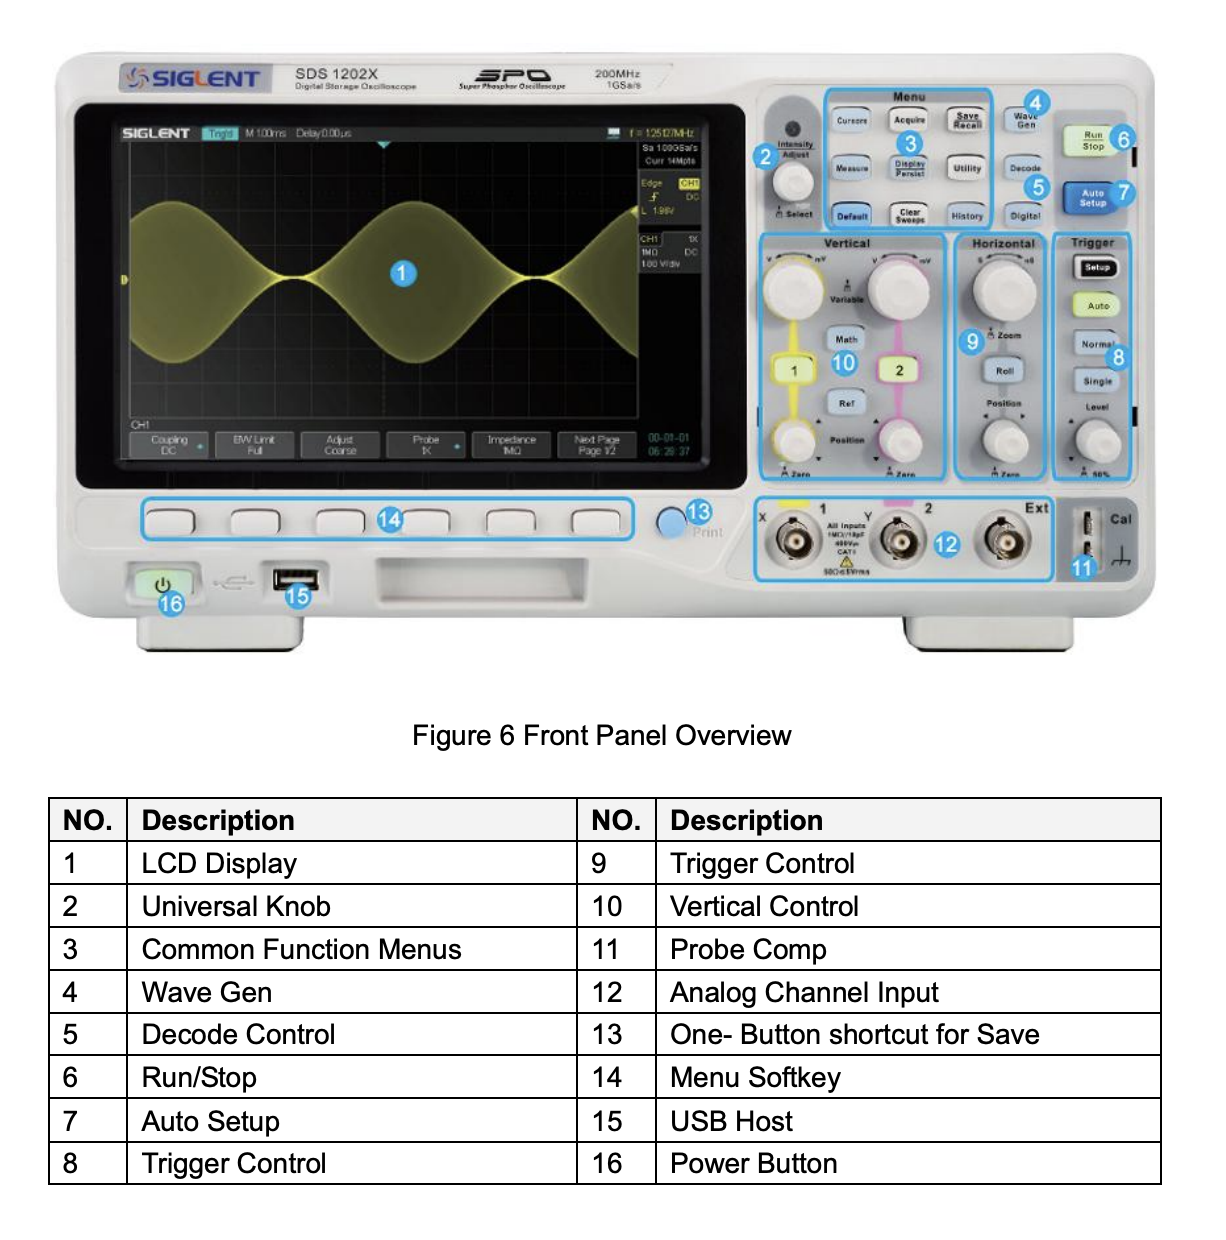
Front Panel
The Basics
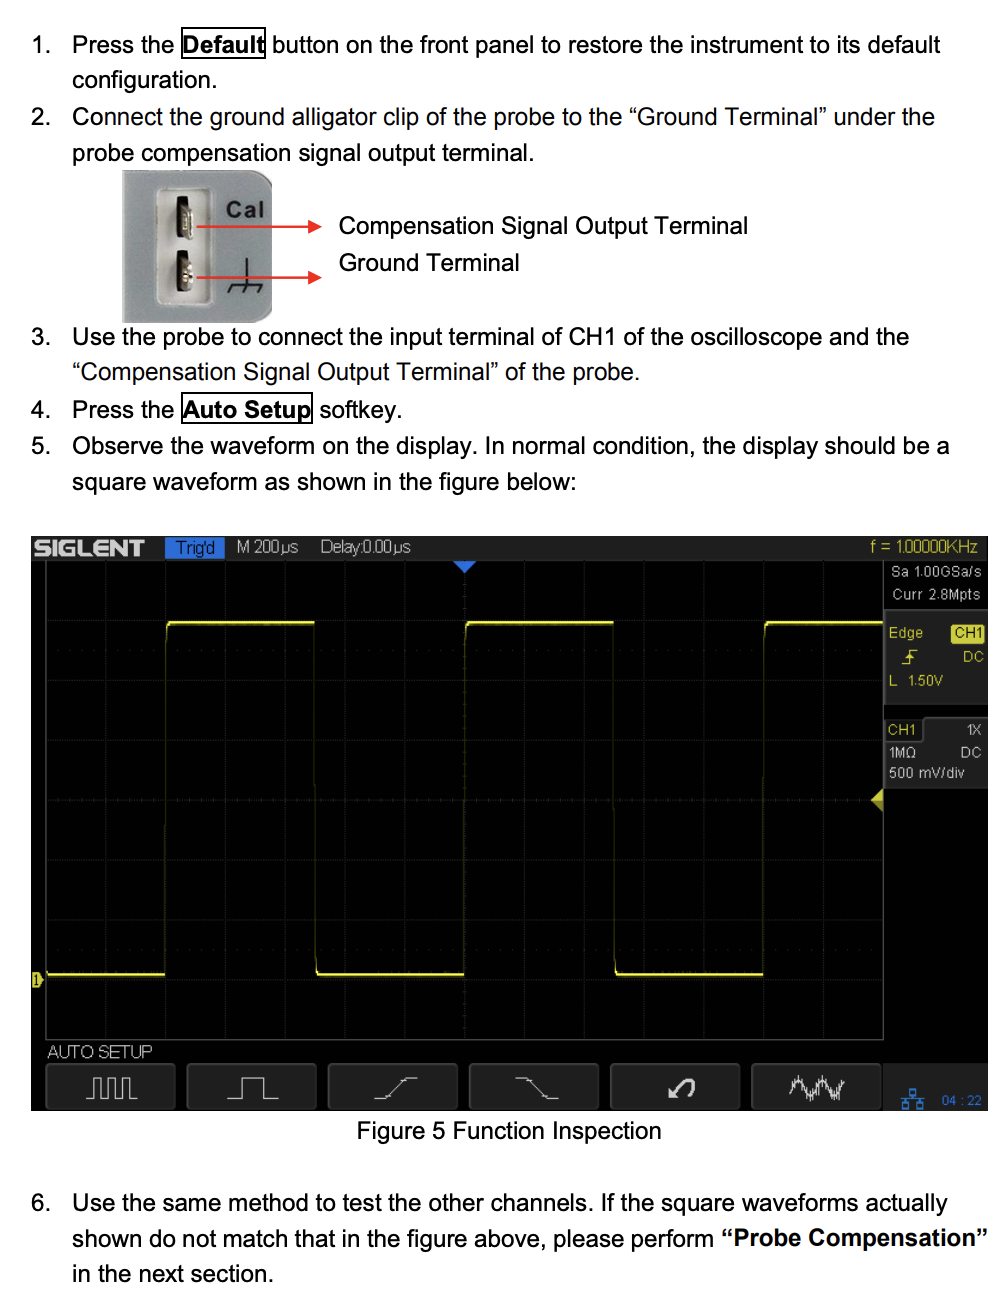
Function Inspection
Specifying Probe Attenuation Factor
Set the probe attenuation factor to match the type of the probe that you are using to ensure correct vertical readouts.
- press the CH1 button on the front panel
- press the Probe softkey and turn the Universal Knob to select the desired value and push the knob to confirm.
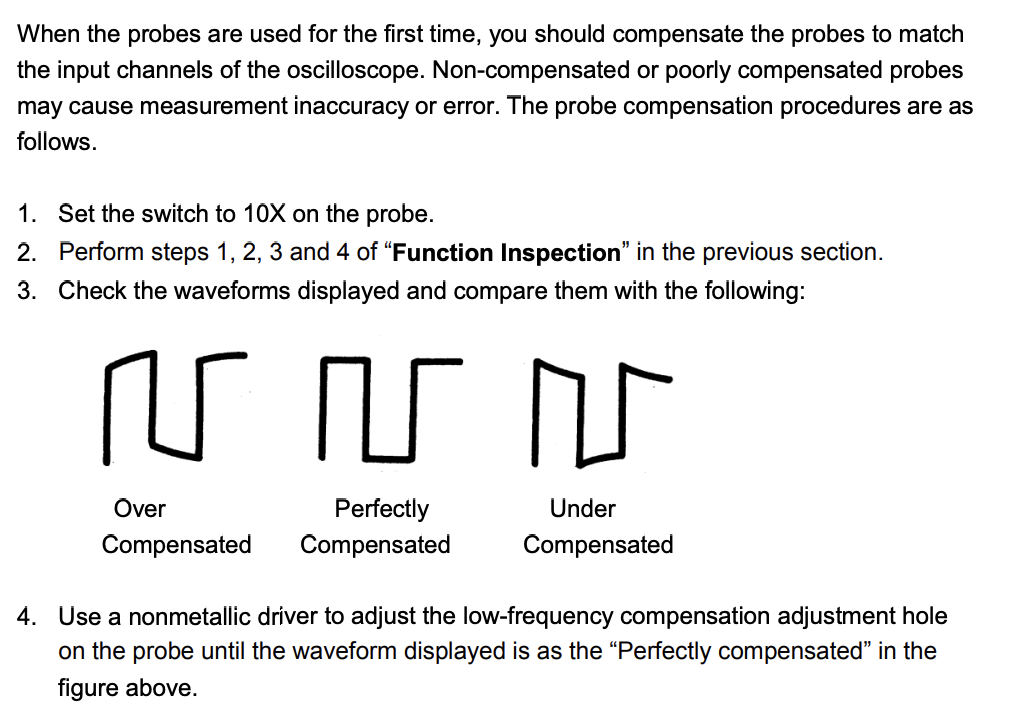
Probe Compensation
Self Calibration
The self calibration program can quickly make the oscilloscope reach the best working state to get the most precise measurement values. You can perform self calibration at anytime especially when the change of the environment temperature is up to or more than 5°C. Make sure that the oscilloscope has been warmed up or operated for more than 30minutes before the self calibration.
Do the following steps to do self calibration:
1. Disconnect all the input channels.
2. Press the Utility button on the front panel,and then press the Do Self Cal soft-key, and the oscilloscope will pop-out the message box shown as below
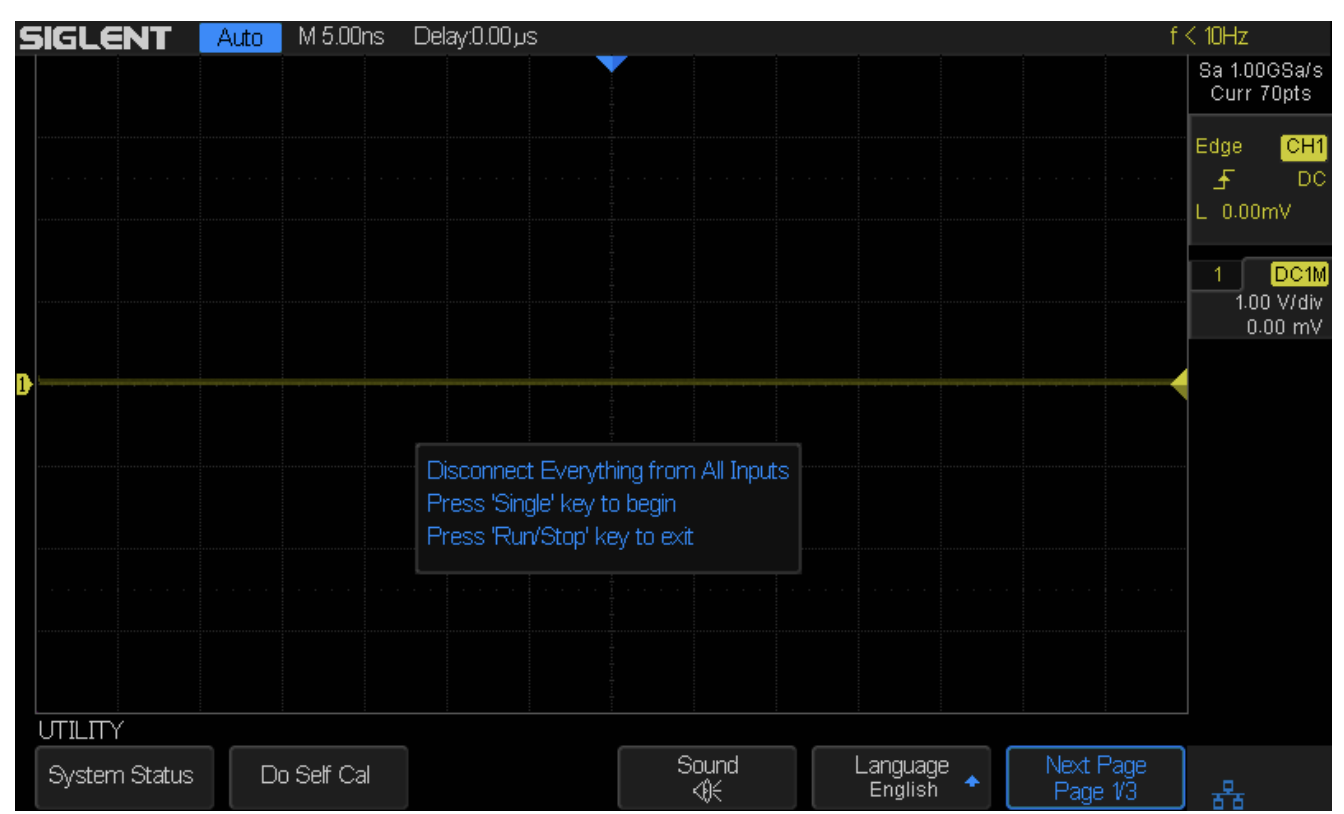
3. Press the Single button on the front panel to perform the self calibration program. During the calibration, most of the keys are disabled.
4. When the self calibration program is finished, it will pop-out the message "press Run/Stop key to exit. Press the Run/Stop button on the front panel to exit the calibration interface.
To Specify Probe Attenuation Factor
Set the probe attenuation factor to match the type of the probe that you are using to ensure correct vertical readouts.
- press the CH1 button on the front panel
- press the Probe softkey and turn the Universal Knob to select the desired value and push the knob to confirm.
The default setup is 1X. The current probe attenuation factor is displayed in the channel label at the right side of the screen. You can also press the Probe softkey continuously to switch the probe attenuation factor.
References
| Reference | URL |
|---|---|
| Quick Start Guide | https://siglentna.com/wp-content/uploads/2020/11/SDS1000X-ESDS1000X-U_QuickStart_QS0101E-E05A.pdf |
| User Manual | https://siglentna.com/wp-content/uploads/dlm_uploads/2021/08/SDS1000X-ESDS1000X-U_UserManual_EN05B.pdf |
| Siglent SDS 1202X-E Unboxing Calibration and self test | https://www.youtube.com/watch?v=NMrozZz6xM0 |