...
|
> reboot
Build
...
the Load Balancer
Set
...
Hostname
> sudo hostnamectl set-hostname k8slb
> sudo hostnamectl
Update Yum
> yum update
Disable firewall
> sudo hostnamectl set-hostname k8smaster1
> sudo hostnamectl
Initialize Master (using Flannel)
> sudo kubeadm init --apiserver-advertise-address <IP ADDRESS> --pod-network-cidr=10.244.0.0/16
systemctl disable firewalld
> systemctl stop firewalld
> systemctl status firewalld
Install haproxy
> yum install haproxy
> vi /etc/haproxy/haproxy.cfg
| Code Block | ||||
|---|---|---|---|---|
| ||||
global
...
defaults
...
#---------------------------------------------------------------------
# main frontend which proxys to the backends
#---------------------------------------------------------------------
frontend kubernetes
  bind *:6443
  mode tcp
  default_backend kubernetes-master-nodes

#---------------------------------------------------------------------
# static backend for serving up images, stylesheets and such
#---------------------------------------------------------------------
backend kubernetes-master-nodes
  mode tcp
  balance roundrobin
  option tcp-check
  server k8smaster1 172.20.233.181:6443 check fall 3 rise 2
  server k8smaster2 172.20.233.182:6443 check fall 3 rise 2
  server k8smaster3 172.20.233.183:6443 check fall 3 rise 2
|
> sudo systemctl start haproxy
> sudo systemctl status haproxy
Verify that you can connect
nc -v LOAD_BALANCER_IP 6443
> nc -v 172.20.233.180 6443
Build a Node
Set the hostname
> sudo hostnamectl set-hostname k8smaster1
> sudo hostnamectl
...
Initialize Master (using Flannel)
> sudo kubeadm init --apiserver-advertise-address <IP ADDRESS> --pod-network-cidr=10.244.0.0/16
| Code Block |
|---|
[init] Using Kubernetes version: v1.13.2
[preflight] Running pre-flight checks
[preflight] Pulling images required for setting up a Kubernetes cluster
[preflight] This might take a minute or two, depending on the speed of your internet connection
[preflight] You can also perform this action in beforehand using 'kubeadm config images pull'
[kubelet-start] Writing kubelet environment file with flags to file "/var/lib/kubelet/kubeadm-flags.env"
[kubelet-start] Writing kubelet configuration to file "/var/lib/kubelet/config.yaml"
[kubelet-start] Activating the kubelet service
[certs] Using certificateDir |
| Code Block |
[init] Using Kubernetes version: v1.13.2 [preflight] Running pre-flight checks [preflight] Pulling images required for setting up a Kubernetes cluster [preflight] This might take a minute or two, depending on the speed of your internet connection [preflight] You can also perform this action in beforehand using 'kubeadm config images pull' [kubelet-start] Writing kubelet environment file with flags to file "/var/lib/kubelet/kubeadm-flags.env" [kubelet-start] Writing kubelet configuration to file "/var/lib/kubelet/config.yaml" [kubelet-start] Activating the kubelet service [certs] Using certificateDir folder "/etc/kubernetes/pki" [certs] Generating "ca" certificate and key [certs] Generating "apiserver-kubelet-client" certificate and key [certs] Generating "apiserver" certificate and key [certs] apiserver serving cert is signed for DNS names [deepthought kubernetes kubernetes.default kubernetes.default.svc kubernetes.default.svc.cluster.local] and IPs [10.96.0.1 192.168.1.50] [certs] Generating "front-proxy-ca" certificate and key [certs] Generating "front-proxy-client" certificate and key [certs] Generating "etcd/ca" certificate and key [certs] Generating "etcd/server" certificate and key [certs] etcd/server serving cert is signed for DNS names [deepthought localhost] and IPs [192.168.1.50 127.0.0.1 ::1] [certs] Generating "etcd/peer" certificate and key [certs] etcd/peer serving cert is signed for DNS names [deepthought localhost] and IPs [192.168.1.50 127.0.0.1 ::1] [certs] Generating "etcd/healthcheck-client" certificate and key [certs] Generating "apiserver-etcd-client" certificate and key [certs] Generating "sa" key and public key [kubeconfig] Using kubeconfig folder "/etc/kubernetes" [kubeconfig] Writing "admin.conf" kubeconfig file [kubeconfig] Writing "kubelet.conf" kubeconfig file [kubeconfig] Writing "controller-manager.conf" kubeconfig file [kubeconfig] Writing "scheduler.conf" kubeconfig file [control-plane] Using manifest folder "/etc/kubernetes/manifestspki" [control-planecerts] Creating static Pod manifest for "kube-apiserver" [control-plane] Creating static Pod manifest for "kube-controller-manager" [control-plane] Creating static Pod manifest for "kube-scheduler" [etcd] Creating static Pod manifest for local etcd in "/etc/kubernetes/manifests" [wait-control-plane] Waiting for the kubelet to boot up the control plane as static Pods from directory "/etc/kubernetes/manifests". This can take up to 4m0s [apiclient] All control plane components are healthy after 26.002483 seconds [uploadconfig] storing the configuration used in ConfigMap "kubeadm-config" in the "kube-system" Namespace [kubelet] Creating a ConfigMap "kubelet-config-1.13" in namespace kube-system with the configuration for the kubelets in the cluster [patchnode] Uploading the CRI Socket information "/var/run/dockershim.sock" to the Node API object "deepthought" as an annotation [mark-control-plane] Marking the node deepthought as control-plane by adding the label "node-role.kubernetes.io/master=''" [mark-control-plane] Marking the node deepthought as control-plane by adding the taints [node-role.kubernetes.io/master:NoSchedule] [bootstrap-token] Using token: 0s0oa4.2i5lo5vyuyvbnze6 [bootstrap-token] Configuring bootstrap tokens, cluster-info ConfigMap, RBAC Roles [bootstraptoken] configured RBAC rules to allow Node Bootstrap tokens to post CSRs in order for nodes to get long term certificate credentials [bootstraptoken] configured RBAC rules to allow the csrapprover controller automatically approve CSRs from a Node Bootstrap Token [bootstraptoken] configured RBAC rules to allow certificate rotation for all node client certificates in the cluster [bootstraptoken] creating the "cluster-info" ConfigMap in the "kube-public" namespace [addons] Applied essential addon: CoreDNS [addons] Applied essential addon: kube-proxy Your Kubernetes master has initialized successfully! To start using your cluster, you need to run the following as a regular user: mkdir -p $HOME/.kube sudo cp -i /etc/kubernetes/admin.conf $HOME/.kube/config sudo chown $(id -u):$(id -g) $HOME/.kube/config You should now deploy a pod network to the cluster. Run "kubectl apply -f [podnetwork].yaml" with one of the options listed at: https://kubernetes.io/docs/concepts/cluster-administration/addons/ You can now join any number of machines by running the following on each node as root: kubeadm join 192.168.1.50:6443 --token 0s0oa4.2i5lo5vyuyvbnze6 --discovery-token-ca-cert-hash sha256:20b8104c05927611df68ebb0eb9fbf8f65d3b85d2e57de9ecc5468e5369b9c22 |
Record the kubeadm join command!
As your non root user:
| Code Block |
|---|
mkdir -p $HOME/.kube
sudo cp -i /etc/kubernetes/admin.conf $HOME/.kube/config
sudo chown $(id -u):$(id -g) $HOME/.kube/config
|
Verify that your network is on the right network interface
Generating "ca" certificate and key
[certs] Generating "apiserver-kubelet-client" certificate and key
[certs] Generating "apiserver" certificate and key
[certs] apiserver serving cert is signed for DNS names [deepthought kubernetes kubernetes.default kubernetes.default.svc kubernetes.default.svc.cluster.local] and IPs [10.96.0.1 192.168.1.50]
[certs] Generating "front-proxy-ca" certificate and key
[certs] Generating "front-proxy-client" certificate and key
[certs] Generating "etcd/ca" certificate and key
[certs] Generating "etcd/server" certificate and key
[certs] etcd/server serving cert is signed for DNS names [deepthought localhost] and IPs [192.168.1.50 127.0.0.1 ::1]
[certs] Generating "etcd/peer" certificate and key
[certs] etcd/peer serving cert is signed for DNS names [deepthought localhost] and IPs [192.168.1.50 127.0.0.1 ::1]
[certs] Generating "etcd/healthcheck-client" certificate and key
[certs] Generating "apiserver-etcd-client" certificate and key
[certs] Generating "sa" key and public key
[kubeconfig] Using kubeconfig folder "/etc/kubernetes"
[kubeconfig] Writing "admin.conf" kubeconfig file
[kubeconfig] Writing "kubelet.conf" kubeconfig file
[kubeconfig] Writing "controller-manager.conf" kubeconfig file
[kubeconfig] Writing "scheduler.conf" kubeconfig file
[control-plane] Using manifest folder "/etc/kubernetes/manifests"
[control-plane] Creating static Pod manifest for "kube-apiserver"
[control-plane] Creating static Pod manifest for "kube-controller-manager"
[control-plane] Creating static Pod manifest for "kube-scheduler"
[etcd] Creating static Pod manifest for local etcd in "/etc/kubernetes/manifests"
[wait-control-plane] Waiting for the kubelet to boot up the control plane as static Pods from directory "/etc/kubernetes/manifests". This can take up to 4m0s
[apiclient] All control plane components are healthy after 26.002483 seconds
[uploadconfig] storing the configuration used in ConfigMap "kubeadm-config" in the "kube-system" Namespace
[kubelet] Creating a ConfigMap "kubelet-config-1.13" in namespace kube-system with the configuration for the kubelets in the cluster
[patchnode] Uploading the CRI Socket information "/var/run/dockershim.sock" to the Node API object "deepthought" as an annotation
[mark-control-plane] Marking the node deepthought as control-plane by adding the label "node-role.kubernetes.io/master=''"
[mark-control-plane] Marking the node deepthought as control-plane by adding the taints [node-role.kubernetes.io/master:NoSchedule]
[bootstrap-token] Using token: 0s0oa4.2i5lo5vyuyvbnze6
[bootstrap-token] Configuring bootstrap tokens, cluster-info ConfigMap, RBAC Roles
[bootstraptoken] configured RBAC rules to allow Node Bootstrap tokens to post CSRs in order for nodes to get long term certificate credentials
[bootstraptoken] configured RBAC rules to allow the csrapprover controller automatically approve CSRs from a Node Bootstrap Token
[bootstraptoken] configured RBAC rules to allow certificate rotation for all node client certificates in the cluster
[bootstraptoken] creating the "cluster-info" ConfigMap in the "kube-public" namespace
[addons] Applied essential addon: CoreDNS
[addons] Applied essential addon: kube-proxy

Your Kubernetes master has initialized successfully!

To start using your cluster, you need to run the following as a regular user:

  mkdir -p $HOME/.kube
  sudo cp -i /etc/kubernetes/admin.conf $HOME/.kube/config
  sudo chown $(id -u):$(id -g) $HOME/.kube/config

You should now deploy a pod network to the cluster.
Run "kubectl apply -f [podnetwork].yaml" with one of the options listed at:
  https://kubernetes.io/docs/concepts/cluster-administration/addons/

You can now join any number of machines by running the following on each node
as root:

  kubeadm join 192.168.1.50:6443 --token 0s0oa4.2i5lo5vyuyvbnze6 --discovery-token-ca-cert-hash sha256:20b8104c05927611df68ebb0eb9fbf8f65d3b85d2e57de9ecc5468e5369b9c22
|
Record the kubeadm join command!
As your non root user:
| Code Block |
|---|
mkdir -p $HOME/.kube
sudo cp -i /etc/kubernetes/admin.conf $HOME/.kube/config
sudo chown $(id -u):$(id -g) $HOME/.kube/config
|
Verify that your network is on the right network interface
| Code Block |
|---|
kubectl get pods -o wide --all-namespaces

NAMESPACE NAME |
| Code Block |
kubectl get pods -o wide --all-namespaces NAMESPACE NAME READY STATUS RESTARTS AGE IP NODE NOMINATED NODE READINESS GATES kube-system coredns-86c58d9df4-8zk5t 0/1 Pending 0 2d3h <none> <none> <none> <none> kube-system coredns-86c58d9df4-tsftk READY 0/1 STATUS PendingRESTARTS 0AGE IP 2d3h <none> NODE <none> NOMINATED NODE <none> <none>READINESS GATES kube-system etcdcoredns-86c58d9df4-k8master8zk5t 0/1 Pending 0 1/1 Running 2d3h 1 <none> <none> 2d3h 10.0.3.15 k8master <none> <none> kube-system kubecoredns-apiserver86c58d9df4-k8mastertsftk 10/1 RunningPending 10 2d3h 10.0.3.15 <none> <none> k8master <none> <none> kube-system kubeetcd-controller-manager-k8master 1/1 Running 1 2d3h 10.0.3.15 k8master <none> <none> kube-system kube-proxyapiserver-88gdq k8master 1/1 Running 1 2d3h 10.0.3.15 k8master <none> <none> kube-system kube-schedulercontroller-manager-k8master 1/1 Running 1 2d3h 10.0.3.15 k8master <none> <none> |
Install Flannel Network Plugin
> sudo sysctl net.bridge.bridge-nf-call-iptables=1
> kubectl apply -f https://raw.githubusercontent.com/coreos/flannel/bc79dd1505b0c8681ece4de4c0d86c5cd2643275/Documentation/kube-flannel.yml
NOTE: See https://kubernetes.io/docs/setup/independent/create-cluster-kubeadm/ for details on the various plugins and their setup.
Verify that all of your kubernetes pods are running
> kubectl get pods --all-namespaces
| Code Block |
|---|
NAMESPACEkube-system kube-proxy-88gdq 1/1 Running 1 NAME 2d3h 10.0.3.15 k8master <none> READY STATUS RESTARTS AGE<none> kube-system corednskube-86c58d9df4scheduler-8zk5tk8master 1/1 Running 01 47h kube-system2d3h coredns-86c58d9df4-tsftk10.0.3.15 k8master <none> 1/1 <none> |
Install Flannel Network Plugin
> sudo sysctl net.bridge.bridge-nf-call-iptables=1
> kubectl apply -f https://raw.githubusercontent.com/coreos/flannel/bc79dd1505b0c8681ece4de4c0d86c5cd2643275/Documentation/kube-flannel.yml
NOTE: See https://kubernetes.io/docs/setup/independent/create-cluster-kubeadm/ for details on the various plugins and their setup.
Verify that all of your kubernetes pods are running
> kubectl get pods --all-namespaces
| Code Block |
|---|
NAMESPACERunning 0 47h kube-system etcd-k8master 1/1 Running 1 NAME 47h kube-system kube-apiserver-k8master 1/1 Running 1READY STATUS RESTARTS 47hAGE kube-system kubecoredns-controller-manager-k8master86c58d9df4-8zk5t 1/1 Running 10 47h kube-system kubecoredns-flannel-ds-amd64-fl5wp86c58d9df4-tsftk 1/1 Running 0 12s47h kube-system kube-proxy-88gdqetcd-k8master 1/1 Running 1 47h kube-system kube-schedulerapiserver-k8master 1/1 Running 1 47h |
By default, your cluster will not schedule pods on the master for security reasons. If you want to be able to schedule pods on the master, e.g. for a single-machine Kubernetes cluster for development, run:
> kubectl taint nodes --all node-role.kubernetes.io/master-Install Dashboard
From the master node:
| Code Block |
|---|
> kubectl create -f https://raw.githubusercontent.com/kubernetes/dashboard/master/aio/deploy/recommended/kubernetes-dashboard.yaml

secret/kubernetes-dashboard-certs created
serviceaccount/kubernetes-dashboard created
role.rbac.authorization.k8s.io/kubernetes-dashboard-minimal created
rolebinding.rbac.authorization.k8s.io/kubernetes-dashboard-minimal created
deployment.apps/kubernetes-dashboard created
service/kubernetes-dashboard created
|
Create a dashboard admin user:
vi dashboard-adminuser.yaml
| Code Block |
|---|
apiVersion: v1
kind: ServiceAccount
metadata:
  name: admin-user
  namespace: kube-system
---
apiVersion: rbac.authorization.k8s.io/v1
kind: ClusterRoleBinding
metadata:
  name: admin-user
roleRef:
  apiGroup: rbac.authorization.k8s.io
  kind: ClusterRole
  name: cluster-admin
subjects:
- kind: ServiceAccount
  name: admin-user
namespace: kube-system |
> kubectl apply -f dashboard-adminuser.yaml
| Code Block |
|---|
serviceaccount/admin-user created
clusterrolebinding.rbac.authorization.k8s.io/admin-user created |
Get the access token
| Code Block |
|---|
> kubectl -n kube-system describe secret $(kubectl -n kube-system get secret | grep admin-user | awk '{print $1}')

Name:         admin-user-token-s6x6d
Namespace:    kube-system
Labels:       <none>
Annotations:  kubernetes.io/service-account.name: admin-user
              kubernetes.io/service-account.uid: 7f55a022-1a05-11e9-a8cb-6c3be541582b

Type:  kubernetes.io/service-account-token


Data
====
namespace:  11 bytes
token:      eyJhbGciOiJSUzI1NiIsImtpZCI6IiJ9.eyJpc3MiOiJrdWJlcm5ldGVzL3NlcnZpY2VhY2NvdW50Iiwia3ViZXJuZXRlcy5pby9zZXJ2aWNlYWNjb3VudC9uYW1lc3BhY2UiOiJrdWJlLXN5c3RlbSIsImt1YmVybmV0ZXMuaW8vc2VydmljZWFjY291bnQvc2VjcmV0Lm5hbWUiOiJhZG1pbi11c2VyLXRva2VuLXM2eDZkIiwia3ViZXJuZXRlcy5pby9zZXJ2aWNlYWNjb3VudC9zZXJ2aWNlLWFjY291bnQubmFtZSI6ImFkbWluLXVzZXIiLCJrdWJlcm5ldGVzLmlvL3NlcnZpY2VhY2NvdW50L3NlcnZpY2UtYWNjb3VudC51aWQiOiI3ZjU1YTAyMi0xYTA1LTExZTktYThjYi02YzNiZTU0MTU4MmIiLCJzdWIiOiJzeXN0ZW06c2VydmljZWFjY291bnQ6a3ViZS1zeXN0ZW06YWRtaW4tdXNlciJ9.btoYxamkG_dww0sht85C_txkXr6v0rwISzwkyGT1ivj9MIgrvBG0eF044VOihhWyqjv-lJQOpbFk3TnbDE4QWUr9aFyiQZo_qQGgqSj_NBKWuDw3N0KTjk_siB_3Zb4tOCGe9i0iJ3zwYxDlh5eAD_-YiY-yU8QKY85pJPbTqR4USWiHh4Saj4HEg0TM0EUIToCqF-u9qEF0Y51dc17VW3NKeCEIfarP4x893yzYRnNrbk8ItgjQqln6oQ2AH49dow28fUiGyUCcu1dazXrOr0A_j-Lg-5KaVkT6dXIU5SMMMlrhszrdmrK9akbEP3AdKRErVNosVR_afWdOo8lByA
ca.crt: 1025 bytes |
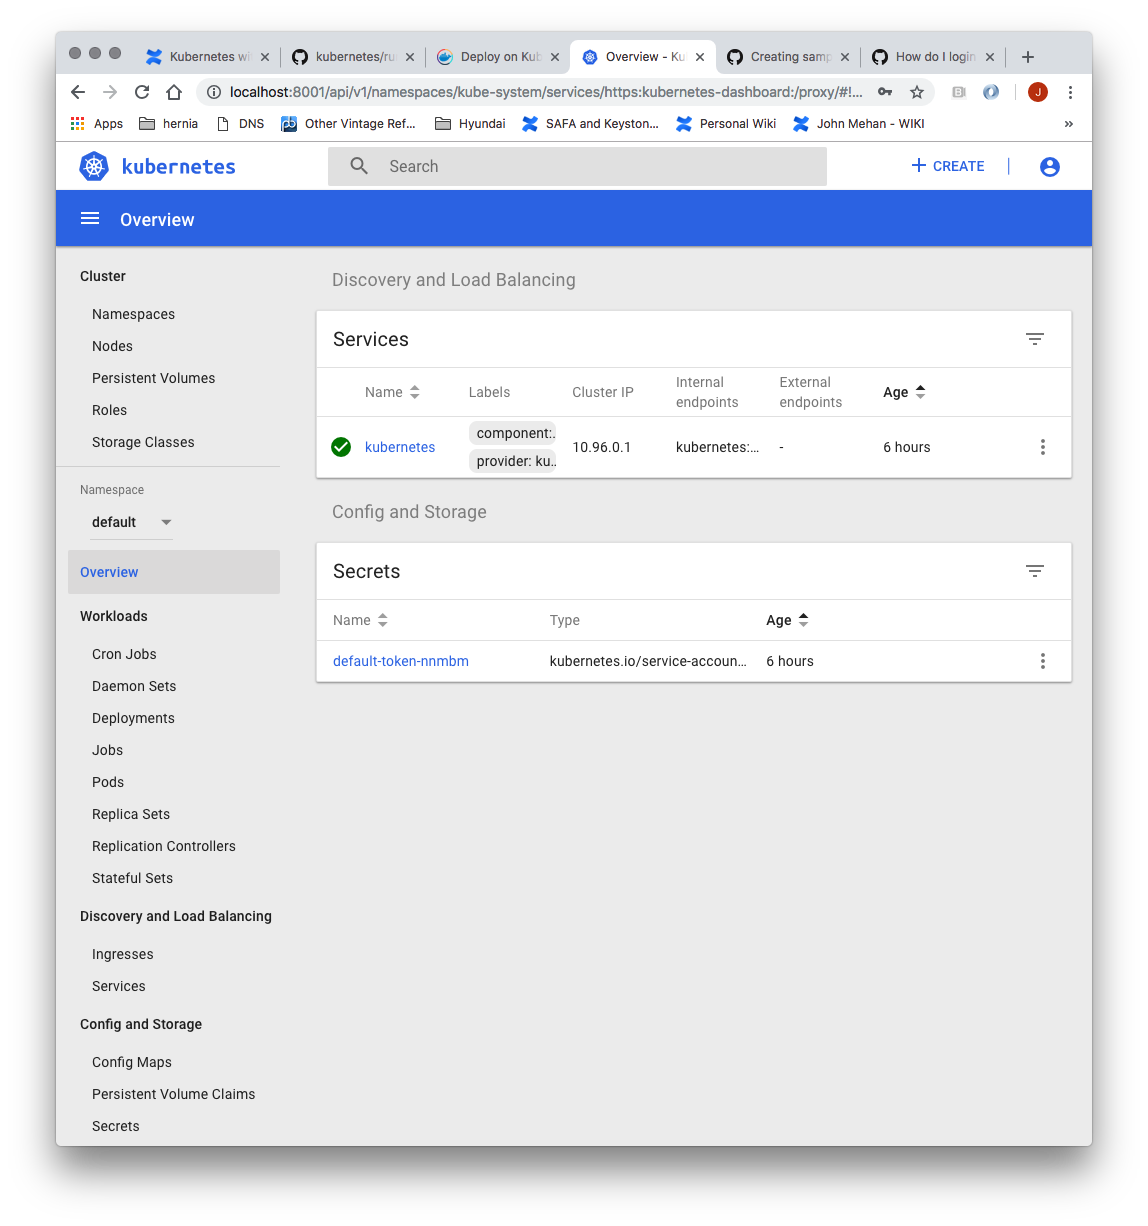
Access the Dashboard by using the API proxy
From your local machine:
> ssh -L 8001:127.0.0.1:8001 <USER>@<IP>
> kubectl proxy
Browse to:
http://localhost:8001/api/v1/namespaces/kube-system/services/https:kubernetes-dashboard:/proxy/.
Access the Dashboard using port forwarding
From your local machine:
> ssh -L 8443:127.0.0.1:8443 <USER>@<IP>
> kubectl port-forward $(kubectl -n kube-system get pods |grep kubernetes-dashboard |awk '{print $1}') 8443:8443 --namespace=kube-system
Browse to:
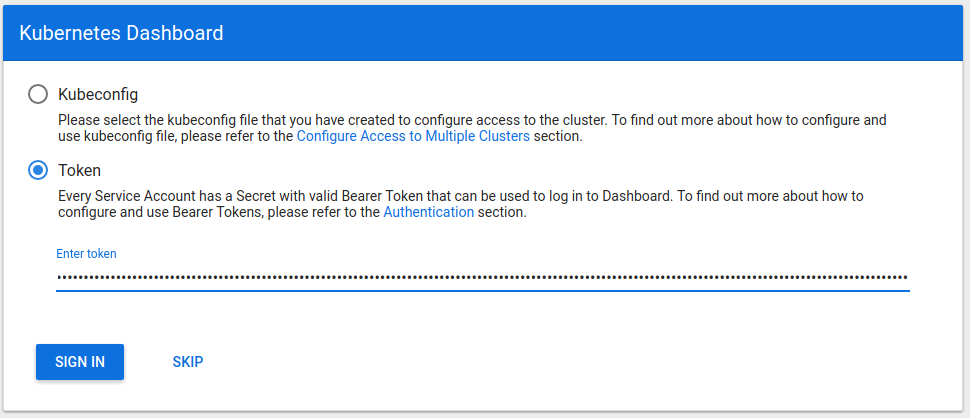
Sign in to the Dashboard
Sign in using the token previously retrieved.
Install Sample Pod
> vi nginx-example.yaml
| Code Block |
|---|
apiVersion: apps/v1 # for versions before 1.9.0 use apps/v1beta2
kind: Deployment
metadata:
  name: nginx-deployment
spec:
  selector:
    matchLabels:
      app: nginx
  replicas: 2 # tells deployment to run 2 pods matching the template
  template:
    metadata:
      labels:
        app: nginx
    spec:
      containers:
      - name: nginx
        image: nginx:1.7.9
        ports:
- containerPort: 80 |
> kubectl apply -f nginx-example.yaml
Expose your nginx pods via a nodePort
> kubectl expose deployment nginx-deployment --type=NodePort --name=nginx
> kubectl get services
| Code Block |
|---|
NAME         TYPE        CLUSTER-IP     EXTERNAL-IP   PORT(S)        AGE
kubernetes   ClusterIP   10.96.0.1      <none>        443/TCP        95m
nginx NodePort 10.98.77.176 <none> 80:31490/TCP 119s |
From the above we can see that the nginx service is exposed on port 31490.
Verify by issuing the following command:
> curl http://<NODE_IP>:31490
Build the Load Balancer
Set Hostname
> sudo hostnamectl set-hostname k8slb
> sudo hostnamectl
Update Yum
> yum update
Disable firewall
> systemctl disable firewalld
> systemctl stop firewalld
> systemctl status firewalld
Install haproxy
> yum install haproxy
> vi /etc/haproxy/haproxy.cfg
| Code Block | ||||
|---|---|---|---|---|
| ||||
global
...
defaults
...
#---------------------------------------------------------------------
# main frontend which proxys to the backends
#---------------------------------------------------------------------
frontend kubernetes
  bind *:6443
  mode tcp
  default_backend kubernetes-master-nodes

#---------------------------------------------------------------------
# static backend for serving up images, stylesheets and such
#---------------------------------------------------------------------
backend kubernetes-master-nodes
  mode tcp
  balance roundrobin
  option tcp-check
  server k8smaster1 172.20.233.181:6443 check fall 3 rise 2
  server k8smaster2 172.20.233.182:6443 check fall 3 rise 2
  server k8smaster3 172.20.233.183:6443 check fall 3 rise 2
|
...
> sudo systemctl status haproxy
Verify that you can connect
nc -v LOAD_BALANCER_IP 6443
kube-system   kube-controller-manager-k8master   1/1     Running   1          47h
kube-system   kube-flannel-ds-amd64-fl5wp        1/1     Running   0          12s
kube-system   kube-proxy-88gdq                   1/1     Running   1          47h
kube-system kube-scheduler-k8master 1/1 Running 1 47h |
By default, your cluster will not schedule pods on the master for security reasons. If you want to be able to schedule pods on the master, e.g. for a single-machine Kubernetes cluster for development, run:
> kubectl taint nodes --all node-role.kubernetes.io/master-Install Dashboard
From the master node:
| Code Block |
|---|
> kubectl create -f https://raw.githubusercontent.com/kubernetes/dashboard/master/aio/deploy/recommended/kubernetes-dashboard.yaml

secret/kubernetes-dashboard-certs created
serviceaccount/kubernetes-dashboard created
role.rbac.authorization.k8s.io/kubernetes-dashboard-minimal created
rolebinding.rbac.authorization.k8s.io/kubernetes-dashboard-minimal created
deployment.apps/kubernetes-dashboard created
service/kubernetes-dashboard created
|
Create a dashboard admin user:
vi dashboard-adminuser.yaml
| Code Block |
|---|
apiVersion: v1
kind: ServiceAccount
metadata:
  name: admin-user
  namespace: kube-system
---
apiVersion: rbac.authorization.k8s.io/v1
kind: ClusterRoleBinding
metadata:
  name: admin-user
roleRef:
  apiGroup: rbac.authorization.k8s.io
  kind: ClusterRole
  name: cluster-admin
subjects:
- kind: ServiceAccount
  name: admin-user
namespace: kube-system |
> kubectl apply -f dashboard-adminuser.yaml
| Code Block |
|---|
serviceaccount/admin-user created
clusterrolebinding.rbac.authorization.k8s.io/admin-user created |
Get the access token
| Code Block |
|---|
> kubectl -n kube-system describe secret $(kubectl -n kube-system get secret | grep admin-user | awk '{print $1}')

Name:         admin-user-token-s6x6d
Namespace:    kube-system
Labels:       <none>
Annotations:  kubernetes.io/service-account.name: admin-user
              kubernetes.io/service-account.uid: 7f55a022-1a05-11e9-a8cb-6c3be541582b

Type:  kubernetes.io/service-account-token


Data
====
namespace:  11 bytes
token:      eyJhbGciOiJSUzI1NiIsImtpZCI6IiJ9.eyJpc3MiOiJrdWJlcm5ldGVzL3NlcnZpY2VhY2NvdW50Iiwia3ViZXJuZXRlcy5pby9zZXJ2aWNlYWNjb3VudC9uYW1lc3BhY2UiOiJrdWJlLXN5c3RlbSIsImt1YmVybmV0ZXMuaW8vc2VydmljZWFjY291bnQvc2VjcmV0Lm5hbWUiOiJhZG1pbi11c2VyLXRva2VuLXM2eDZkIiwia3ViZXJuZXRlcy5pby9zZXJ2aWNlYWNjb3VudC9zZXJ2aWNlLWFjY291bnQubmFtZSI6ImFkbWluLXVzZXIiLCJrdWJlcm5ldGVzLmlvL3NlcnZpY2VhY2NvdW50L3NlcnZpY2UtYWNjb3VudC51aWQiOiI3ZjU1YTAyMi0xYTA1LTExZTktYThjYi02YzNiZTU0MTU4MmIiLCJzdWIiOiJzeXN0ZW06c2VydmljZWFjY291bnQ6a3ViZS1zeXN0ZW06YWRtaW4tdXNlciJ9.btoYxamkG_dww0sht85C_txkXr6v0rwISzwkyGT1ivj9MIgrvBG0eF044VOihhWyqjv-lJQOpbFk3TnbDE4QWUr9aFyiQZo_qQGgqSj_NBKWuDw3N0KTjk_siB_3Zb4tOCGe9i0iJ3zwYxDlh5eAD_-YiY-yU8QKY85pJPbTqR4USWiHh4Saj4HEg0TM0EUIToCqF-u9qEF0Y51dc17VW3NKeCEIfarP4x893yzYRnNrbk8ItgjQqln6oQ2AH49dow28fUiGyUCcu1dazXrOr0A_j-Lg-5KaVkT6dXIU5SMMMlrhszrdmrK9akbEP3AdKRErVNosVR_afWdOo8lByA
ca.crt: 1025 bytes |
Access the Dashboard by using the API proxy
From your local machine:
> ssh -L 8001:127.0.0.1:8001 <USER>@<IP>
> kubectl proxy
Browse to:
http://localhost:8001/api/v1/namespaces/kube-system/services/https:kubernetes-dashboard:/proxy/.
Access the Dashboard using port forwarding
From your local machine:
> ssh -L 8443:127.0.0.1:8443 <USER>@<IP>
> kubectl port-forward $(kubectl -n kube-system get pods |grep kubernetes-dashboard |awk '{print $1}') 8443:8443 --namespace=kube-system
Browse to:
Sign in to the Dashboard
Sign in using the token previously retrieved.
Install Sample Pod
> vi nginx-example.yaml
| Code Block |
|---|
apiVersion: apps/v1 # for versions before 1.9.0 use apps/v1beta2
kind: Deployment
metadata:
  name: nginx-deployment
spec:
  selector:
    matchLabels:
      app: nginx
  replicas: 2 # tells deployment to run 2 pods matching the template
  template:
    metadata:
      labels:
        app: nginx
    spec:
      containers:
      - name: nginx
        image: nginx:1.7.9
        ports:
- containerPort: 80 |
> kubectl apply -f nginx-example.yaml
Expose your nginx pods via a nodePort
> kubectl expose deployment nginx-deployment --type=NodePort --name=nginx
> kubectl get services
| Code Block |
|---|
NAME         TYPE        CLUSTER-IP     EXTERNAL-IP   PORT(S)        AGE
kubernetes   ClusterIP   10.96.0.1      <none>        443/TCP        95m
nginx NodePort 10.98.77.176 <none> 80:31490/TCP 119s |
From the above we can see that the nginx service is exposed on port 31490.
Verify by issuing the following command:
> curl http://<NODE_IP>:31490> nc -v 172.20.233.180 6443
Troubleshooting
Reset and start all over
...