...
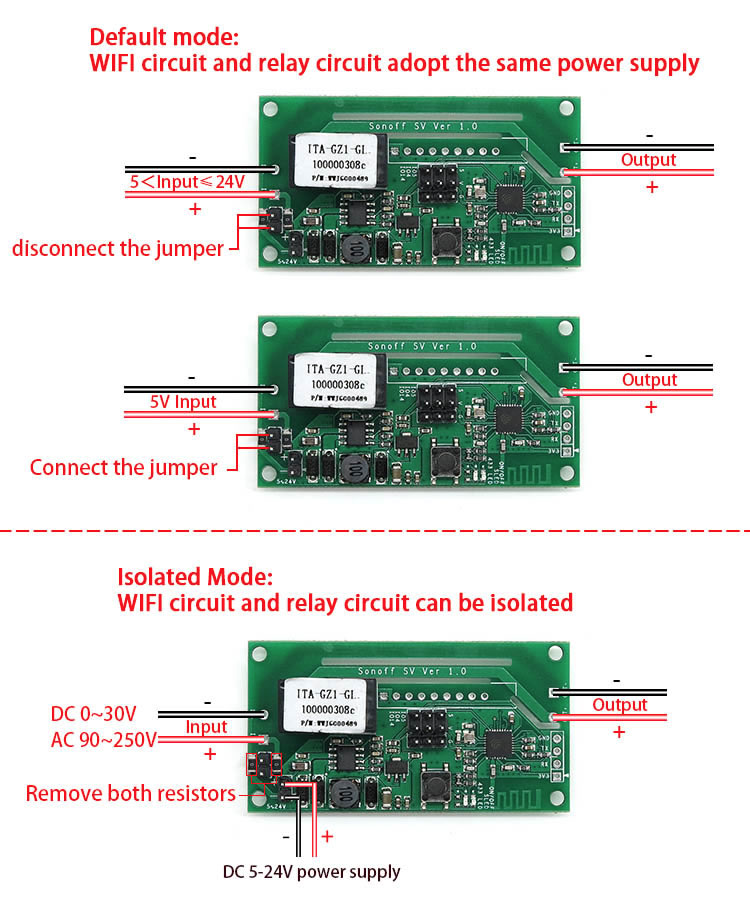
The Sonoff SV is a Sonoff that uses DC only.
Modes
Pinout
Wiring the Sonoff to the serial cable
Flashing Sonoff using Arduino IDE
The Arduino project is located in Sonoff-Tasmota/sonoff/sonoff.ino.
- Copy Libs to Arduino libs folder
> cd Sonoff-Tasmota/lib
> cp -R * ~/Documents/Arduino/libraries/.
- Startup the Arduino IDE
- Open sonoff.ino
- Update parameters in user_config.h. These will be the default values for SSID, etc.
- Set Board Info

- Connect the Sonoff device to a USB port while holding down the button. This will put it in flash mode.
- Select the serial port of the Sonoff device
- Upload and you are done.
See https://github.com/arendst/Sonoff-Tasmota/wiki/Arduino-IDE
Commands
http://HOST/cm?user=USER&password=PASSWORD&cmnd=Power%20TOGGLE
...
{"POWER":"OFF"}{"POWER":"ON"}...
Power%20On
...
{"POWER":"ON"}...
Power%20Off
...
{"POWER":"OFF"}...
{"POWER":"ON"}...
{"FriendlyName1":"Sonoff"}...
{"Status":{"Module":1,"FriendlyName":"Sonoff","Topic":"sonoff" ,"ButtonTopic":"0","Power":0,"PowerOnState":3,"LedState":1,"SaveData":1,"SaveState":1,"ButtonRetain":0,"PowerRetain":0}}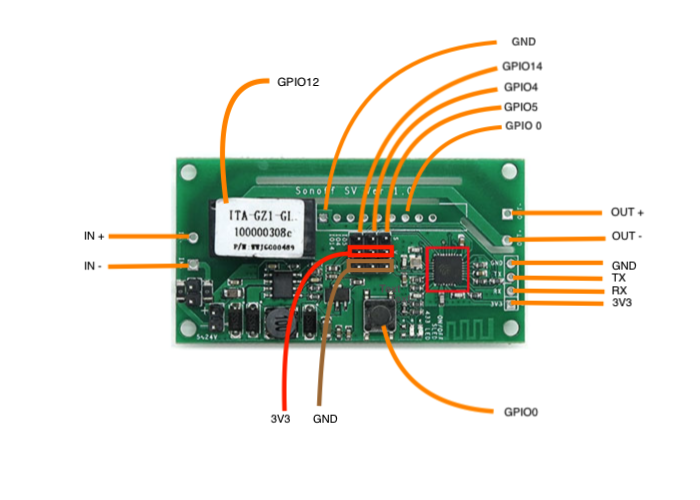
| GPIO | Description |
|---|---|
| 0 | Button |
| 1 | Serial Rx and Optional Sensor |
| 3 | Serial Tx and Optional Sensor |
| 4 | Optional Sensor on Top Header |
| 5 | Optional Sensor on Top Header |
| 12 | Relay and Red LED |
| 13 | Green LED |
| 14 | Optional Sensor on Top Header |
Flashing Sonoff using Arduino IDE
These instructions are the same as for the Sonoff Basic.
See Sonoff Basic
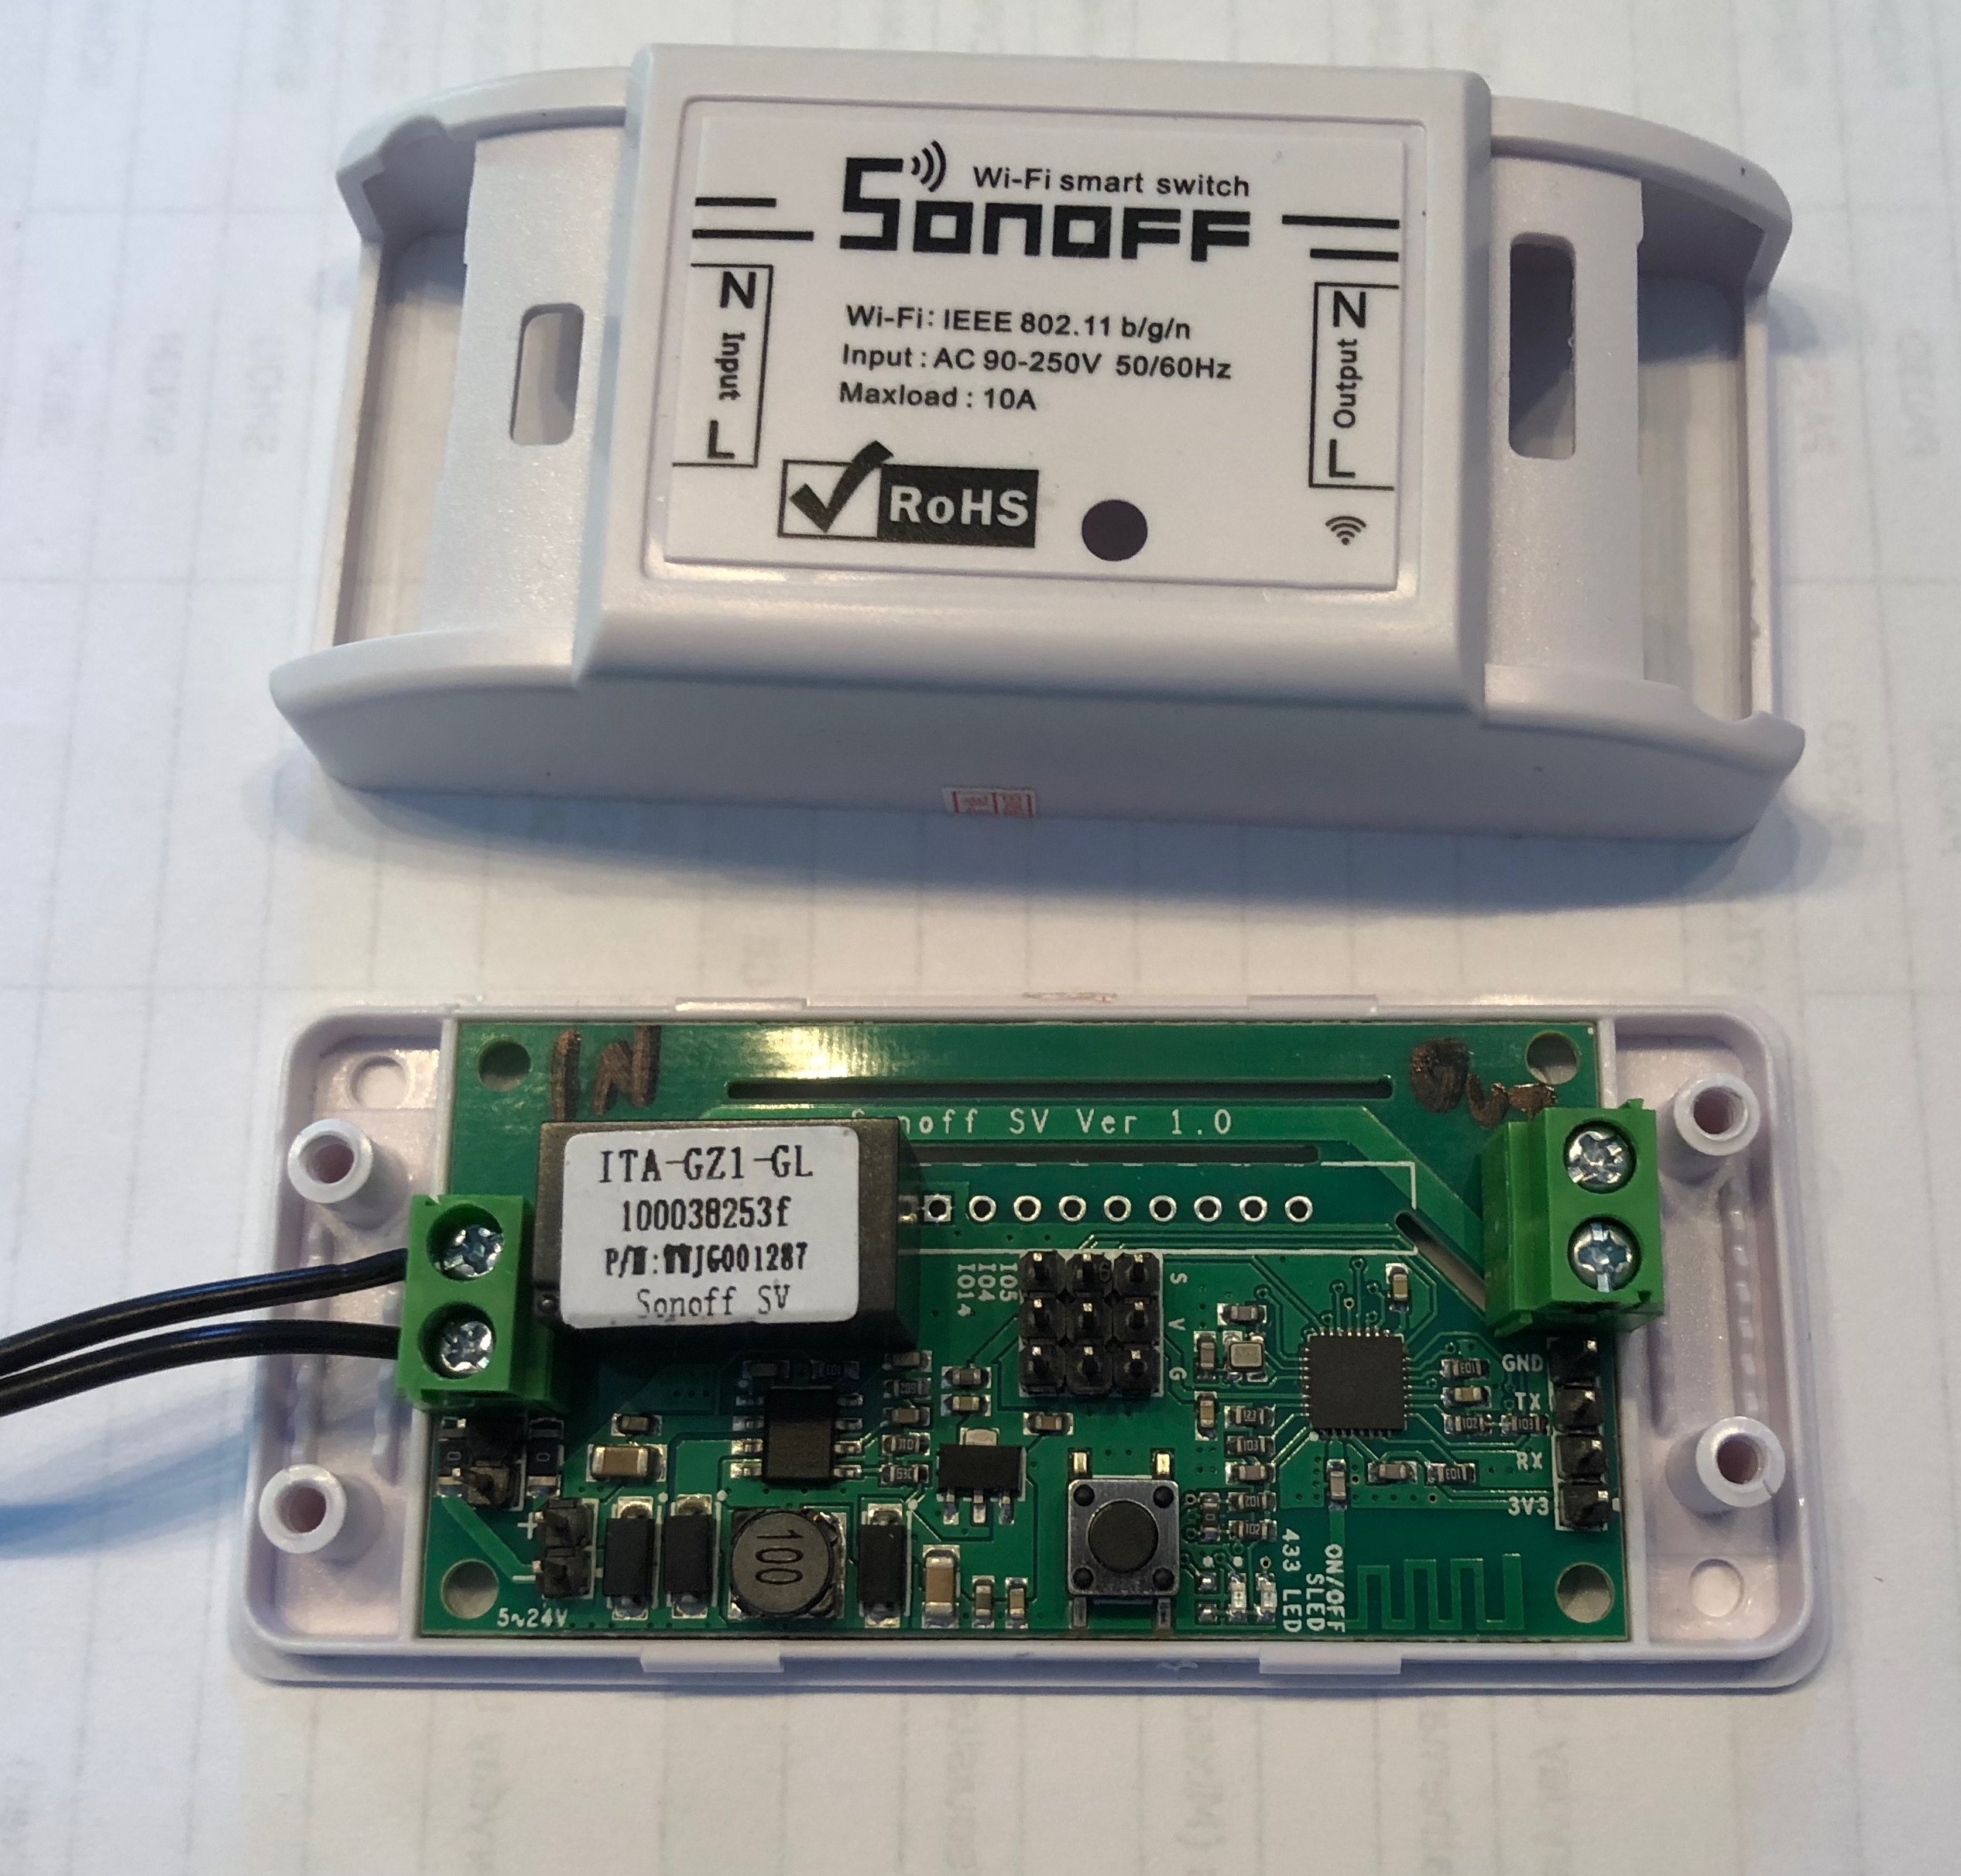
Packaging
Who would have guessed it that the Sonoff SV fits in the Sonoff Basic shell. And it even has the same holes for adding the terminal connectors at the input and output.
References
| Reference | URL |
|---|---|
| Sonoff Basic | http://wiki.jmehan.com/display/KNOW/Sonoff+Basic |
See https://github.com/arendst/Sonoff-Tasmota/wiki/Commands for the full list.
References
| Reference | URL|
|---|---|
| Sonoff Manufacturer's Page | http://sonoff.itead.cc/en/ |
| Flashing Sonoff using Arduino | https://github.com/arendst/Sonoff-Tasmota/wiki/Arduino-IDE |
Sonoff-Tasmota Commands | https://github.com/arendst/Sonoff-Tasmota/wiki/Commands |