Specifications
| Hardware Specifications | |
| Chipset | ESPRESSIF-ESP32 240MHz Xtensa® single-/dual-core 32-bit LX6 microprocessor |
| FLASH | QSPI flash 4MB /16MB |
| SRAM | 520 kB SRAM |
| Button | Reset |
| Modular interface | UART、SPI、SDIO、I2C、LED PWM、TV PWM、I2S、IRGPIO、ADC、capacitor touch sensor、DACLNA pre-amplifier |
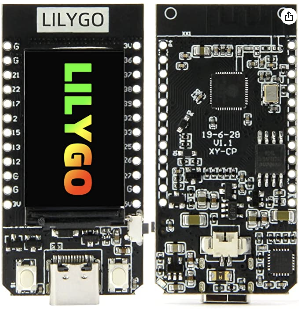
| Display | IPS ST7789V 1.14 Inch Resolution: 135 x 240 |
| Working voltage | 2.7V-4.2V |
| Working current | About 67MA |
| Sleep current | About 350uA |
| Working temperature range | -40℃ ~ +85℃ |
| Size&Weight | 51.52*25.04*8.54mm(7.81g) |
Power Supply Specifications | |
| Power Supply | USB 5V/1A |
| Charging current | 500mA |
| Battery | 3.7V lithium battery |
| JST Connector | 2Pin 1.25mm |
| USB | Type-C |
Wi-Fi | |
| Standard | FCC/CE-RED/IC/TELEC/KCC/SRRC/NCC(esp32 chip) |
| Protocol | 802.11 b/g/n(802.11n,speed up to150Mbps)A-MPDU and A-MSDU polymerization,support 0.4μS Protection interval |
| Frequency range | 2.4GHz~2.5GHz(2400M~2483.5M) |
| Transmit Power | 22dBm |
| Communication distance | 300m |
Bluetooth | |
| Protocol | Meet bluetooth v4.2BR/EDR and BLE standard |
| Radio frequency | With -97dBm sensitivity NZIF receiver Class-1,Class-2&Class-3 emitter AFH |
| Audio frequency | CVSD&SBC audio frequency |
Software specification | |
| Wi-Fi Mode | Station/SoftAP/SoftAP+Station/P2P |
| Security mechanism | WPA/WPA2/WPA2-Enterprise/WPS |
| Encryption Type | AES/RSA/ECC/SHA |
| Firmware upgrade | UART download/OTA(Through network/host to download and write firmware) |
| Software Development | Support cloud server development /SDK for user firmware development |
| Networking protocol | IPv4、IPv6、SSL、TCP/UDP/HTTP/FTP/MQTT |
| User Configuration | AT + Instruction set, cloud server, android/iOSapp |
| OS | FreeRTOS |
Github Link
https://github.com/Xinyuan-LilyGO/TTGO-T-Display
| Code Block |
|---|
git clone https://github.com/Xinyuan-LilyGO/TTGO-T-Display.git
cd TTGO-T-Display
cp -R TFT_eSPI ~/Documents/Arduino/libraries/. |
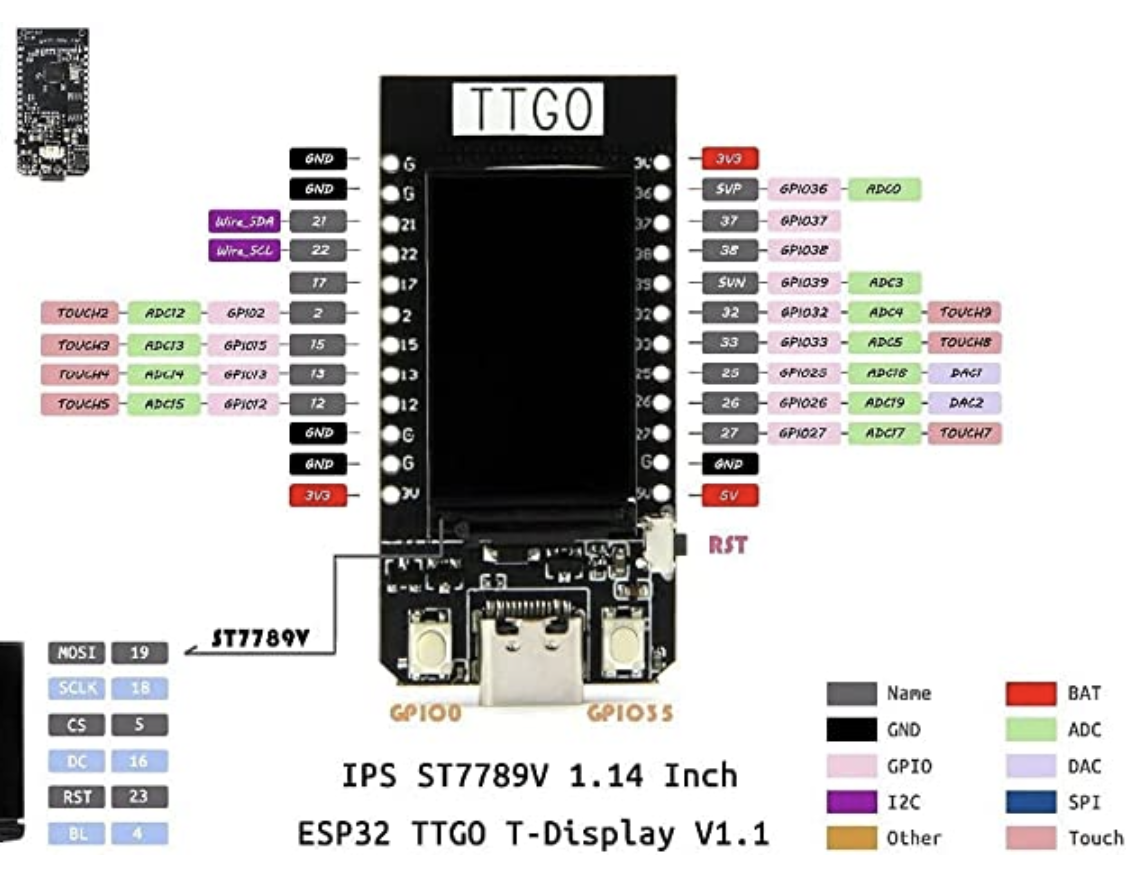
Pinout
Schematic
Install the Serial Driver
https://www.wch.cn/downloads/CH34XSER_MAC_ZIP.html
See instructions in PDF
Arduino
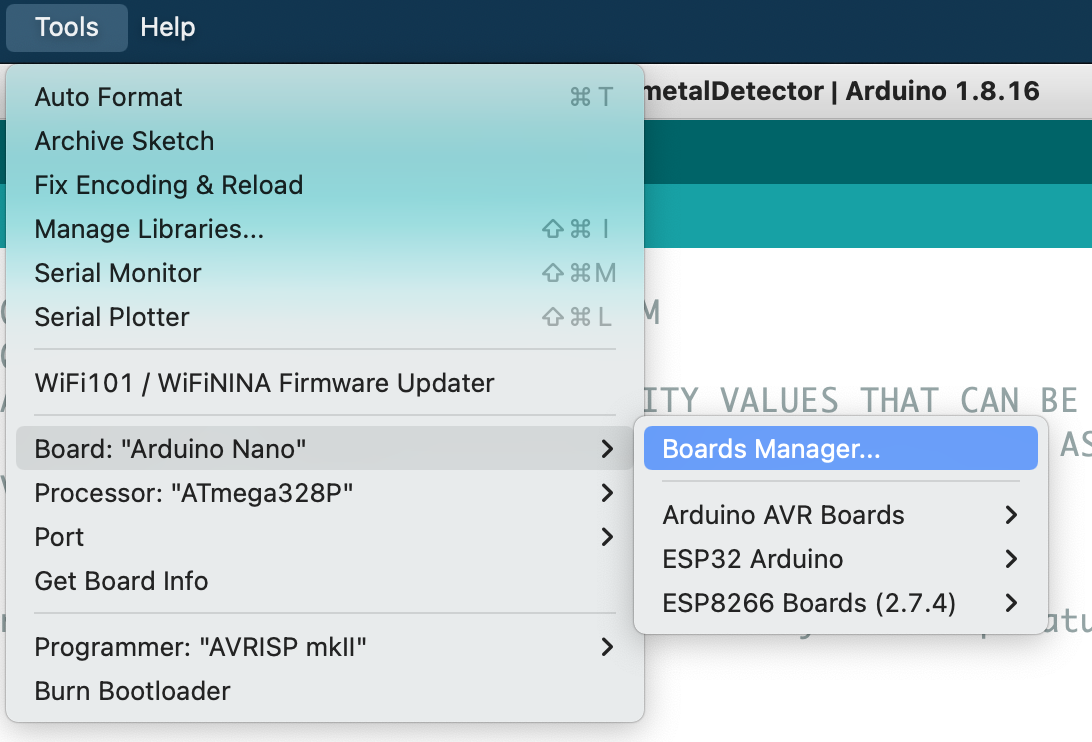
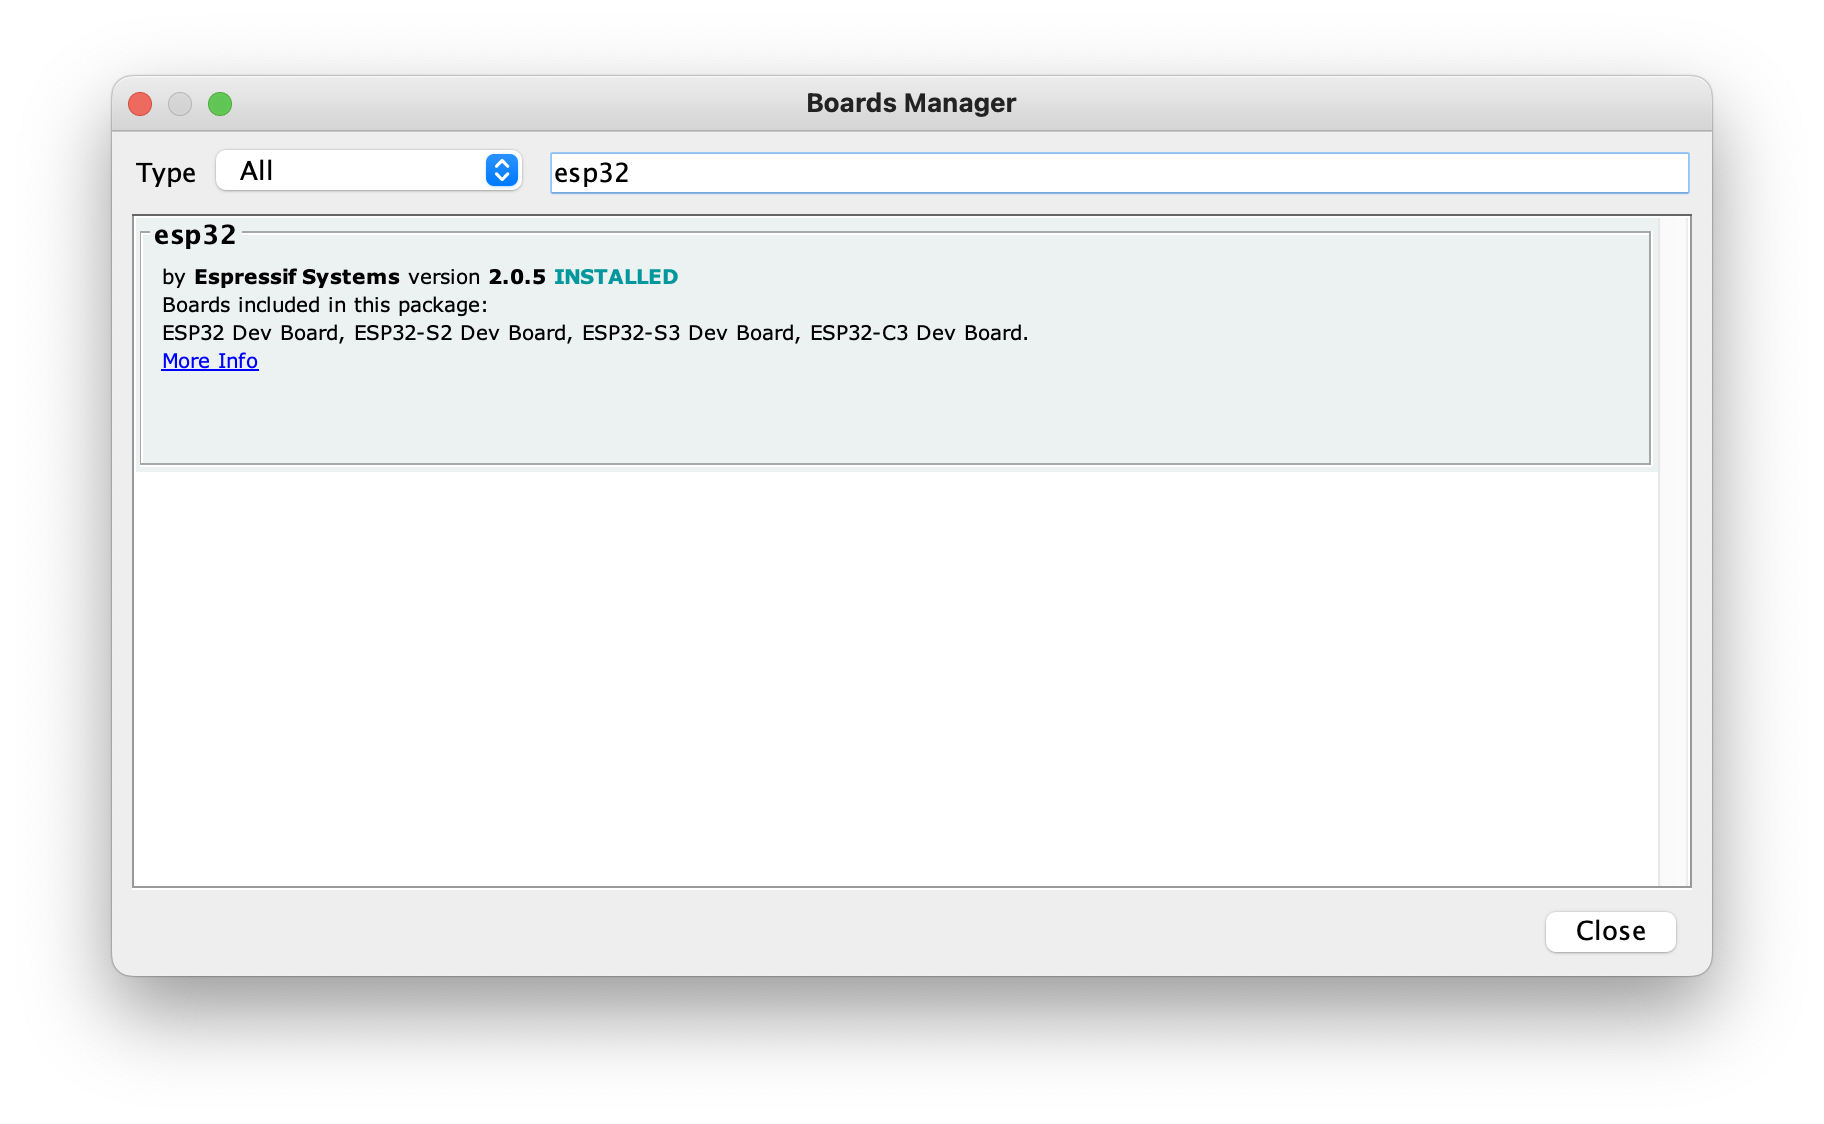
Install Board Manager
...
Install the ESP32 board by selecting Tools → Board Manager and inputing esp32. Install the latest version.
Select Board
...
Select the
...
Code Repo: https://github.com/Xinyuan-LilyGO/T-Display-S3
...
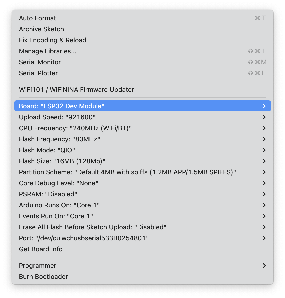
TTGO Lora32-OLED board
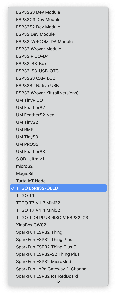
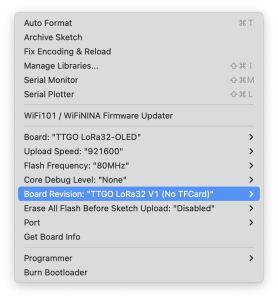
Optional, select the development board ESP32 Dev Module, select Disable in the PSRAM option, select 4-16MB in the Flash Size option, Other keep the default
Note, the port should start with cu.wchubserial.
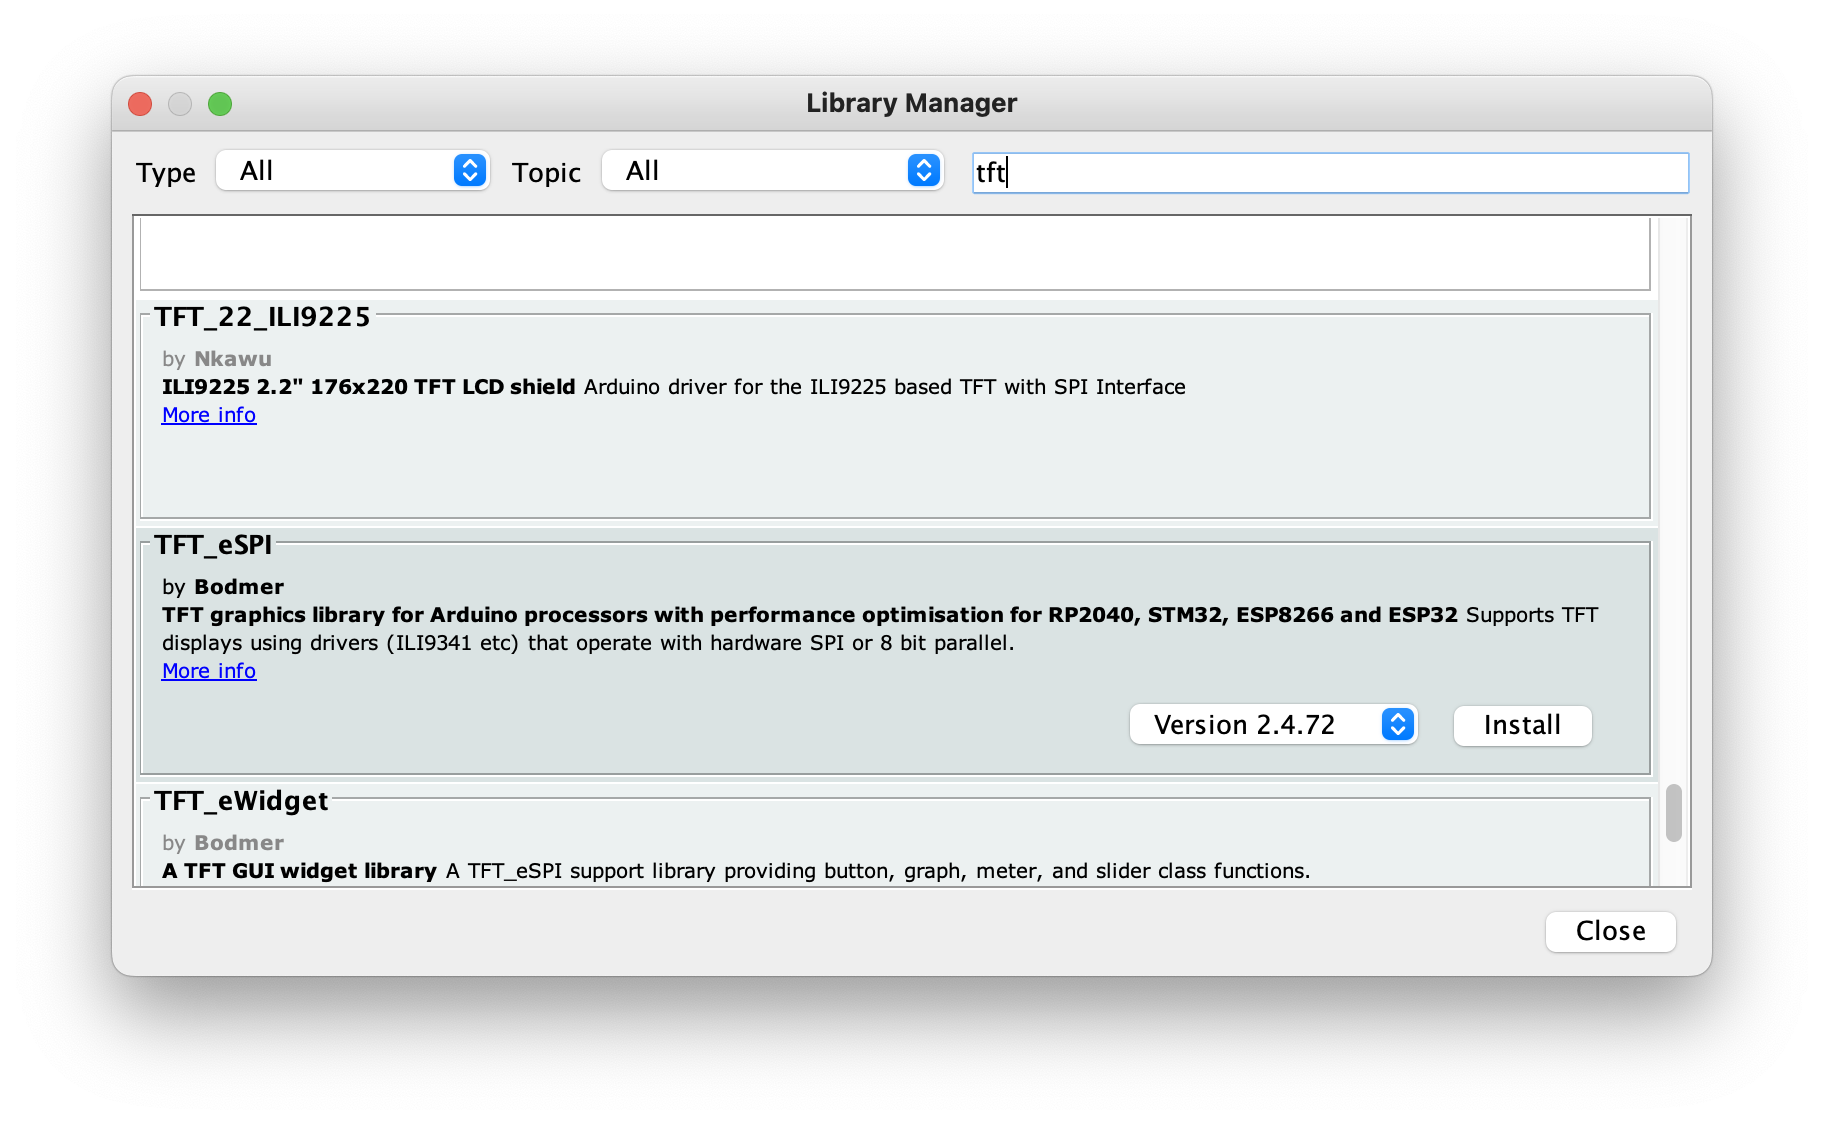
Install the TFT_eSPI Library
From the Library Manager, search for the TFT_eSPI library by Bodmer and click Install.
After installing the library, browse to it's location and modify the User_Setup_Select.h file located in ~/Documents/Arduino/libraries/.
Comment out the line:
//#include <User_Setup.h>
Uncomment the line:
#include <User_Setups/Setup25_TTGO_T_Display.h> // Setup file for ESP32 and TTGO T-Display ST7789V SPI bus TFT
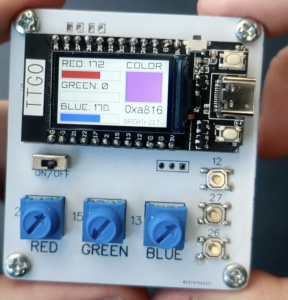
Color Picker Example
| Project | https://www.youtube.com/watch?v=0P5OyN8uz-o |
|---|---|
| Code | https://github.com/VolosR/ColorPickerTTGO/blob/main/colorPicker.ino |
| Display |
|
| Code Block |
|---|
#include <TFT_eSPI.h>
#include "orbitron20.h"
TFT_eSPI    tft = TFT_eSPI();         // Create object "tft"
TFT_eSprite img = TFT_eSprite(&tft);

#define gray 0x94B2

const int pwmFreq = 5000;
const int pwmResolution = 8;
const int pwmLedChannelTFT = 0;
int brightnes=80;

uint16_t color2=TFT_WHITE;
uint16_t color1=TFT_BLACK;

void setup() {
  pinMode(35,INPUT_PULLUP);
  pinMode(12,INPUT_PULLUP);
  pinMode(27,INPUT_PULLUP);
  pinMode(26,INPUT_PULLUP);
  pinMode(0,INPUT_PULLUP);
  tft.init();
  tft.fillScreen(TFT_WHITE);
  tft.setRotation(1);
  img.setFreeFont(&Orbitron_Medium_18);
  img.setTextColor(color1,color2);
  img.createSprite(240, 135);
  ledcSetup(pwmLedChannelTFT, pwmFreq, pwmResolution);
  ledcAttachPin(TFT_BL, pwmLedChannelTFT);
  ledcWrite(pwmLedChannelTFT, brightnes);

}

void loop() {
drawS();
}

void drawS()
{
img.setTextColor(color1,color2);
img.fillSprite(color2);
int r=map(analogRead(2),4095,0,0,255);
int g=map(analogRead(15),4095,0,0,255);
int b=map(analogRead(13),4095,0,0,255);

img.drawRect(4,24,132,20,gray);
img.drawRect(4,68,132,20,gray);
img.drawRect(4,112,132,20,gray);

img.drawString("RED: "+String(r),6,0);
img.fillRect(6,26,r/2,16,TFT_RED);
img.drawString("GREEN: "+String(g),6,44);
img.fillRect(6,70,g/2,16,TFT_GREEN);
img.drawString("BLUE: "+String(b),6,88);
img.fillRect(6,114,b/2,16,TFT_BLUE);

if(digitalRead(26)==0)
{
brightnes=map(analogRead(13),4095,0,0,255);
ledcWrite(pwmLedChannelTFT, brightnes);
}


 uint16_t chosen=tft.color565(r, g, b);
 img.drawString("COLOR",148,0);
 img.drawString("0x"+String(chosen,HEX),148,90,4);
 img.drawString("BRIGHT: "+String(brightnes),148,118,2);
 img.fillRect(148,24,80,62,chosen);
 img.drawRect(146,22,84,66,gray);

 if(digitalRead(12)==0)
color1=chosen;

 if(digitalRead(27)==0)
color2=chosen;

 if(digitalRead(0)==0)
{ color1=TFT_BLACK; color2=TFT_WHITE;}

 if(digitalRead(35)==0)
{
img.fillScreen(color2);
img.drawString("text:0x"+String(color1,HEX),6,10,4);
img.drawString("back:0x"+String(color2,HEX),6,30,4);
img.drawString("select:0x:"+String(chosen,HEX),6,50,4);
}

img.pushSprite(0,0);
} |
Loading an Image
Find an image no bigger than the screen resolution (135 x 240).
Convert to .c with the following converter:
http://www.rinkydinkelectronics.com/t_imageconverter565.php
Rename output file to .h
| Code Block |
|---|
#include <TFT_eSPI.h>
#include "bmp.h"

...

void initScreen(){

  tft.init();
  tft.setRotation(1);
  tft.fillScreen(TFT_BLACK);
  tft.setTextSize(2);
  tft.setTextColor(TFT_GREEN);
  tft.setCursor(0, 0);
  tft.setTextDatum(MC_DATUM);
  tft.setTextSize(1);

  tft.setSwapBytes(true);
  tft.pushImage(0, 0,  240, 135, ttgo);
  espDelay(5000);
} |
Using Fonts
| Code Block |
|---|
#include "orbitron10.h" #include <TFT_eSPI.h> #include "bmp.h" ... void initScreen(){ tft.init(); tft.setRotation(1); tft.setTextColor(TFT_GREEN); tft.setCursor(0, 0); tft.setFreeFont(&Orbitron_Medium_10); tft.fillScreen(TFT_BLACK); tft.setTextDatum(MC_DATUM); tft.drawString("CHARGING", tft.width() / 2, tft.height() / 2 ); } |
Generating a Font File
Navigate to https://oleddisplay.squix.ch
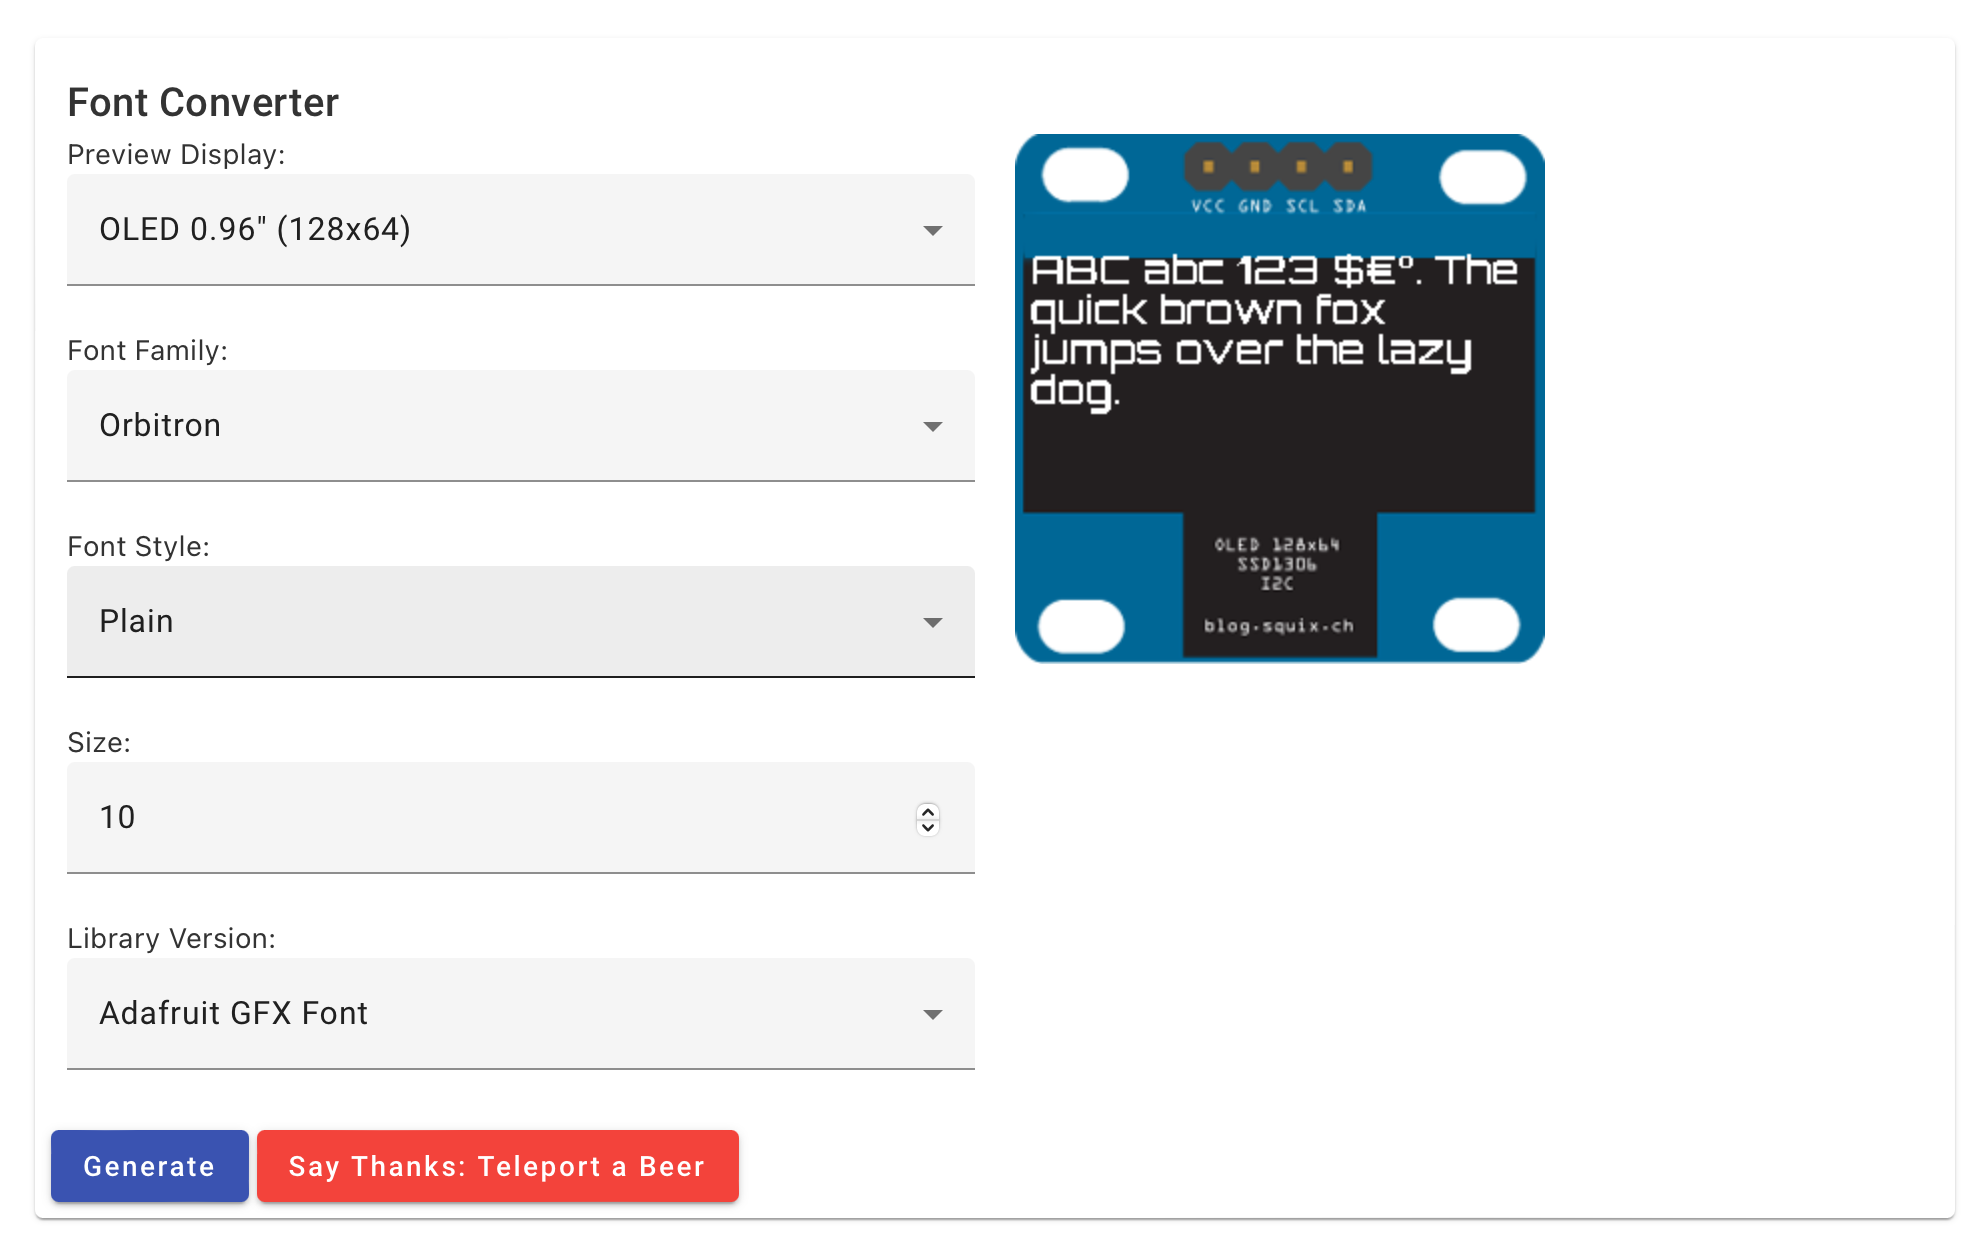
Download or copy generated output to include file.
ie.
orbitron10.hReferences
| Reference | URL |
|---|---|
| LilyGo Product Page | http://www.lilygo.cn/claprod_view.aspx?TypeId=62&Id=1126&FId=t28:62:28 |
| Datasheet | https://github.com/Xinyuan-LilyGO/T-Display-S3/blob/main/doc/esp32-s3_datasheet_en.pdf |
| Reference Manual | https://github.com/Xinyuan-LilyGO/T-Display-S3/blob/main/doc/esp32-s3_technical_reference_manual_en.pdf |
| New sketches for TTGO T-Display (FREE) | https://www.youtube.com/watch?v=Th4IdigA6xE |
| https://www.youtube.com/watch?v=slYZz61u8RY | |
| Volos Projects | https://github.com/VolosR |
| How to Install and Setup TTGO T-Display ( Getting Started tutorial) | https://www.youtube.com/watch?v=b8254--ibmM |
| Transparent Sprites - Programming Tutorial (TFT_eSPI library) | https://www.youtube.com/watch?v=U4jOFLFNZBI |