| Table of Contents |
|---|
Overview
...
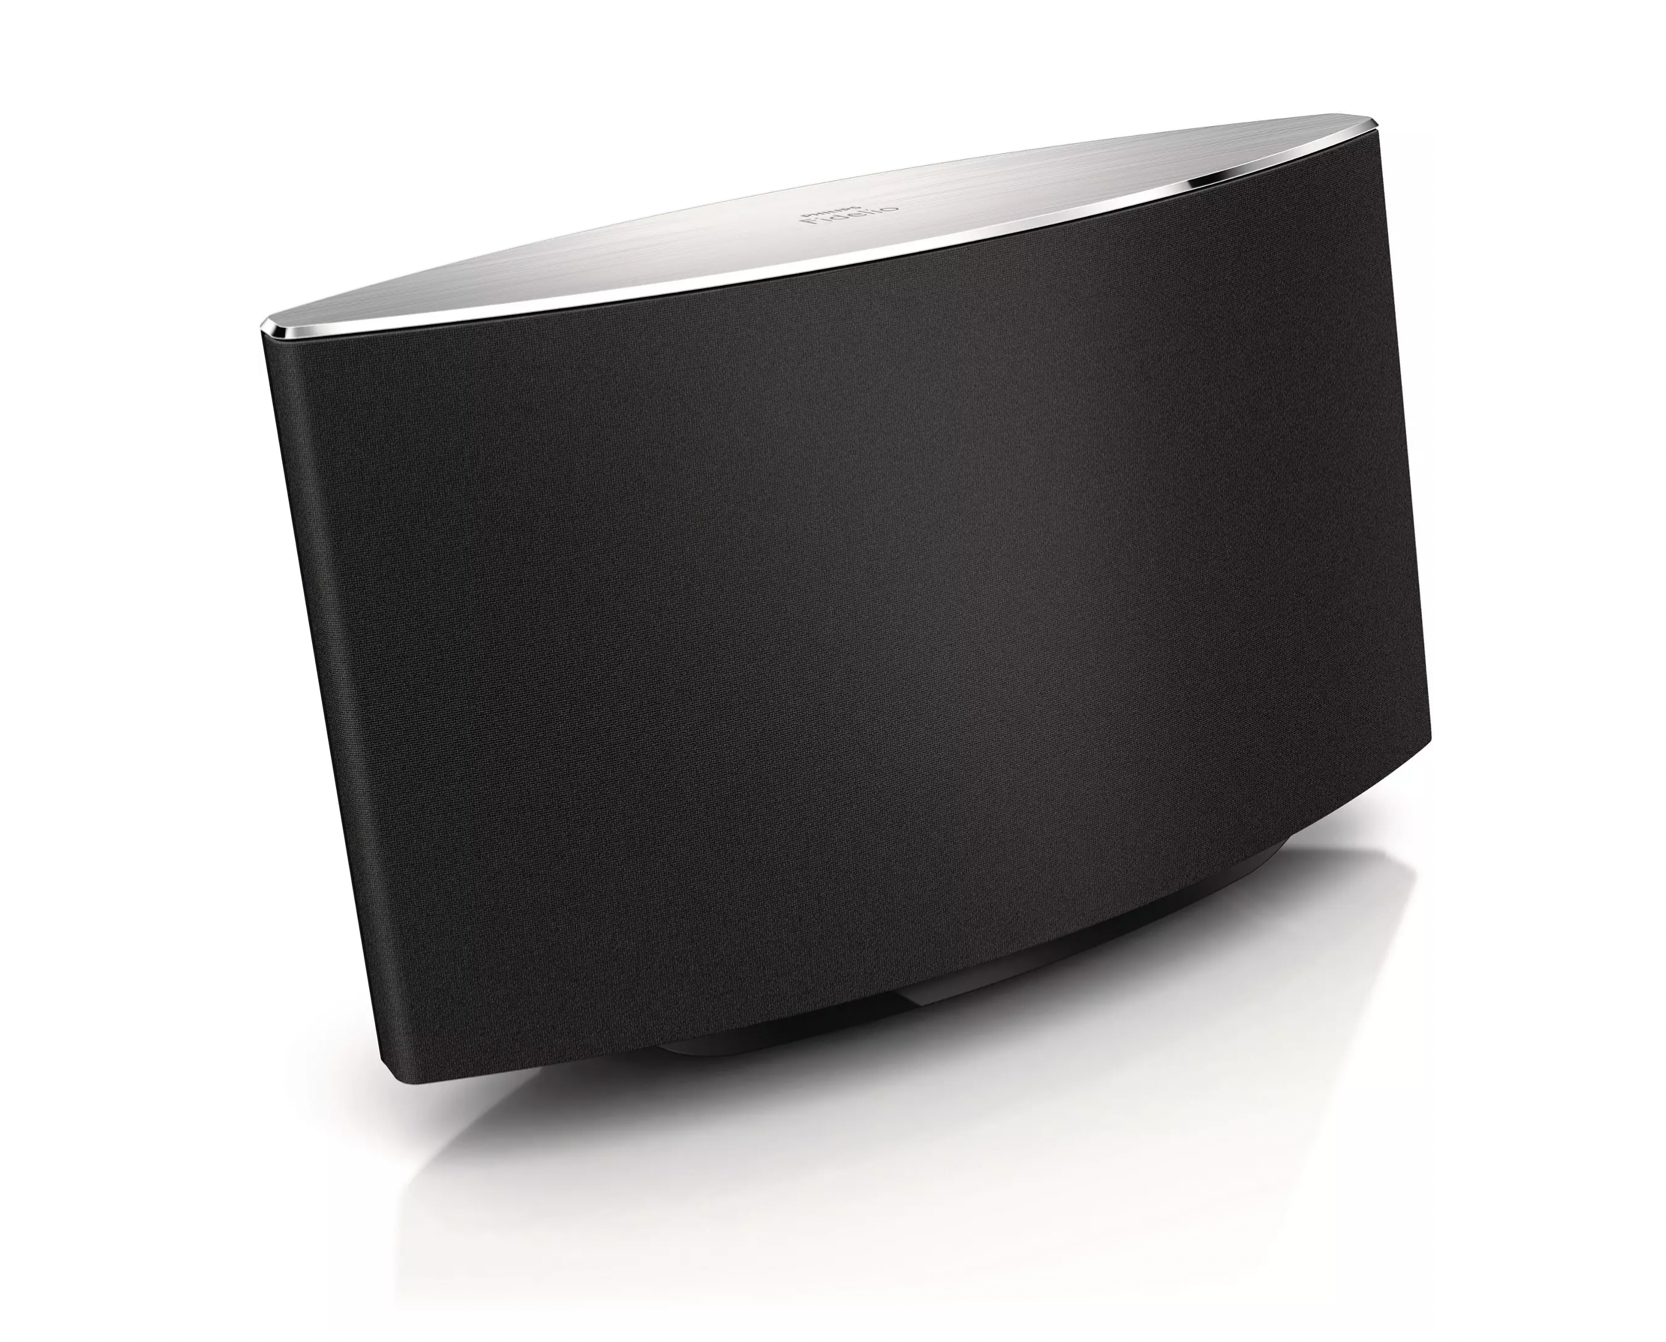
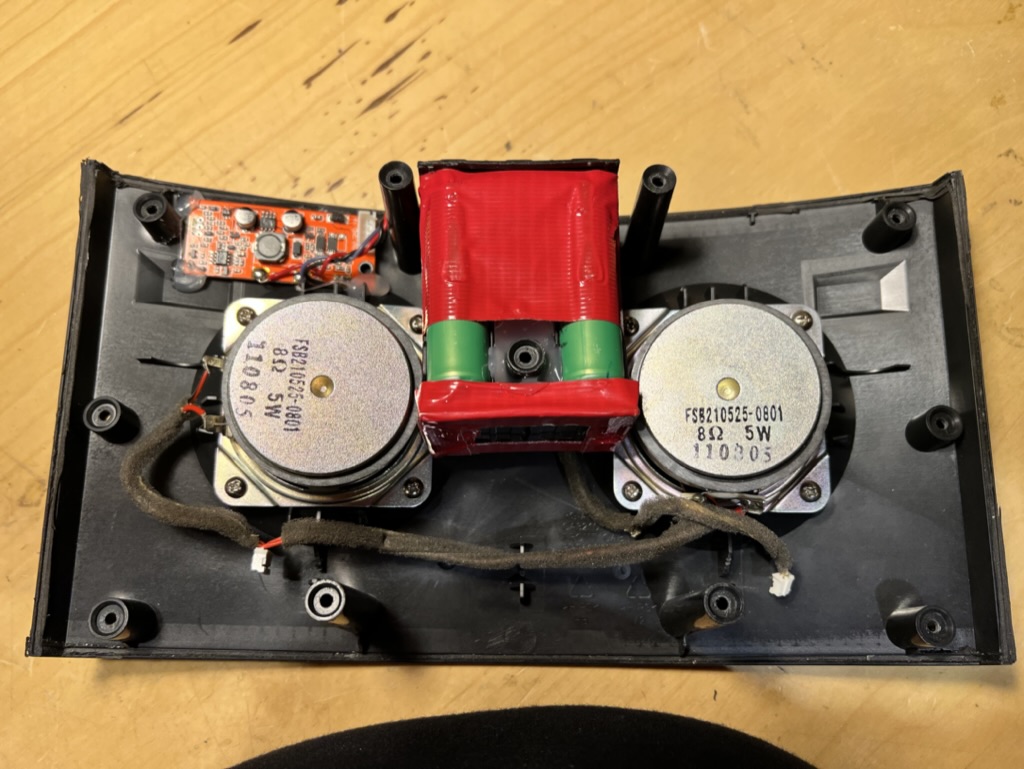
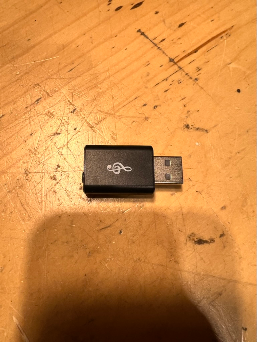
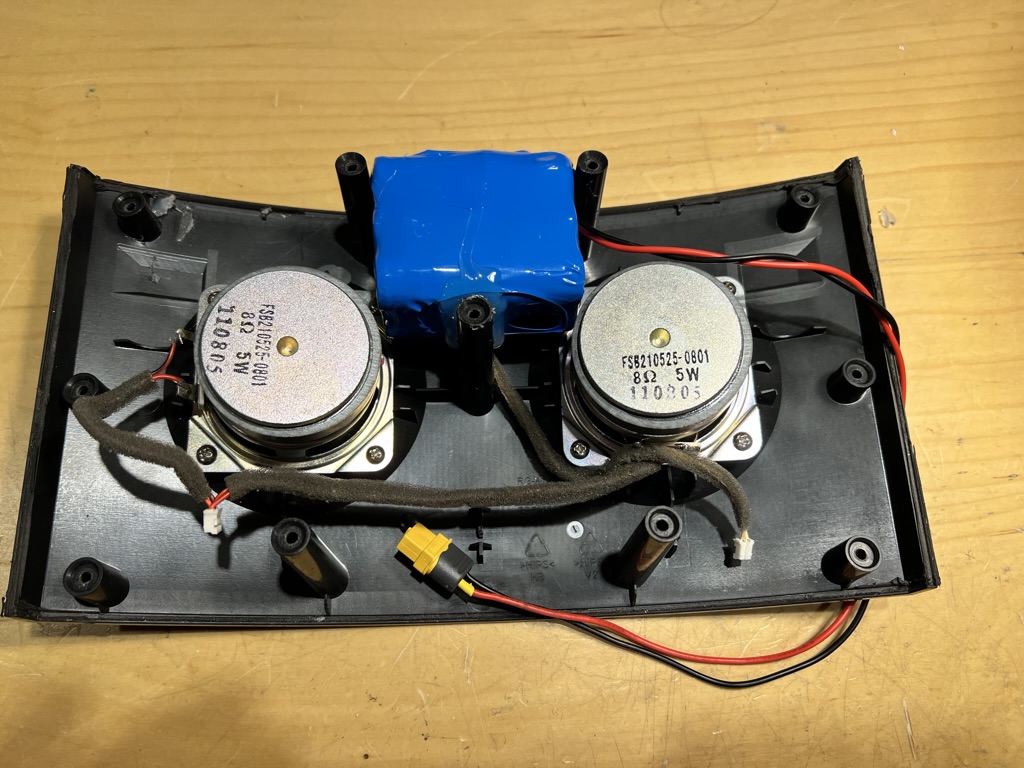
The sound from this speaker is amazing and I wanted something more portable with great sound. So, a few years back I wired in a USB bluetooth receiver and added lithium ion batteries to this speaker to make it portable and bluetooth enabled.
...
Power consumption recording while idle and while listening to some tunes.
Off (Momentary Switch) - disabled now | 15 mA / 0.19w |
|---|---|
| Idle |
| 30 mA / 0. |
| 38w |
| Running |
|---|
| 280 mA / 3.5 w | |
Off Time (33.8Wh / 0.19 W) | ~7.5 days |
|---|---|
Standby Time (33.8 Wh / 0. |
38 W) |
|---|
| ~3.5 days |
Run Time (33.8 Wh / |
|---|
3. |
|---|
5 W) |
|---|
...
| ~9.5 hours |
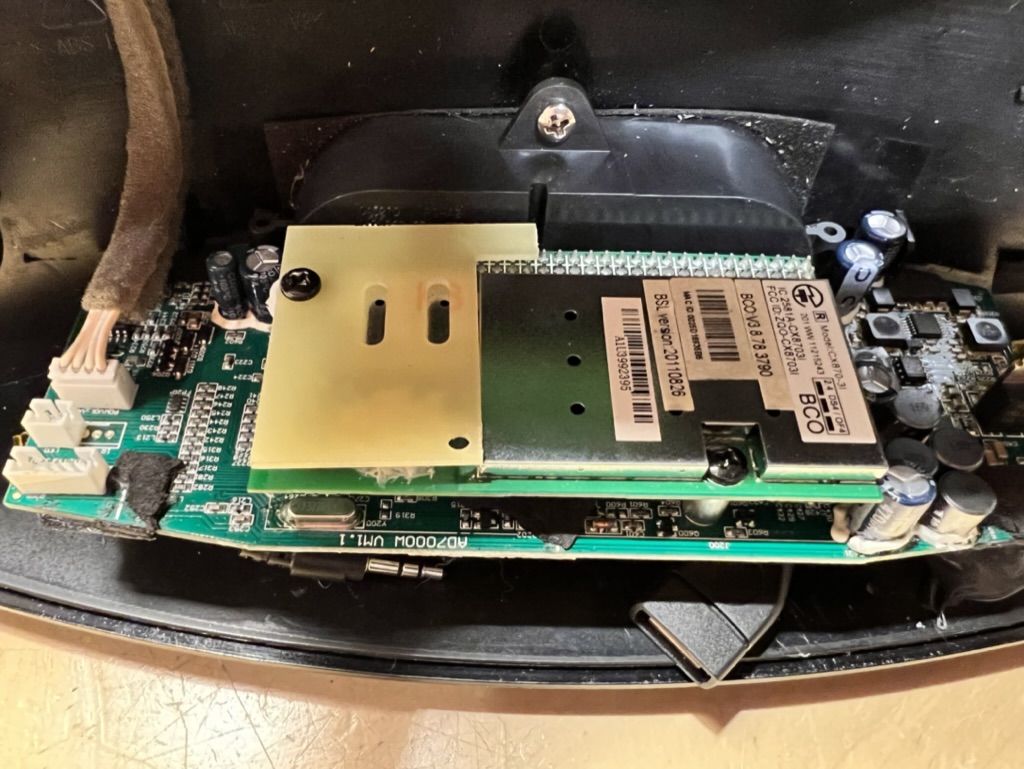
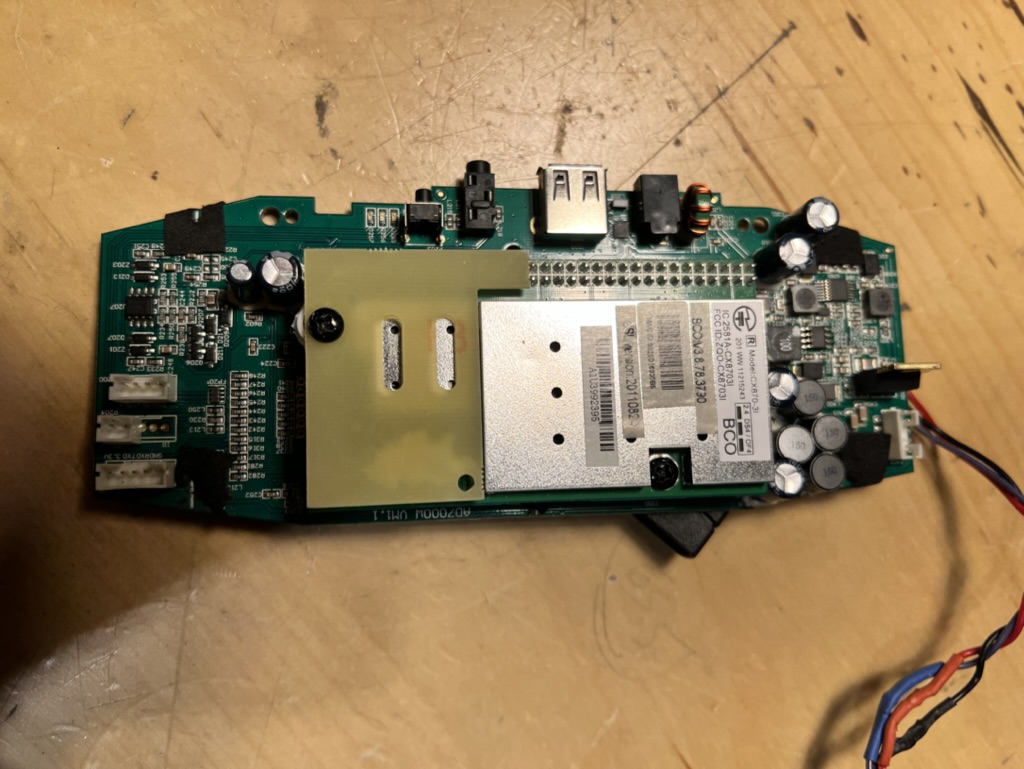
Bluetooth Module
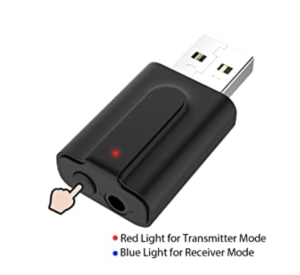
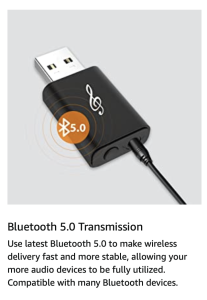
Specifications
...
I confirmed that the last mode is preserved after powering off/on.
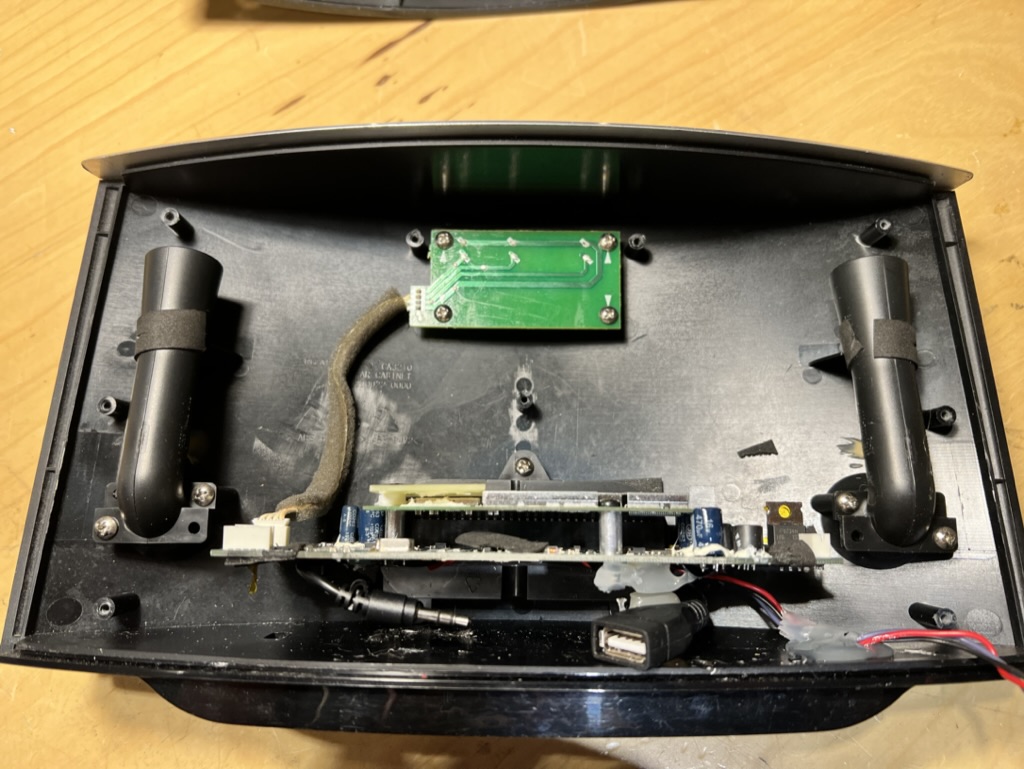
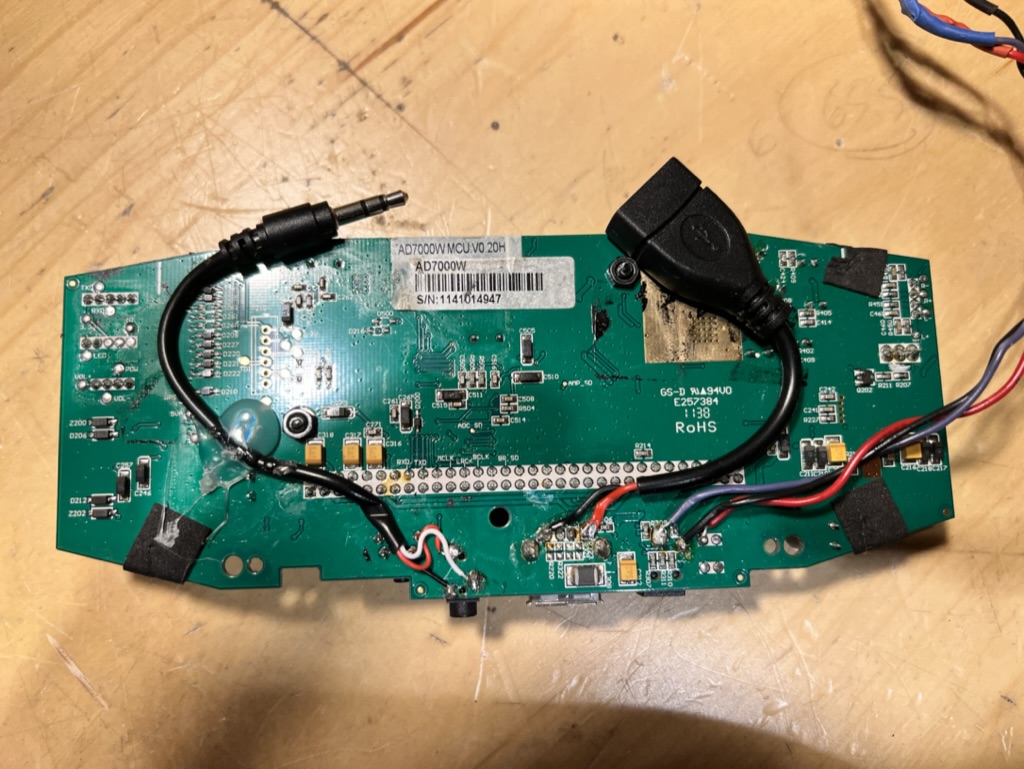
Pictures
...
of Initial Conversion V1
Revision V2
As part of this revision, we are going to add a bigger battery to the speaker.
...
Module name: 3S 12.6V Li-ion Lithium Battery 18650 Charger Protection PCB BoardBoard Suitable range: For nominal voltage 3.6V 3.7V lithium battery(Including 18650,26650, lithium polymer batteries)
...
| Specification | Value |
|---|---|
| Charging voltage | 12.6V - 13.0V |
| Maximum output current | 20A |
| Maximum output power / charging power | 252W |
| Low Voltage Disconnect | 9V or 3V/cell |
| Size | 59 x 20 x 3.4mm |
...
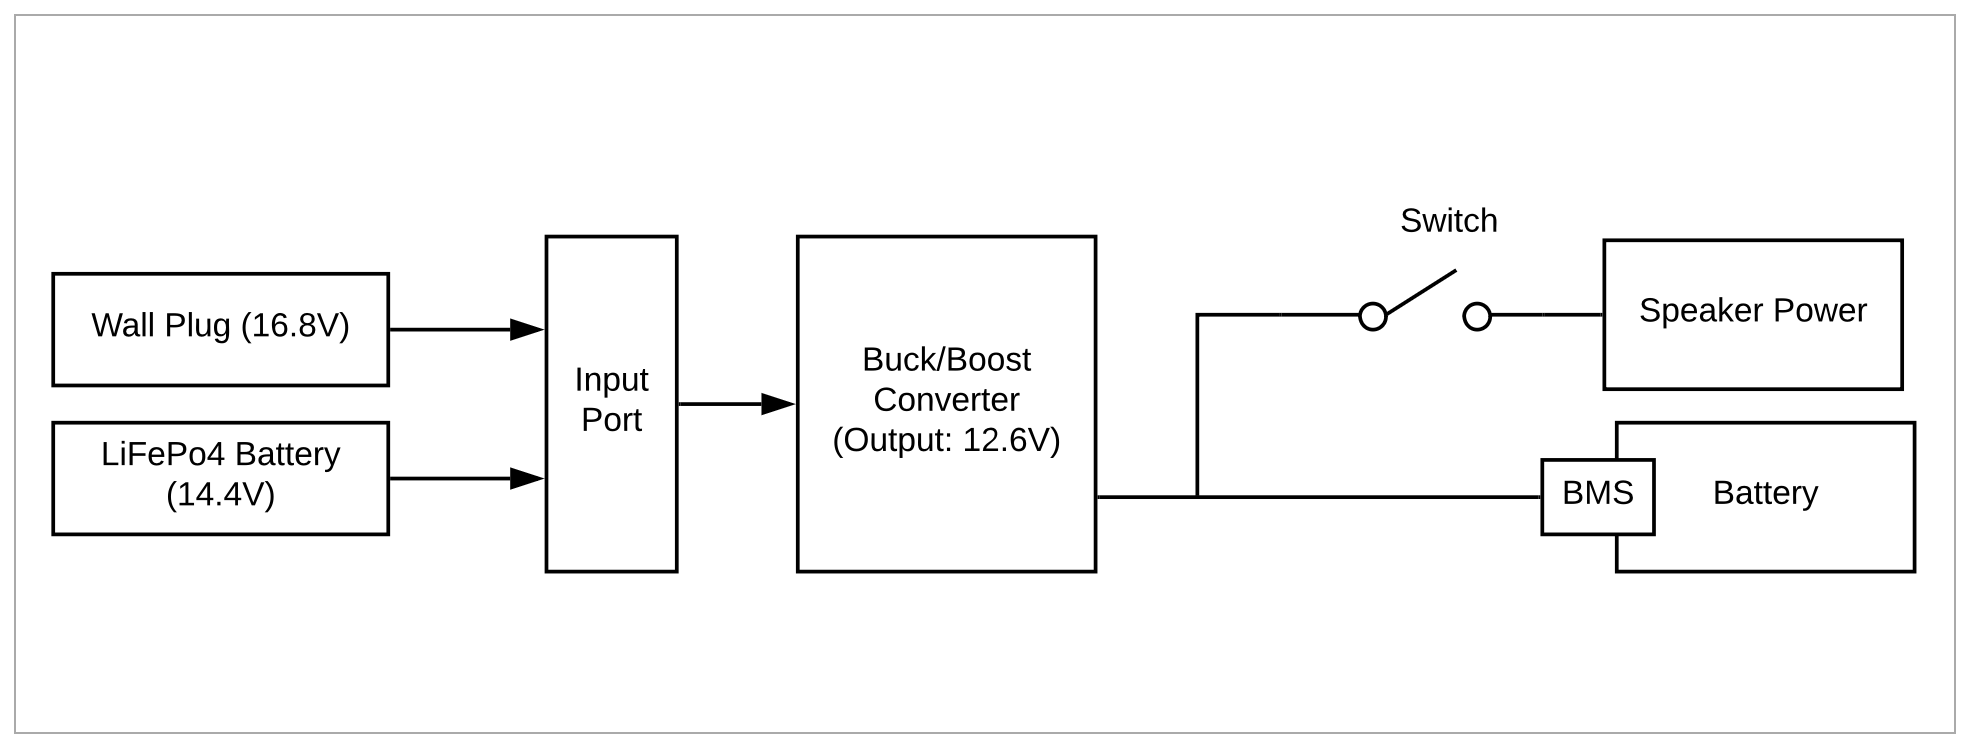
Perhaps we can add a voltage regulator with the output set to about 12.6v ?
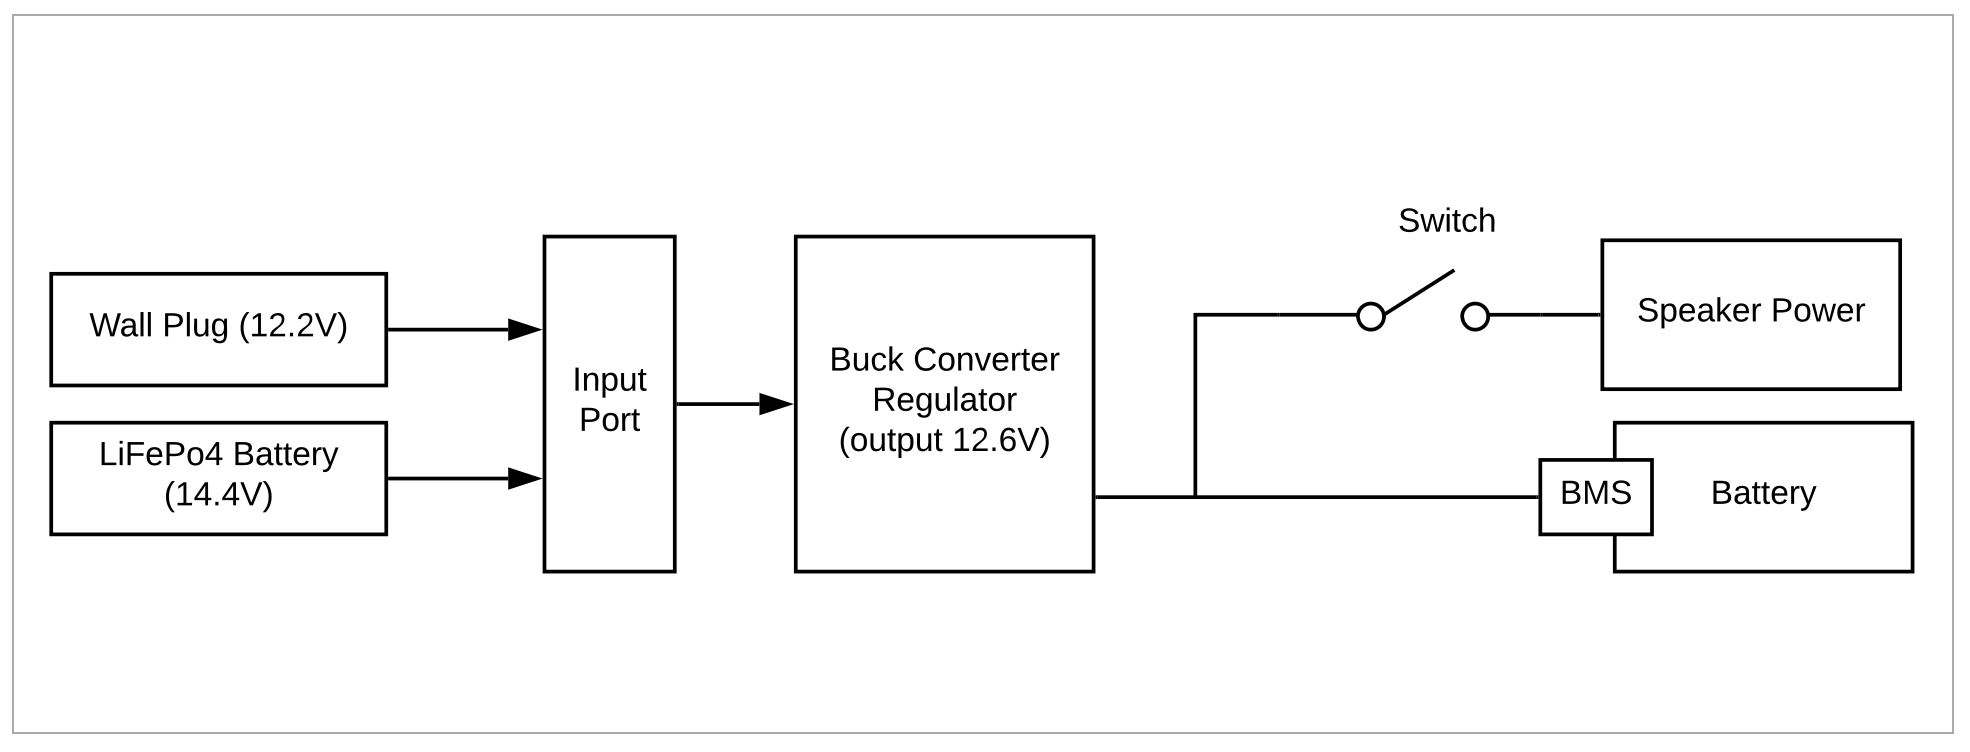
When using the supplied AC/DC wall plug (output=12.2v), the buck converter outputs about 11.5v. This is above the nominal voltage which should still charge the battery.
...
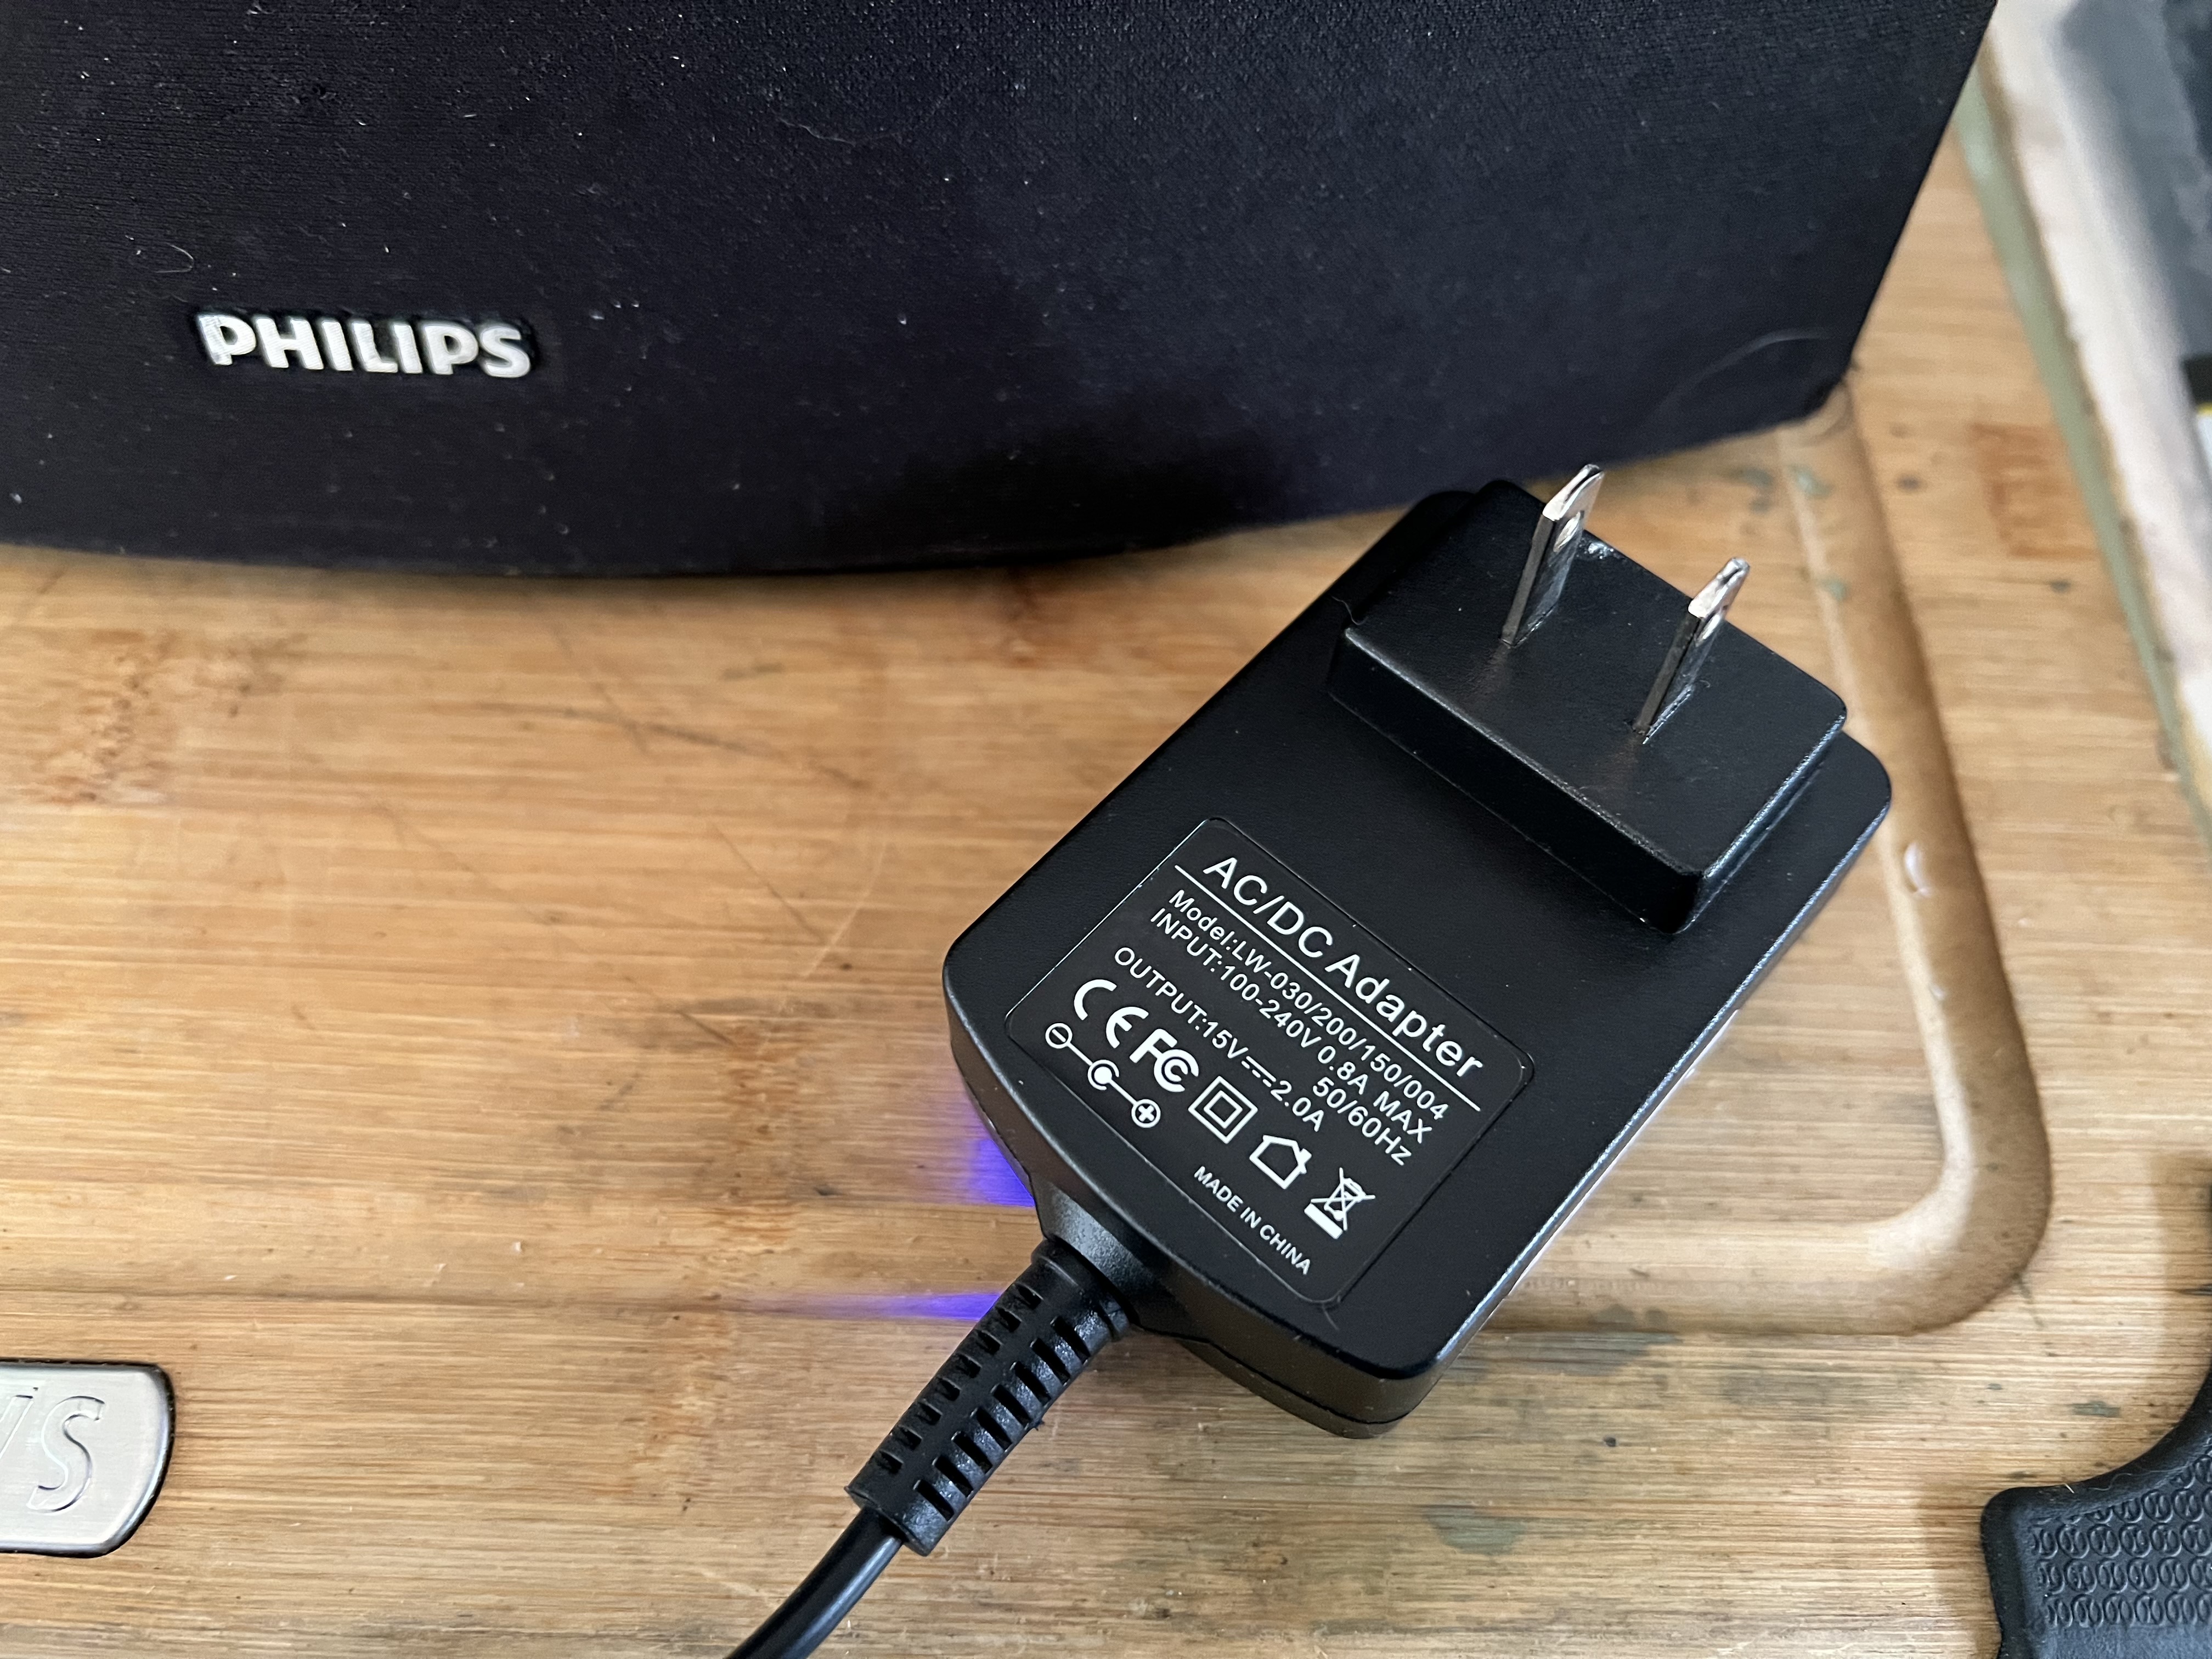
We replaced the AC/DC wall plug with a unit that outputs 15V 2A16.8V 1A 4s Lithium Battery Charger Adapter.
Installation
So, we added a buck converter to the input which drops the voltage to 12.6v9v to charge the battery and power the speaker. This buck module was simply hot glued to to the bottom of the board.
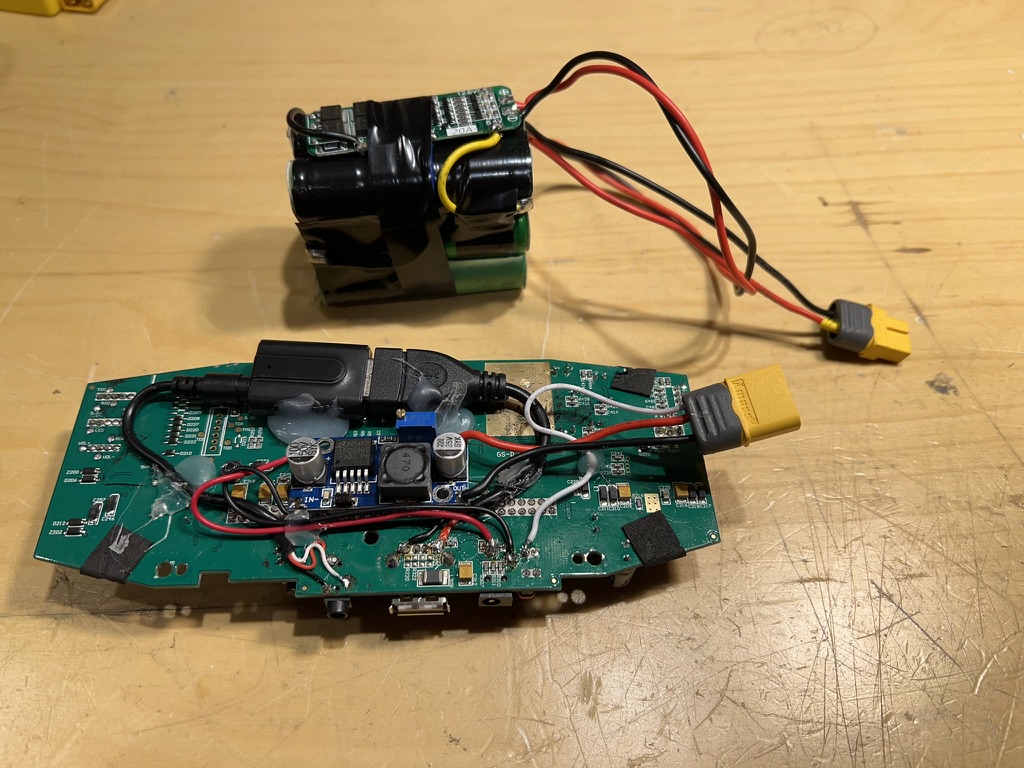
A toggle switch was added to isolate the battery to prevent parasitic draining of the battery over timedisconnect the stereo from the power inputs. This decreases the "standby" load to 15mA as opposed to 30mA.
An added bonus is that it is easier to operate the toggle and toggling on always turns on the unit.
And voila, all done and running on battery and it sounds amazing!

Revision V3
Going to rework this so I don't need the buck converter or I replace the buck converter with a buck/boost converter.
At present it doesn't seem like it is charging to full capacity with the buck converter. Could also just be the battery level monitor. We shall see.
I opted to use a buck boost converter. Tested it out and it holds the voltage steady with varying input voltage. Seems like it is the best option.
Buck/Boost Converter
https://www.amazon.ca/gp/product/B0CCHPPKW4/ref=ppx_yo_dt_b_search_asin_title?ie=UTF8&psc=1
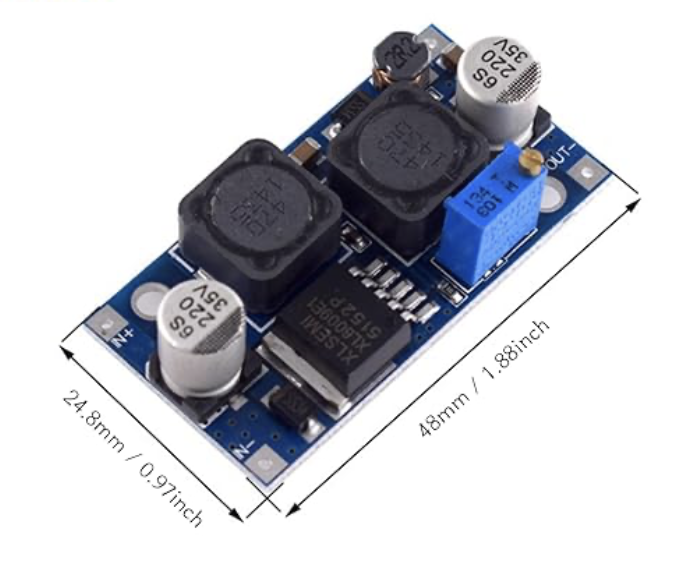
XL6009 buck boost converter
- With automatic voltage boosting and bucking function.
- ⚡【Input Voltage】:3.8~32V.
- ⚡【Output Voltages】:1.25~35V.
- ⚡【Input Current】:3A (max), no load 18mA (5V input, 8V output, no load less than 18mA. The higher the voltage, the higher the no load current.)
- ⚡【Conversion efficiency】:<94% (the higher the differential pressure, the lower the efficiency)
Wiring
Using Buck/Boost Converter

Additionnel Changes
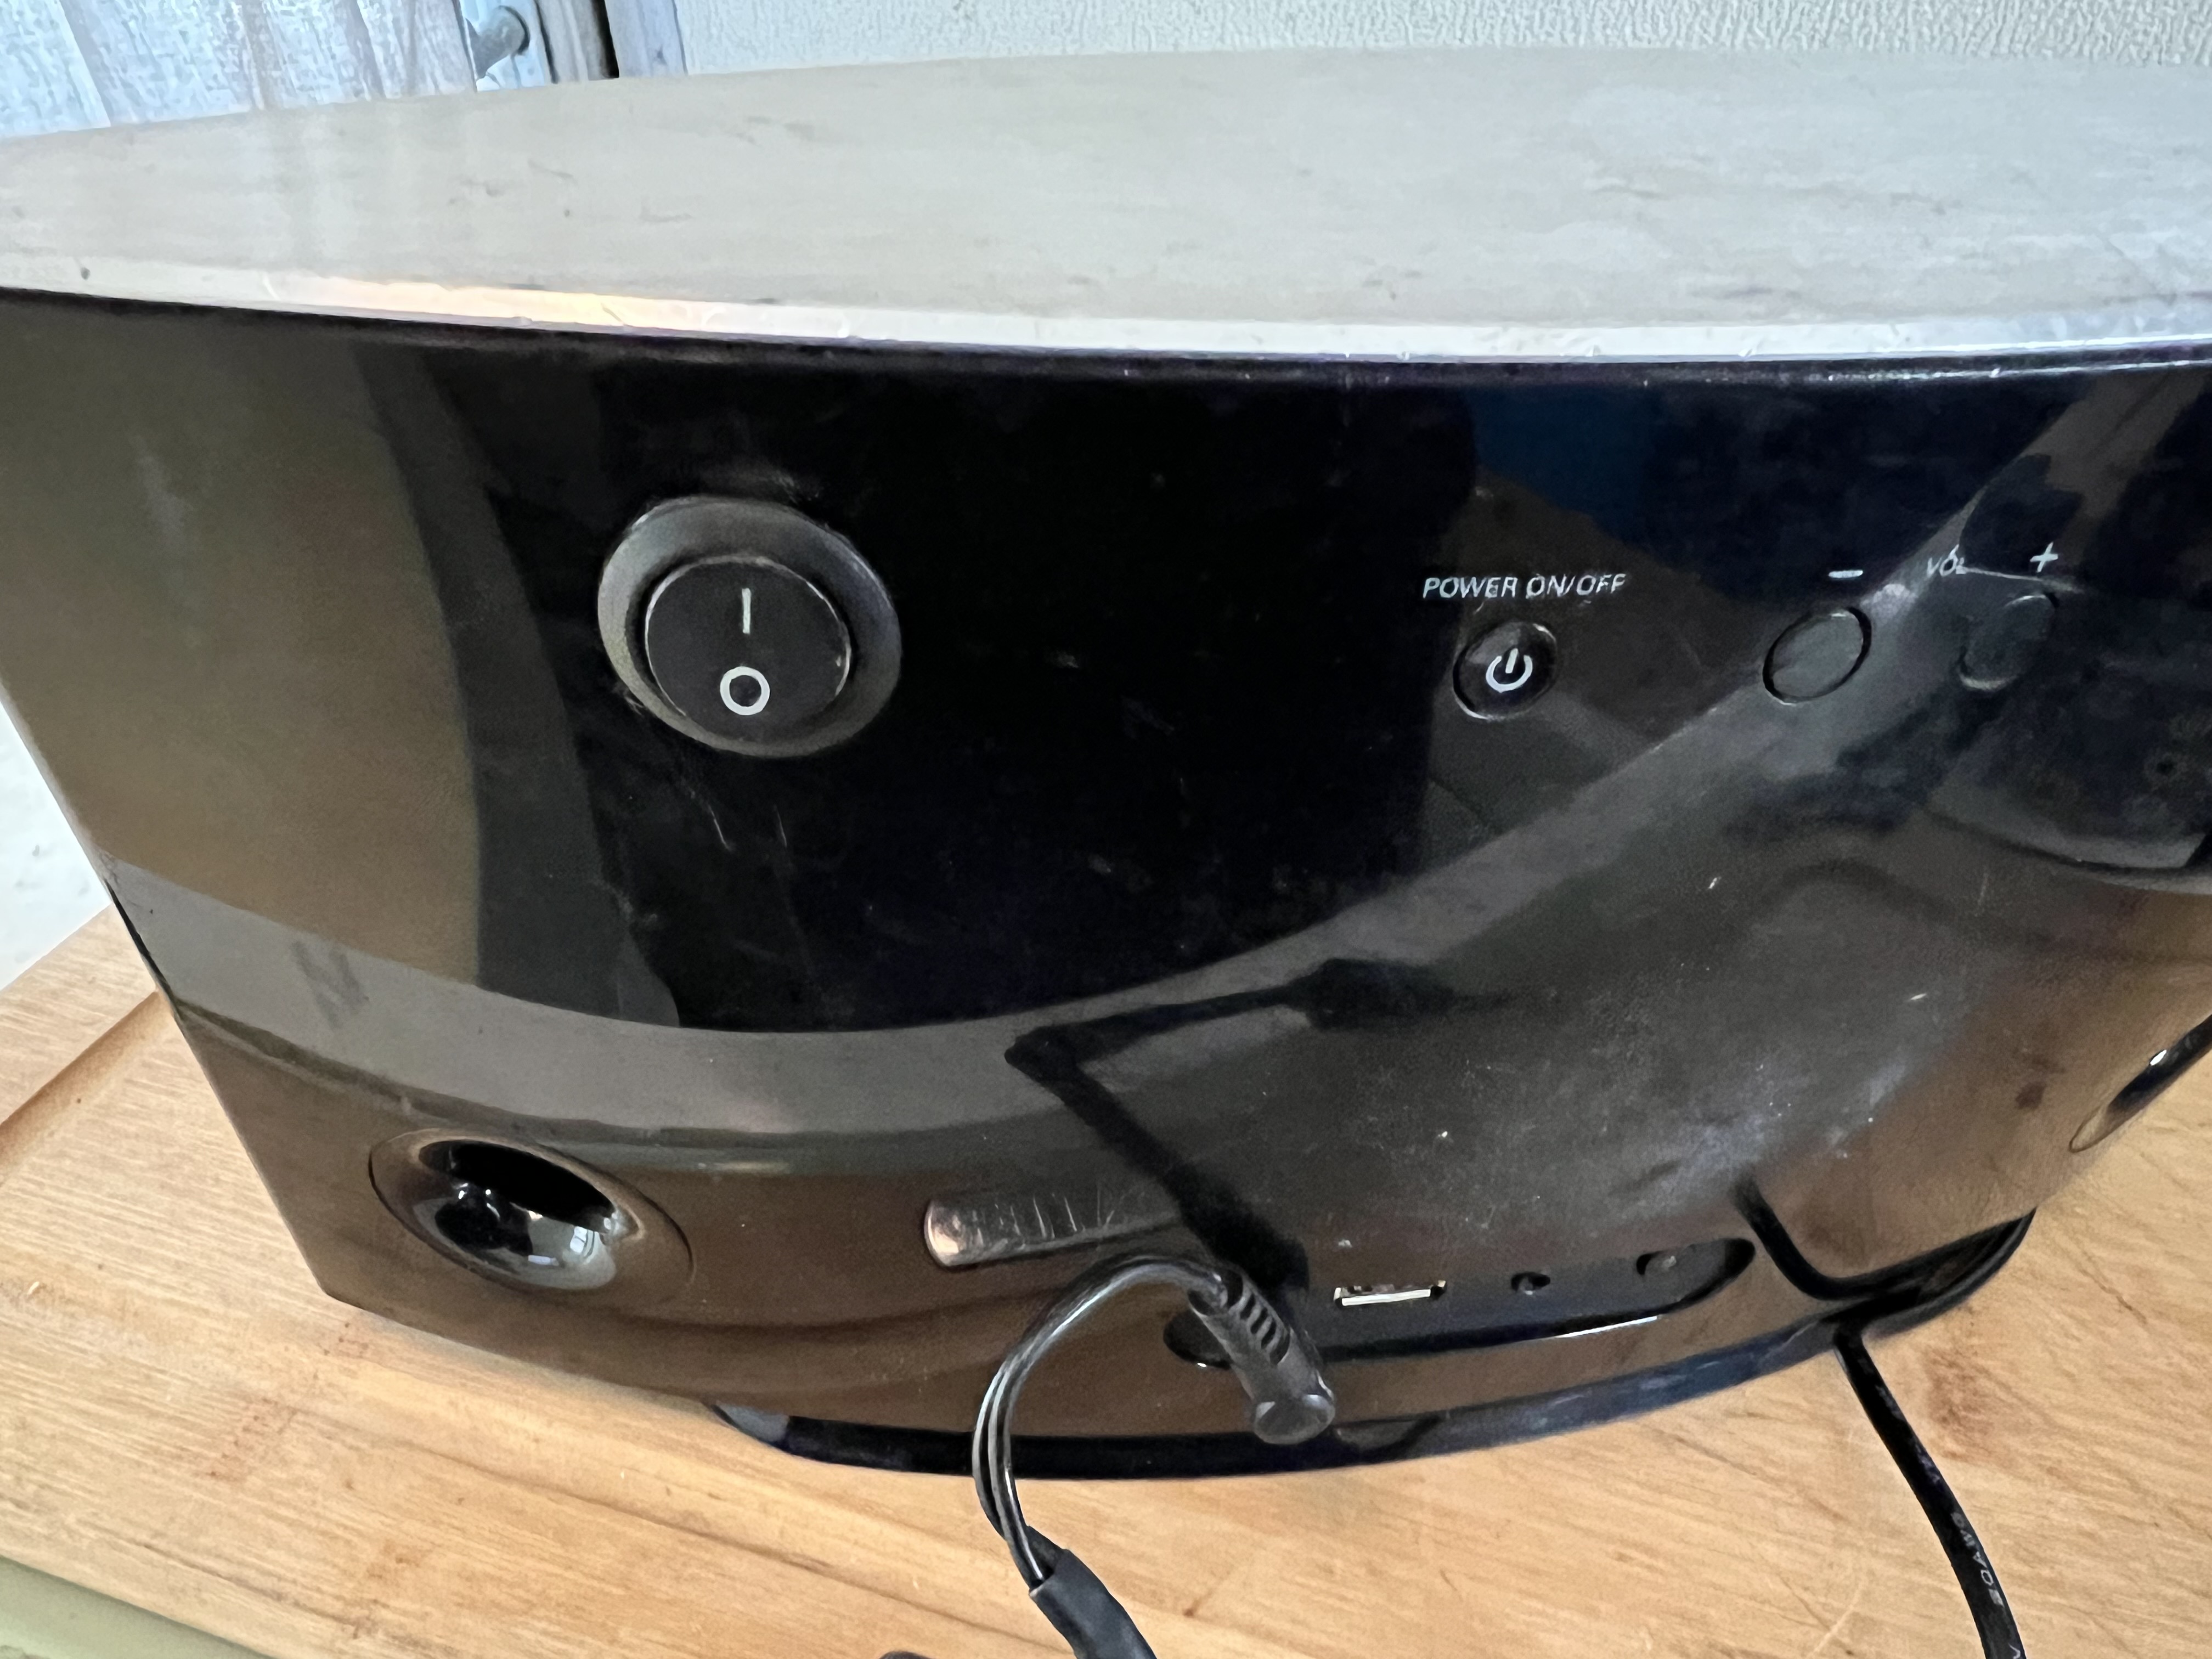
I also cut the power toggle trace since I always seem to accidentally hit this. When powering on with the switch, the unit defaults to always power on.
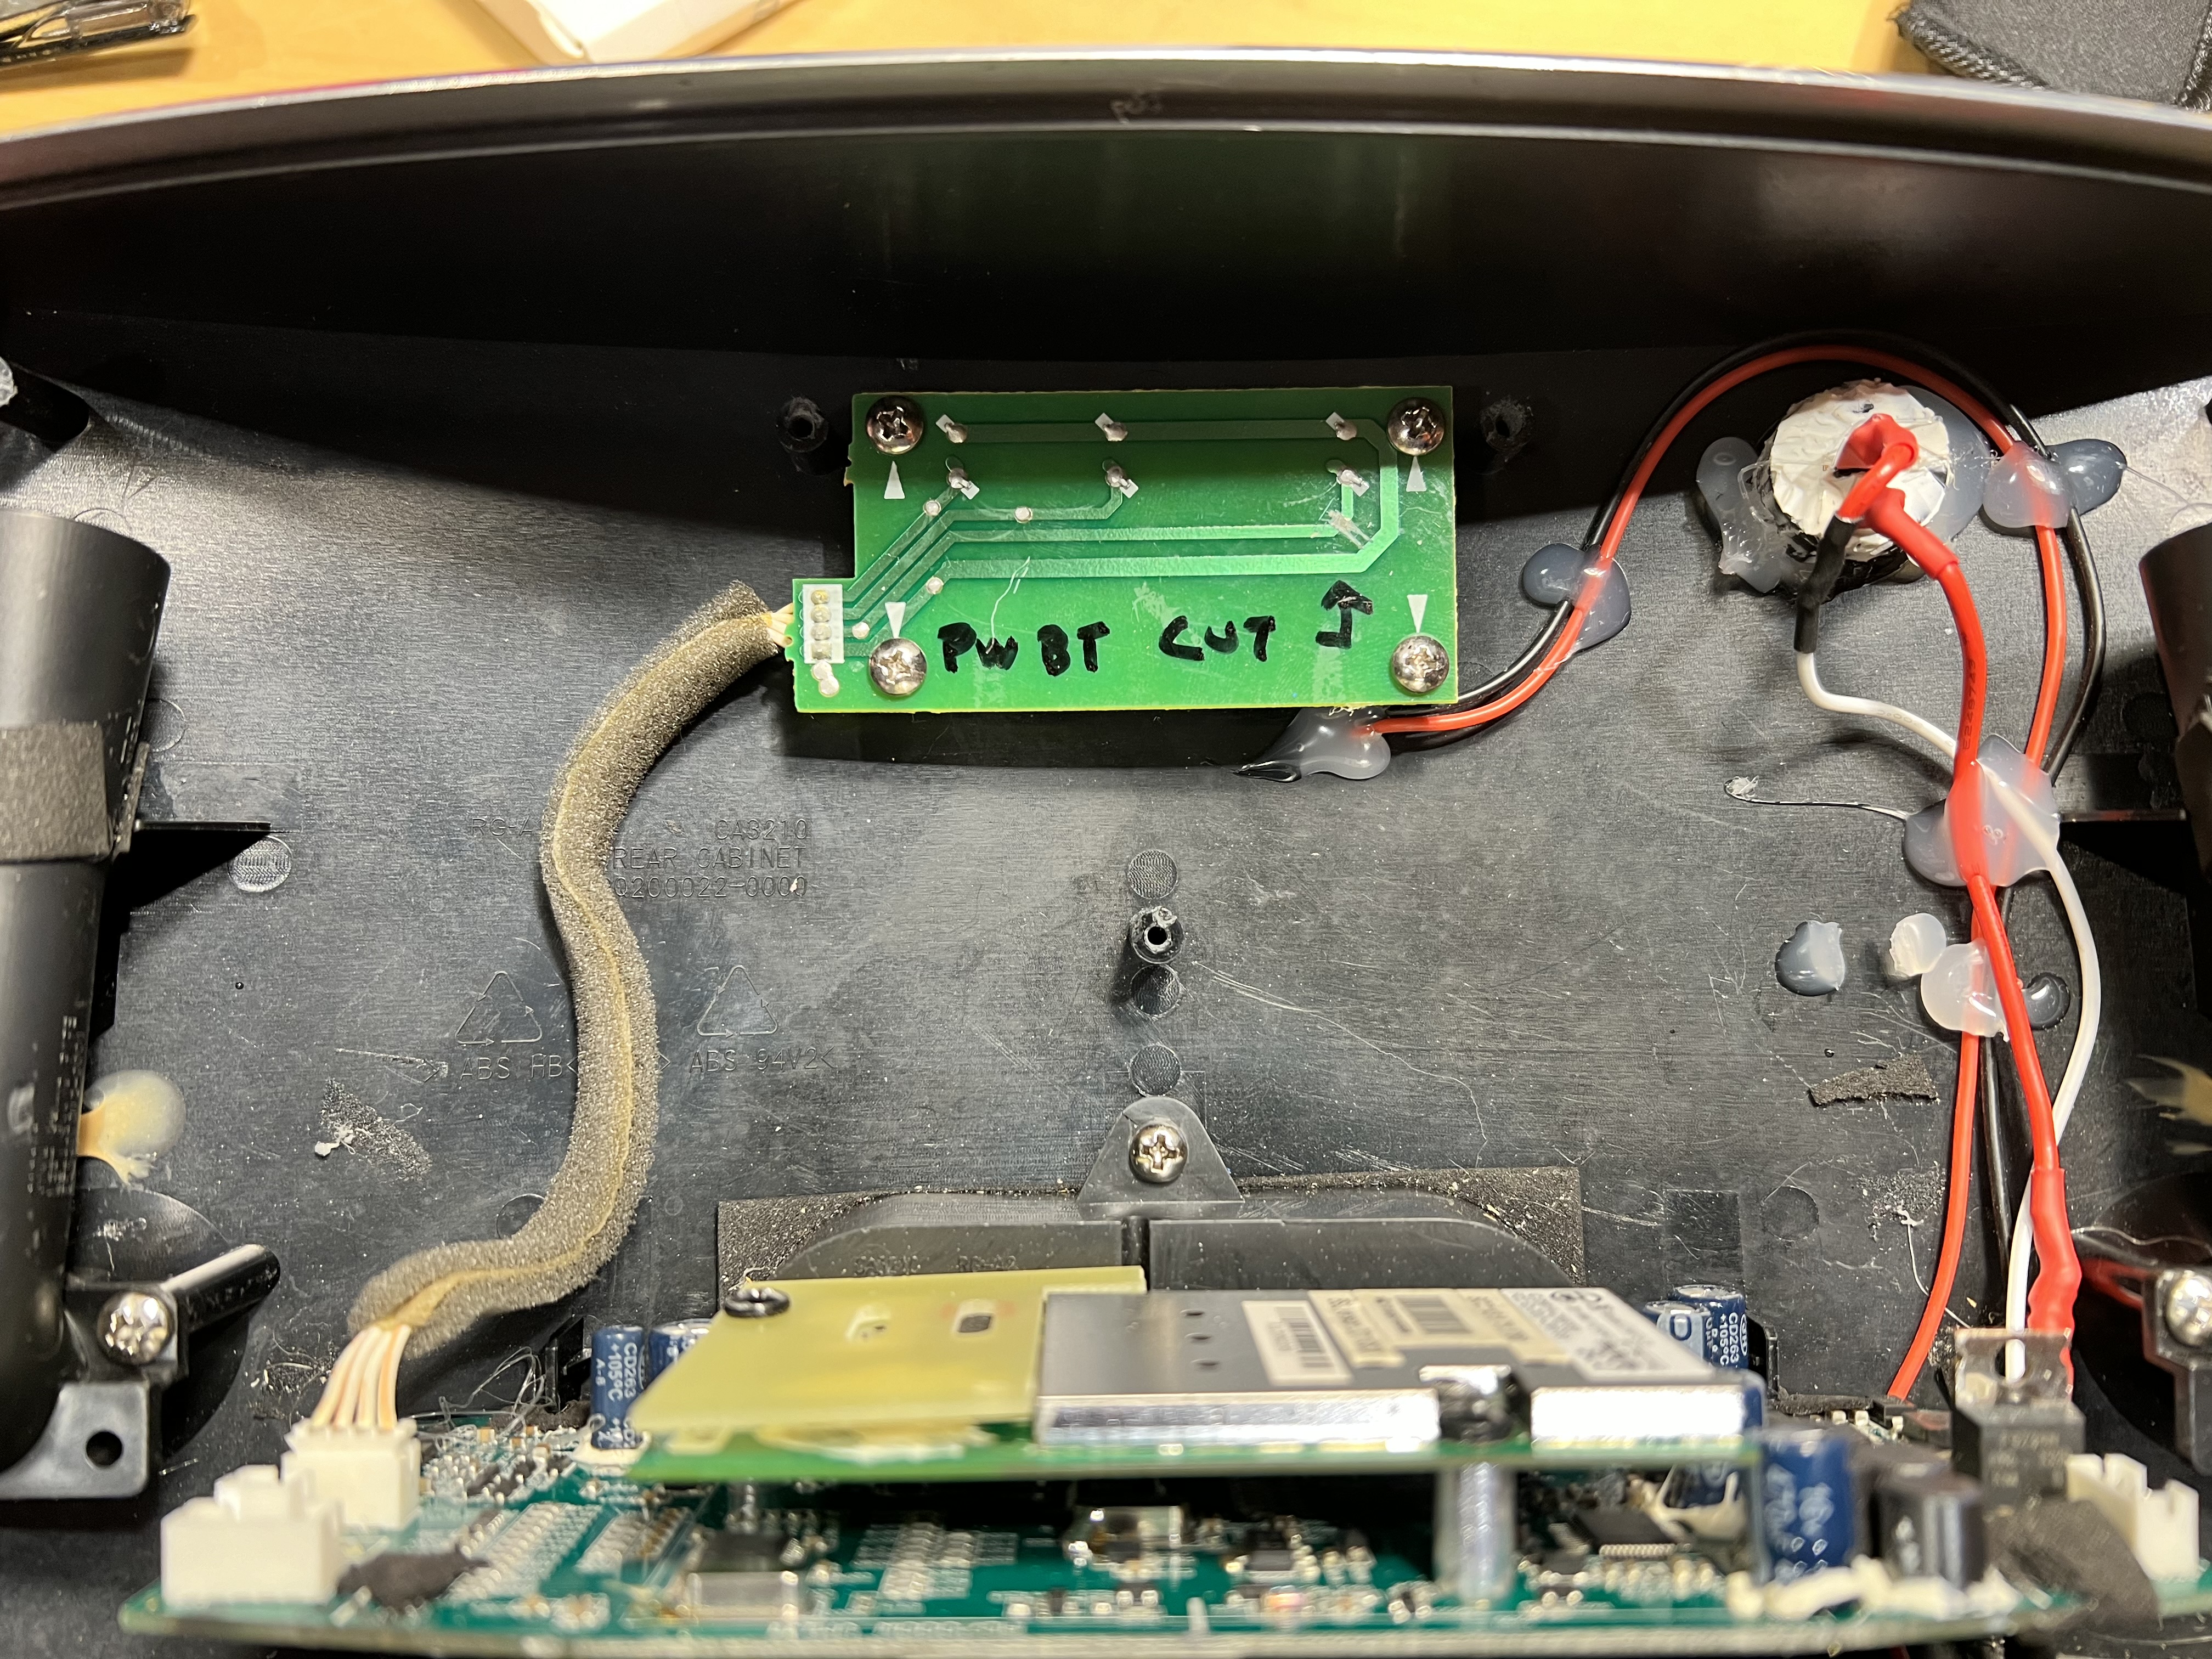
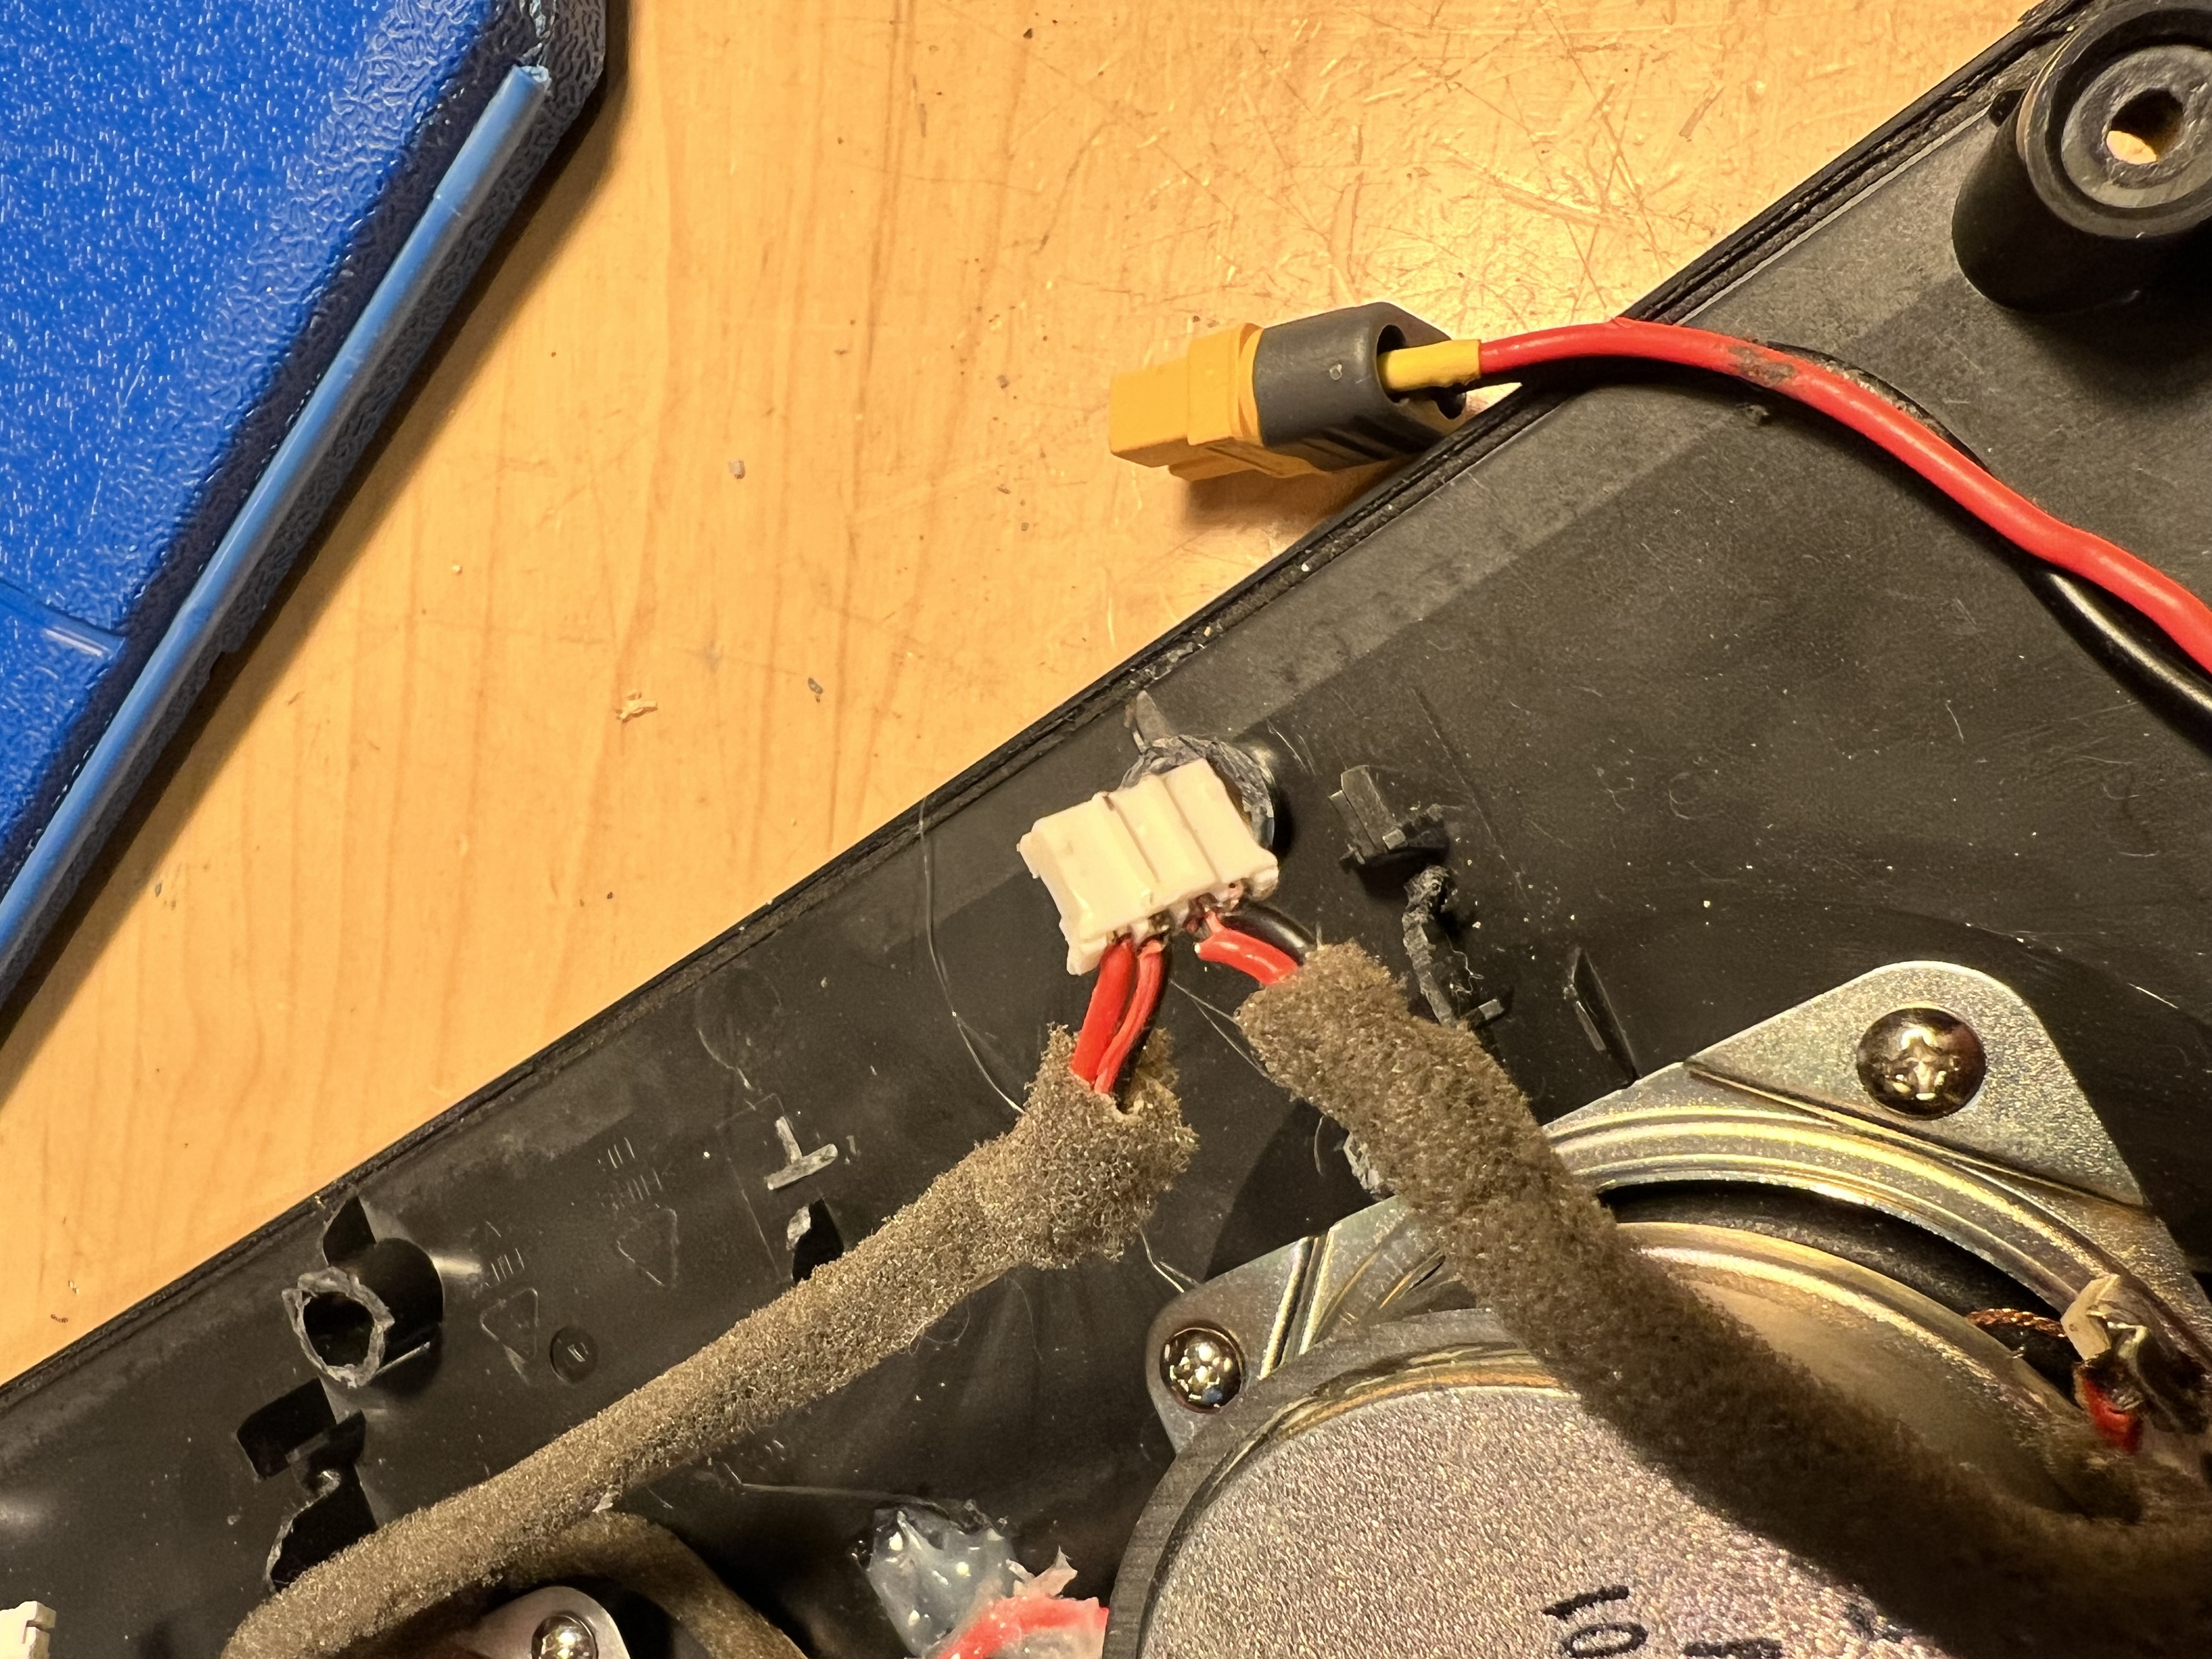
I also ended up replacing the speaker connector since it broke apart.
References
| Reference | URL | ||||||
|---|---|---|---|---|---|---|---|
| User Manual |
| ||||||
| Service Manual |
|