Objective
We wanted to be able to control the fan and lights from a switch and have the ability to setup when the lights would automatically come on.
Contraints
We were limited to only 1 electrical wire (14/2 - Line/Neutral and Ground) from the switch to the fan/lights.
Hardware
- SONOFF Basic
- Lutron MA-LFQHW-WH Maestro Fan Control and Dimmer Kit, White
Wiring
In order to control both a fan and set of lights and be able to have some SMARTs, the following wiring was performed.
The SONOFF Basic is used to close the neutral line to the lights which gives us the ability to toggle the lights on/off wirelessly. Notice that we wired the SONOFF backwards. We wired the neutral where the Line would be. This allows the LINE power to come from the canopy module.
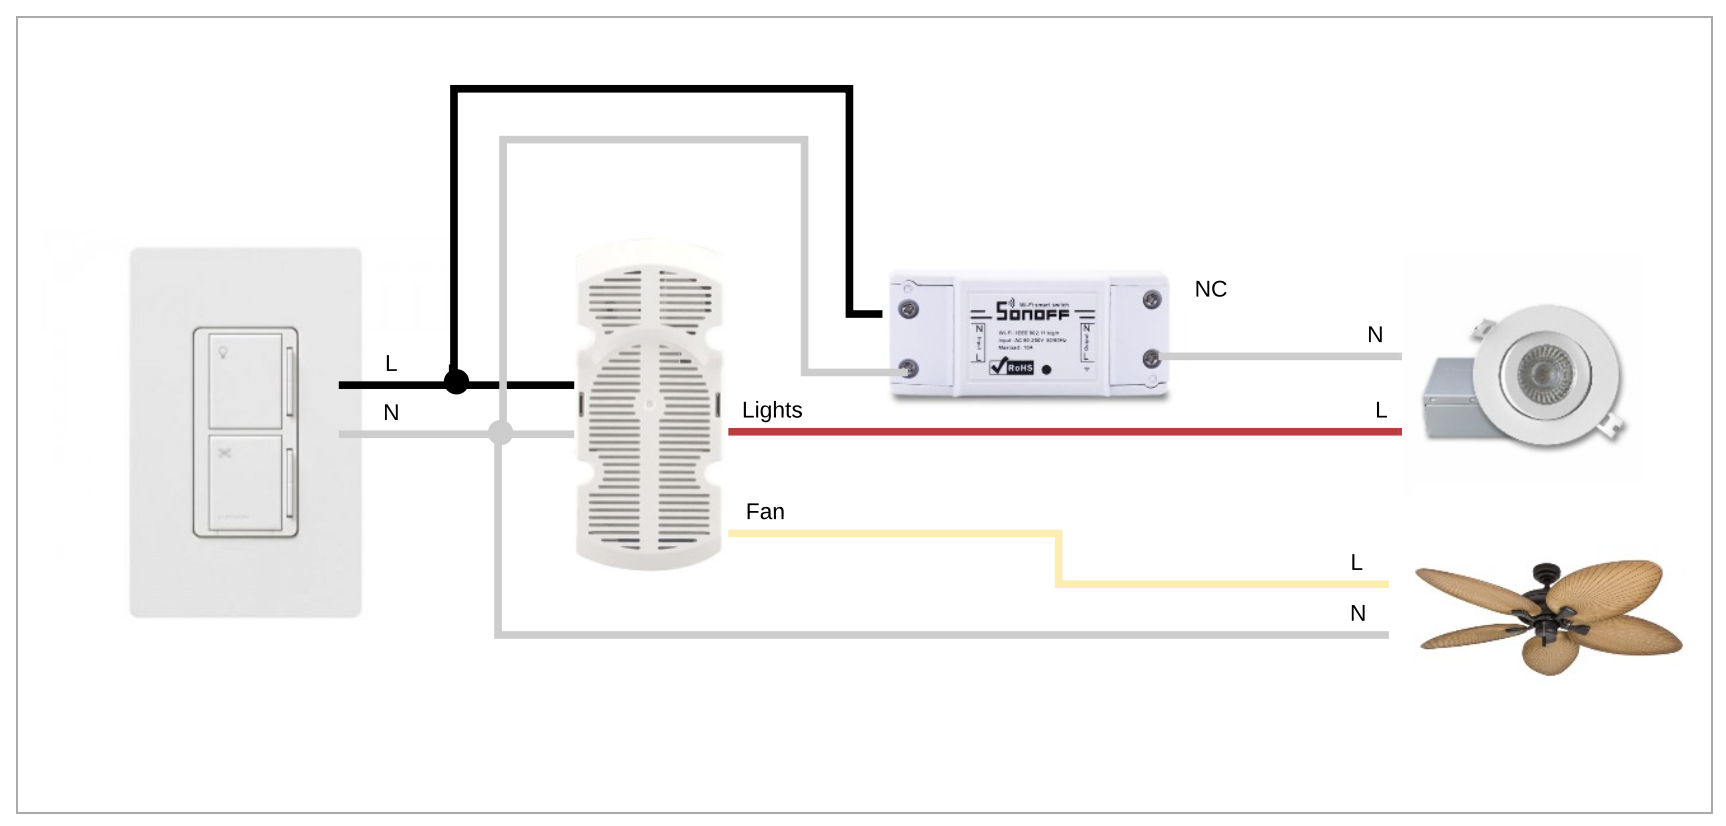
Ground wire connections not shown.
Fan Control
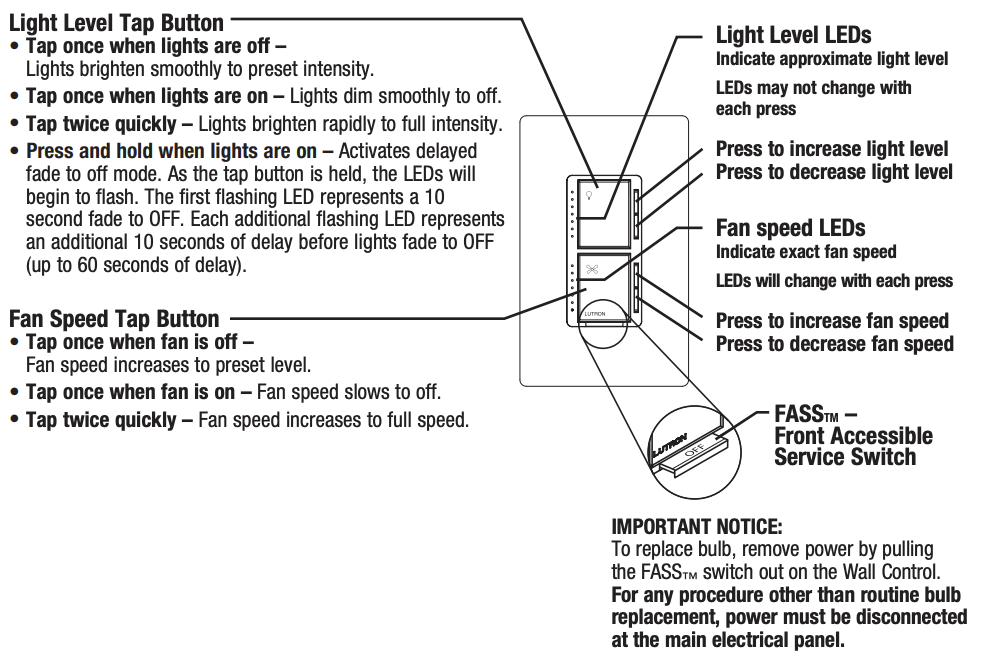
Notice that this unit has a Front Accessible Service Switch (FASS). This will allow us to set the power to an ON state on the SONOFF
SONOFF Configuration
We flashed our SONOFF Basic with Tasmota firmware. This is not required. We did this since all of our other SONOFF devices use Tasmota firmware and we control these devices using our iOS devices via Homebridge.
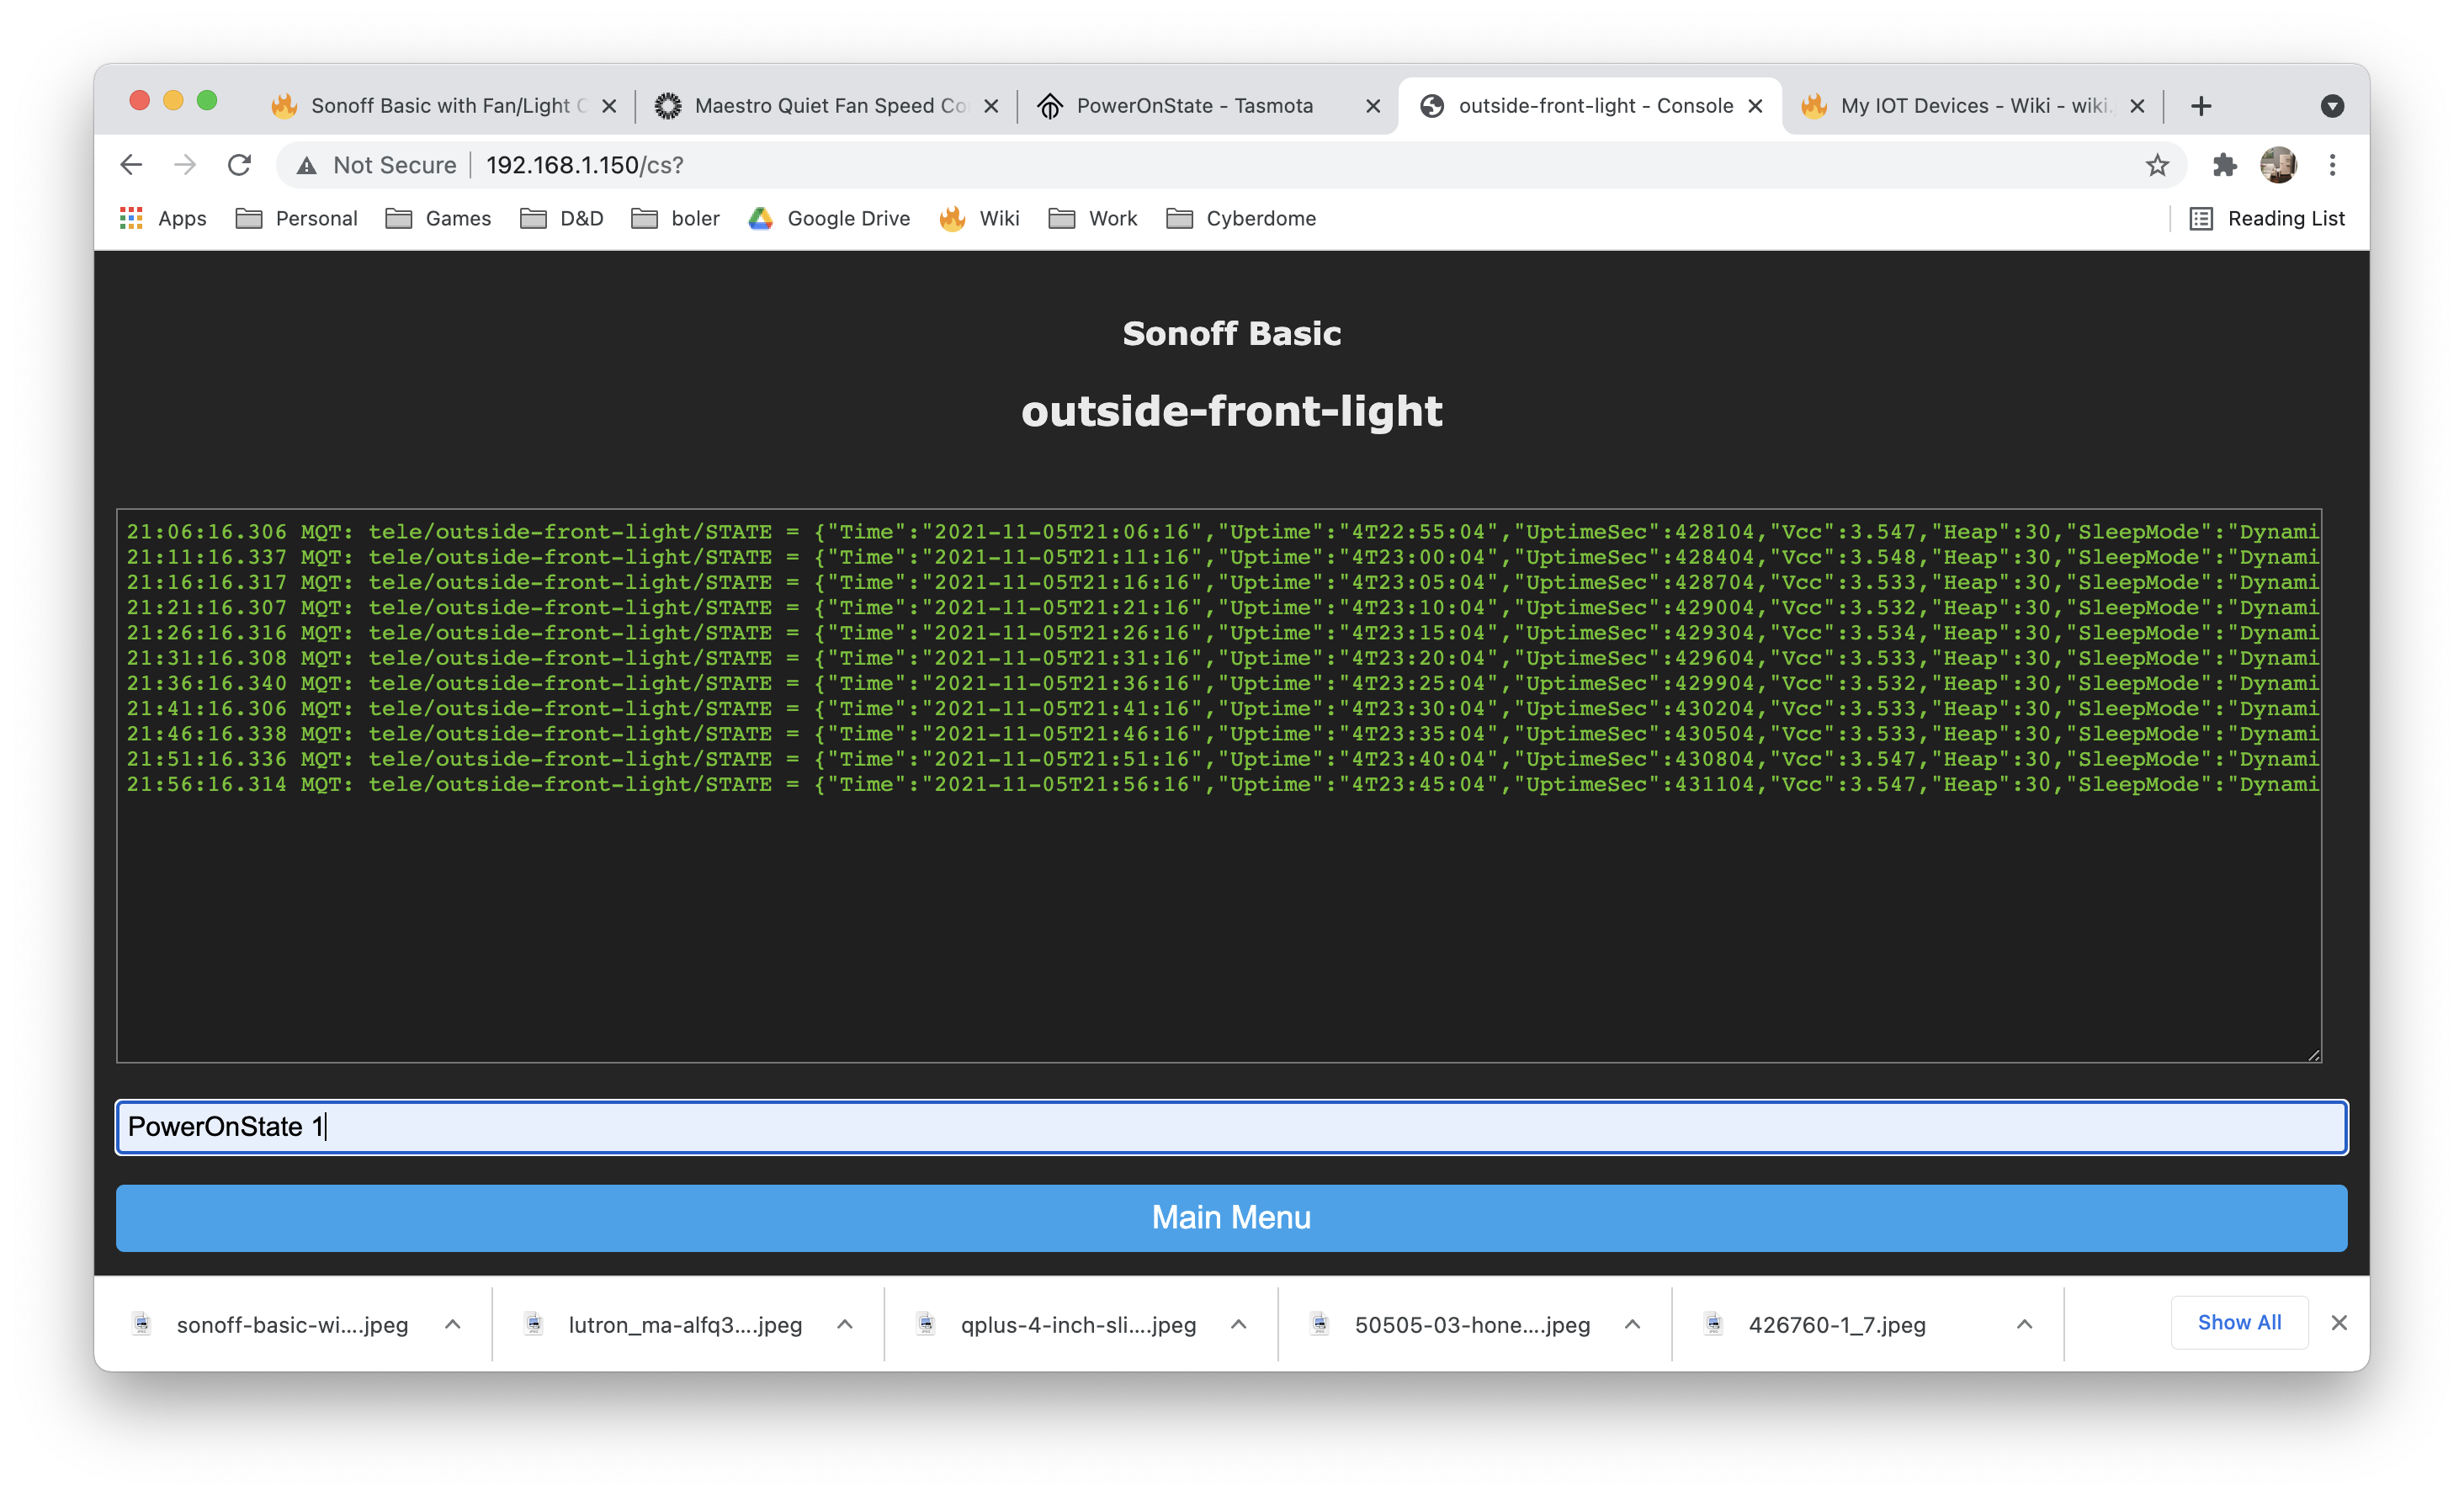
Tasmota Configuration
We wanted our lights to revert to the ON state if power was toggled. This is set in Tasmota's Console screen. What is nice about this, we can get our SONOFF to turn on by pulling the FASS (front access service swith) on the front of the Lutron switch (see Fan Control section).
PowerOnState 1
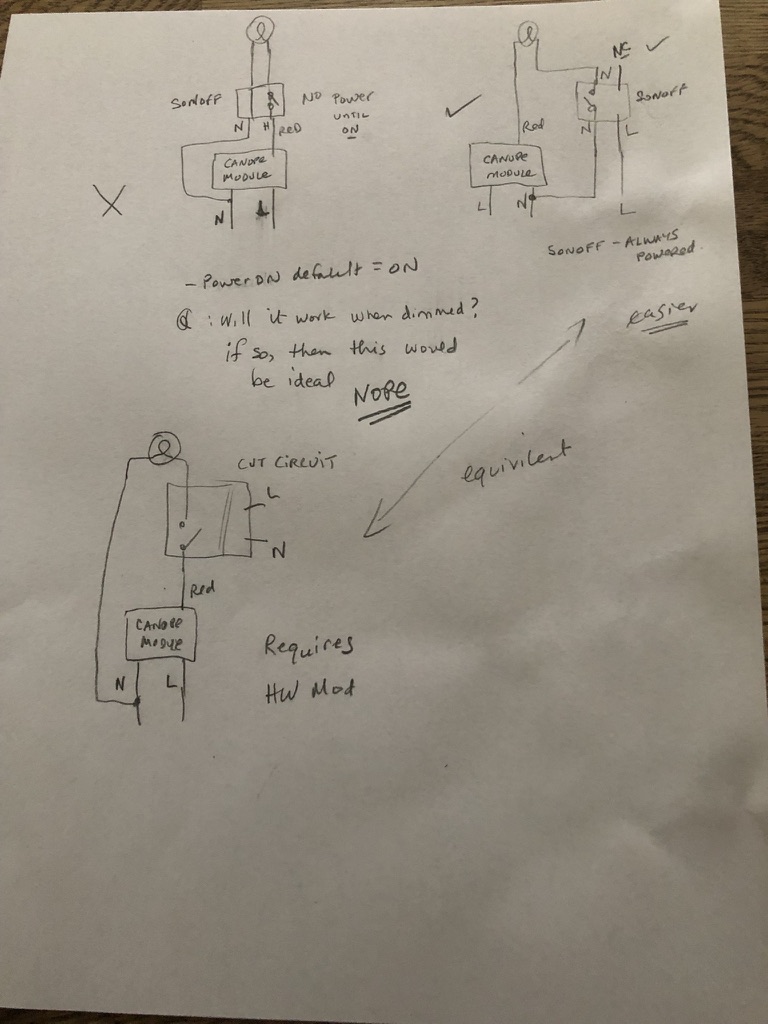
Other Wiring Ideas
References
| Reference | URL |
|---|---|
| Lutron Manual | https://www.lutron.com/TechnicalDocumentLibrary/0301526.pdf |