Overview
The UI Vision RPA software is the tool for visual process automation, codeless UI test automation, web scraping and screen scraping. Automate tasks on Windows, Mac and Linux. UI Vision RPA is just like Selenium IDE but better.
Installation
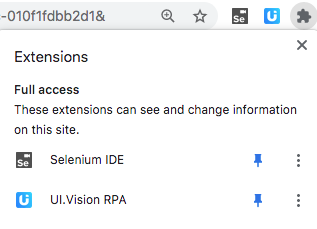
This application is a browser plugin.
See product home page for additional details: https://ui.vision/rpa
You will also want to install the extension modules. Install the extension modules:
https://ui.vision/rpa/x/download
Getting Started
Open the macro creation window
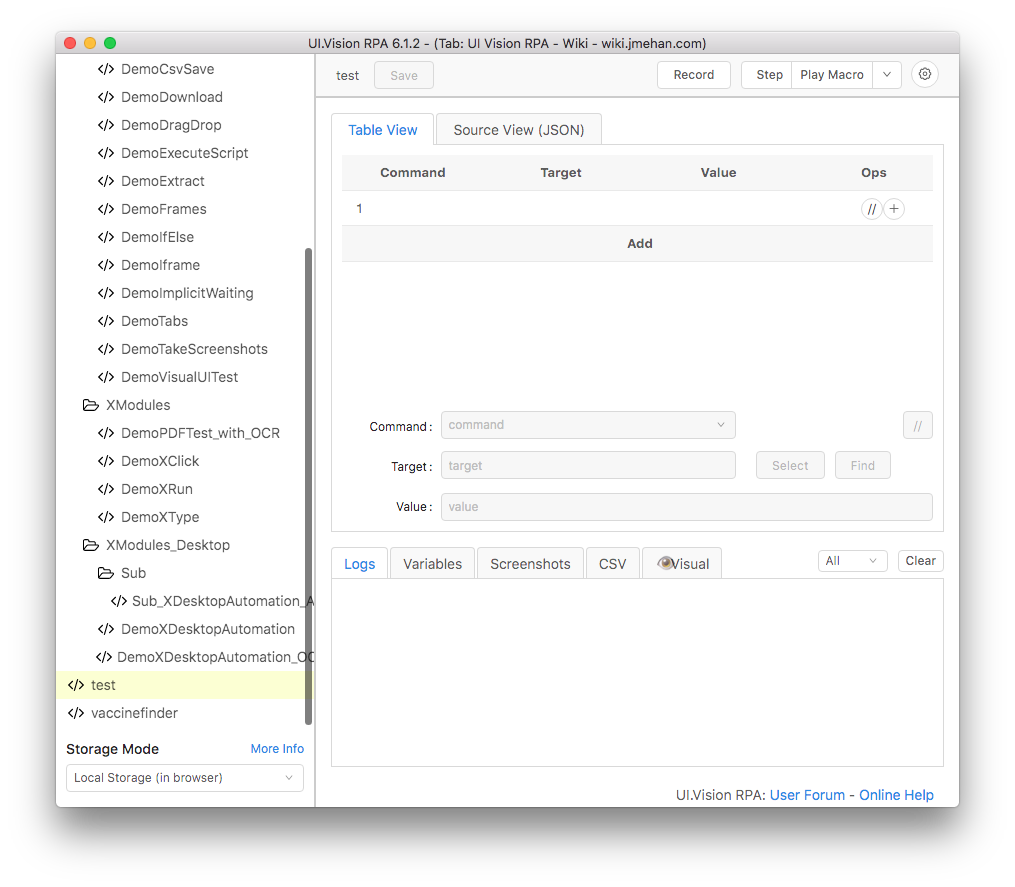
Commands
| Command | Description | Example | ||
|---|---|---|---|---|
| Command | Target | Value | ||
| store | The Selenium functions store, storeValue, and storeText store some data for later access. Selenium uses a map called storedVars to store the data. You can use previously stored variables. ${varaiable_name} gives us access to the storedVars map. To display the value of a stored variable use "echo". | store | John | firstName |
| comment | Adds a comment | comment | My comment here | |
| open | The "Open" command opens the URL in the current selected browser tab. The open command takes a full URL as input (recommended) or a path relative to the baseurl (outdated). | open | http://www.google.com/ | |
| type | TYPE sets the value of an input field, as though you typed it in. | type | id=sq_101i | ${firstName} |
| click | clickAndWait and click send a Javascript click event to the DOM element defined by the locator. The difference between clickAndWait and click is that clickAndWait waits for a page load event after the click. So clickAndWait = click + waitForPageToLoad. | click | xpath=//div[2]/div/div/a | |
| select | The purpose of select and selectAndWait is to select a value from drop down/combo box or list box. | select | xpath=//*[@id="sq_102"]/div[2]/div[2]/div/div[2]/select | label=${birthMonth} |
| executeScript | The executeScript command executes a snippet of JavaScript in the context of the currently selected frame or window. The script fragment will be executed as the body of an anonymous function. To store the return value, use the 'return' keyword and provide a variable name in the value input field. | executeScript | return Number (${i}) + 1; | i |
| Play an audio file. | executeScript | var audio = new Audio("https://www.myinstants.com/media/sounds/jeopardy.mp3"); audio.play(); | ||
| executeScript_Sandbox | The executeScript_Sandbox works exactly as executeScript but runs the Javascript in a sandbox. In other words, the code runs not in the website. The advantage of using the sandbox is that the website can not influence or block the Javascript execution. So unless you want to access elements of the website, better use the sandbox. The flow control commands (if_v2, while_v2, GotoIf_v2) use executeScript_Sandbox internally to evaluate the expression. | executeScript_Sandbox | return Number (${i}) + 1; | i |
do ... repeatIf | The part between Do and Repeat If (expression) is executed as long as the expression is true. RepeatIf uses executeScript_Sandbox to evaluate the expression. If the expression is false, the IDE executes the immediate next command Repeat If. | do | ||
| executeScript | return document.body.innerHTML.search("At this time there are no appointment slots available"); | textLocation | ||
| repeatIf | ${textLocation} != -1 | |||
if_v2 ... elseif ... else ... end | if statement | if_v2 | ${i} == 0 | |
| click | ... | |||
| elseif | ${i}==1 | |||
| click | ... | |||
| else | ||||
| click | ... | |||
| end | ||||
while_v2 ... end | while_v2 | ${i} < 4 | ||
| executeScript_Sandbox | return Number (${i}) + 1; | i | ||
| click | ... | |||
| end | ||||
| break | The break statement breaks the loop and continues executing the code after the loop (if any). Usually it is used after a conditional "if" (or similar) statement. | while_v2 | ${i} < 4 | |
| ... | ||||
| if_v2 | ${i} == 3 | |||
| break | ||||
| end | ||||
| end | ||||
Examples
Running Multiple Tests in Parallel
Create Multiple Profiles
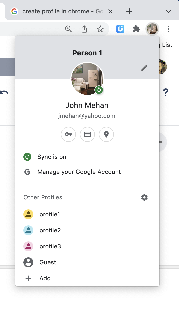
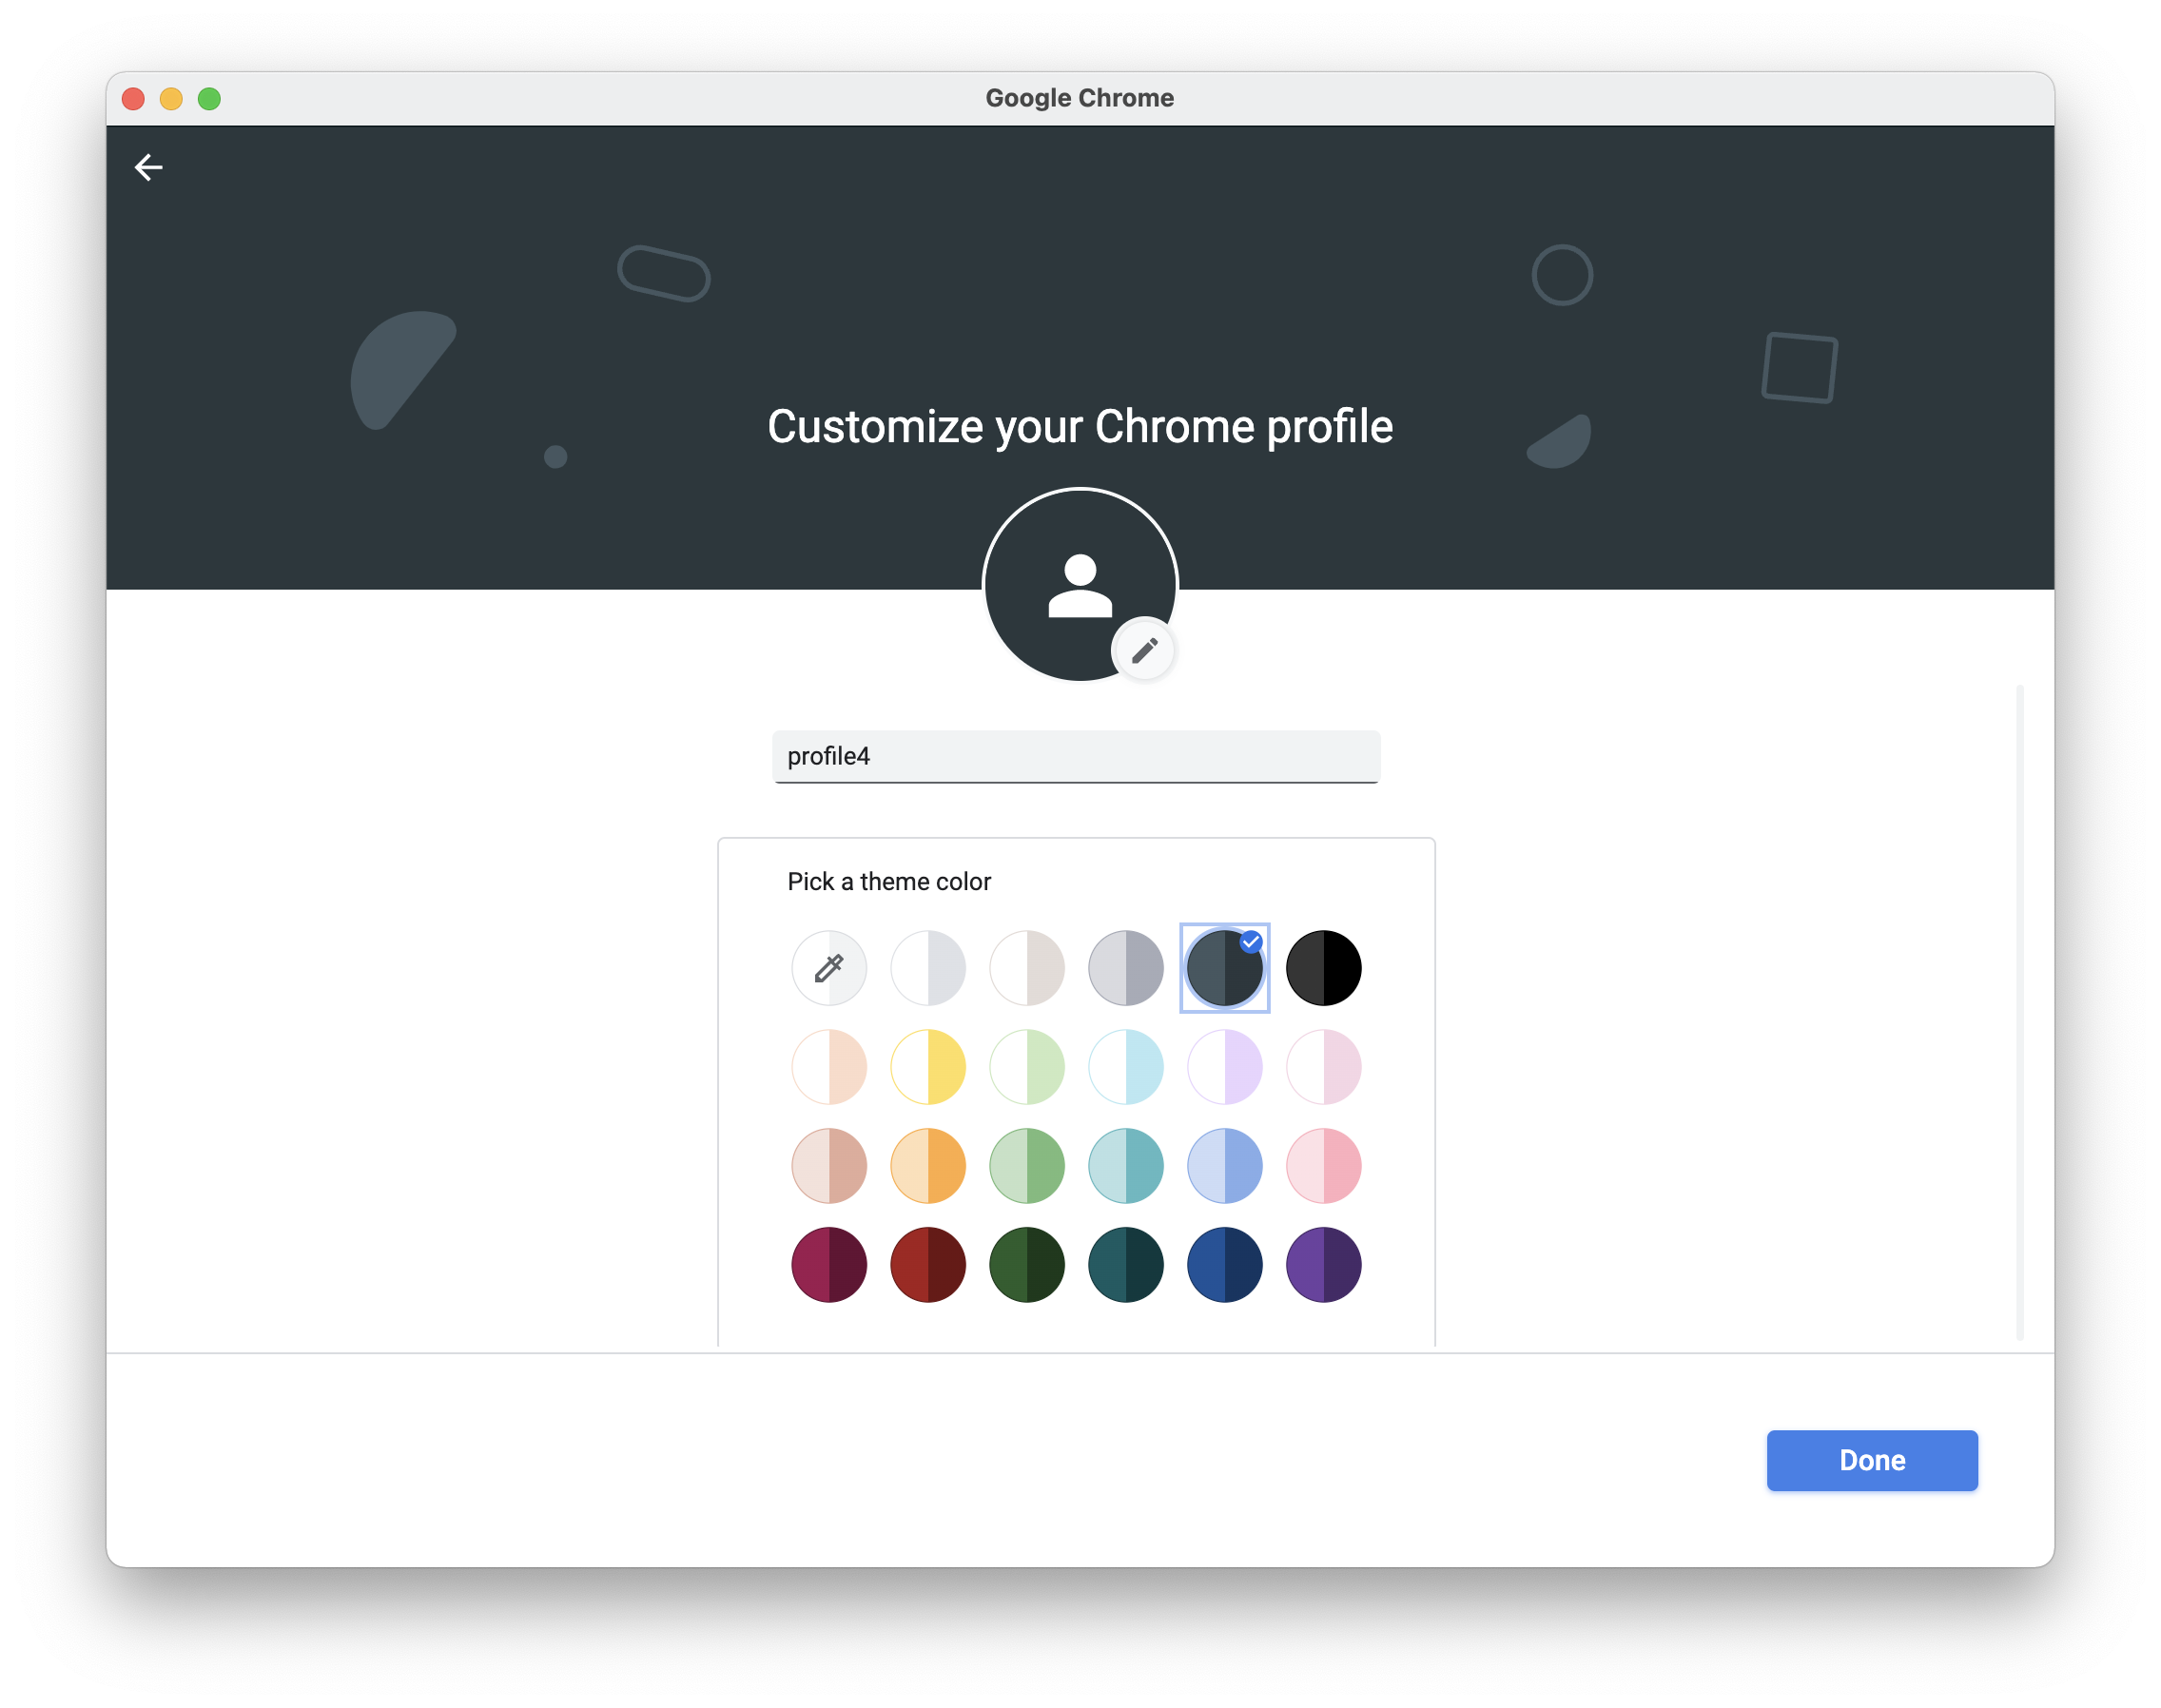
Click on your current profile in the top right corner of your browser and then click Add.
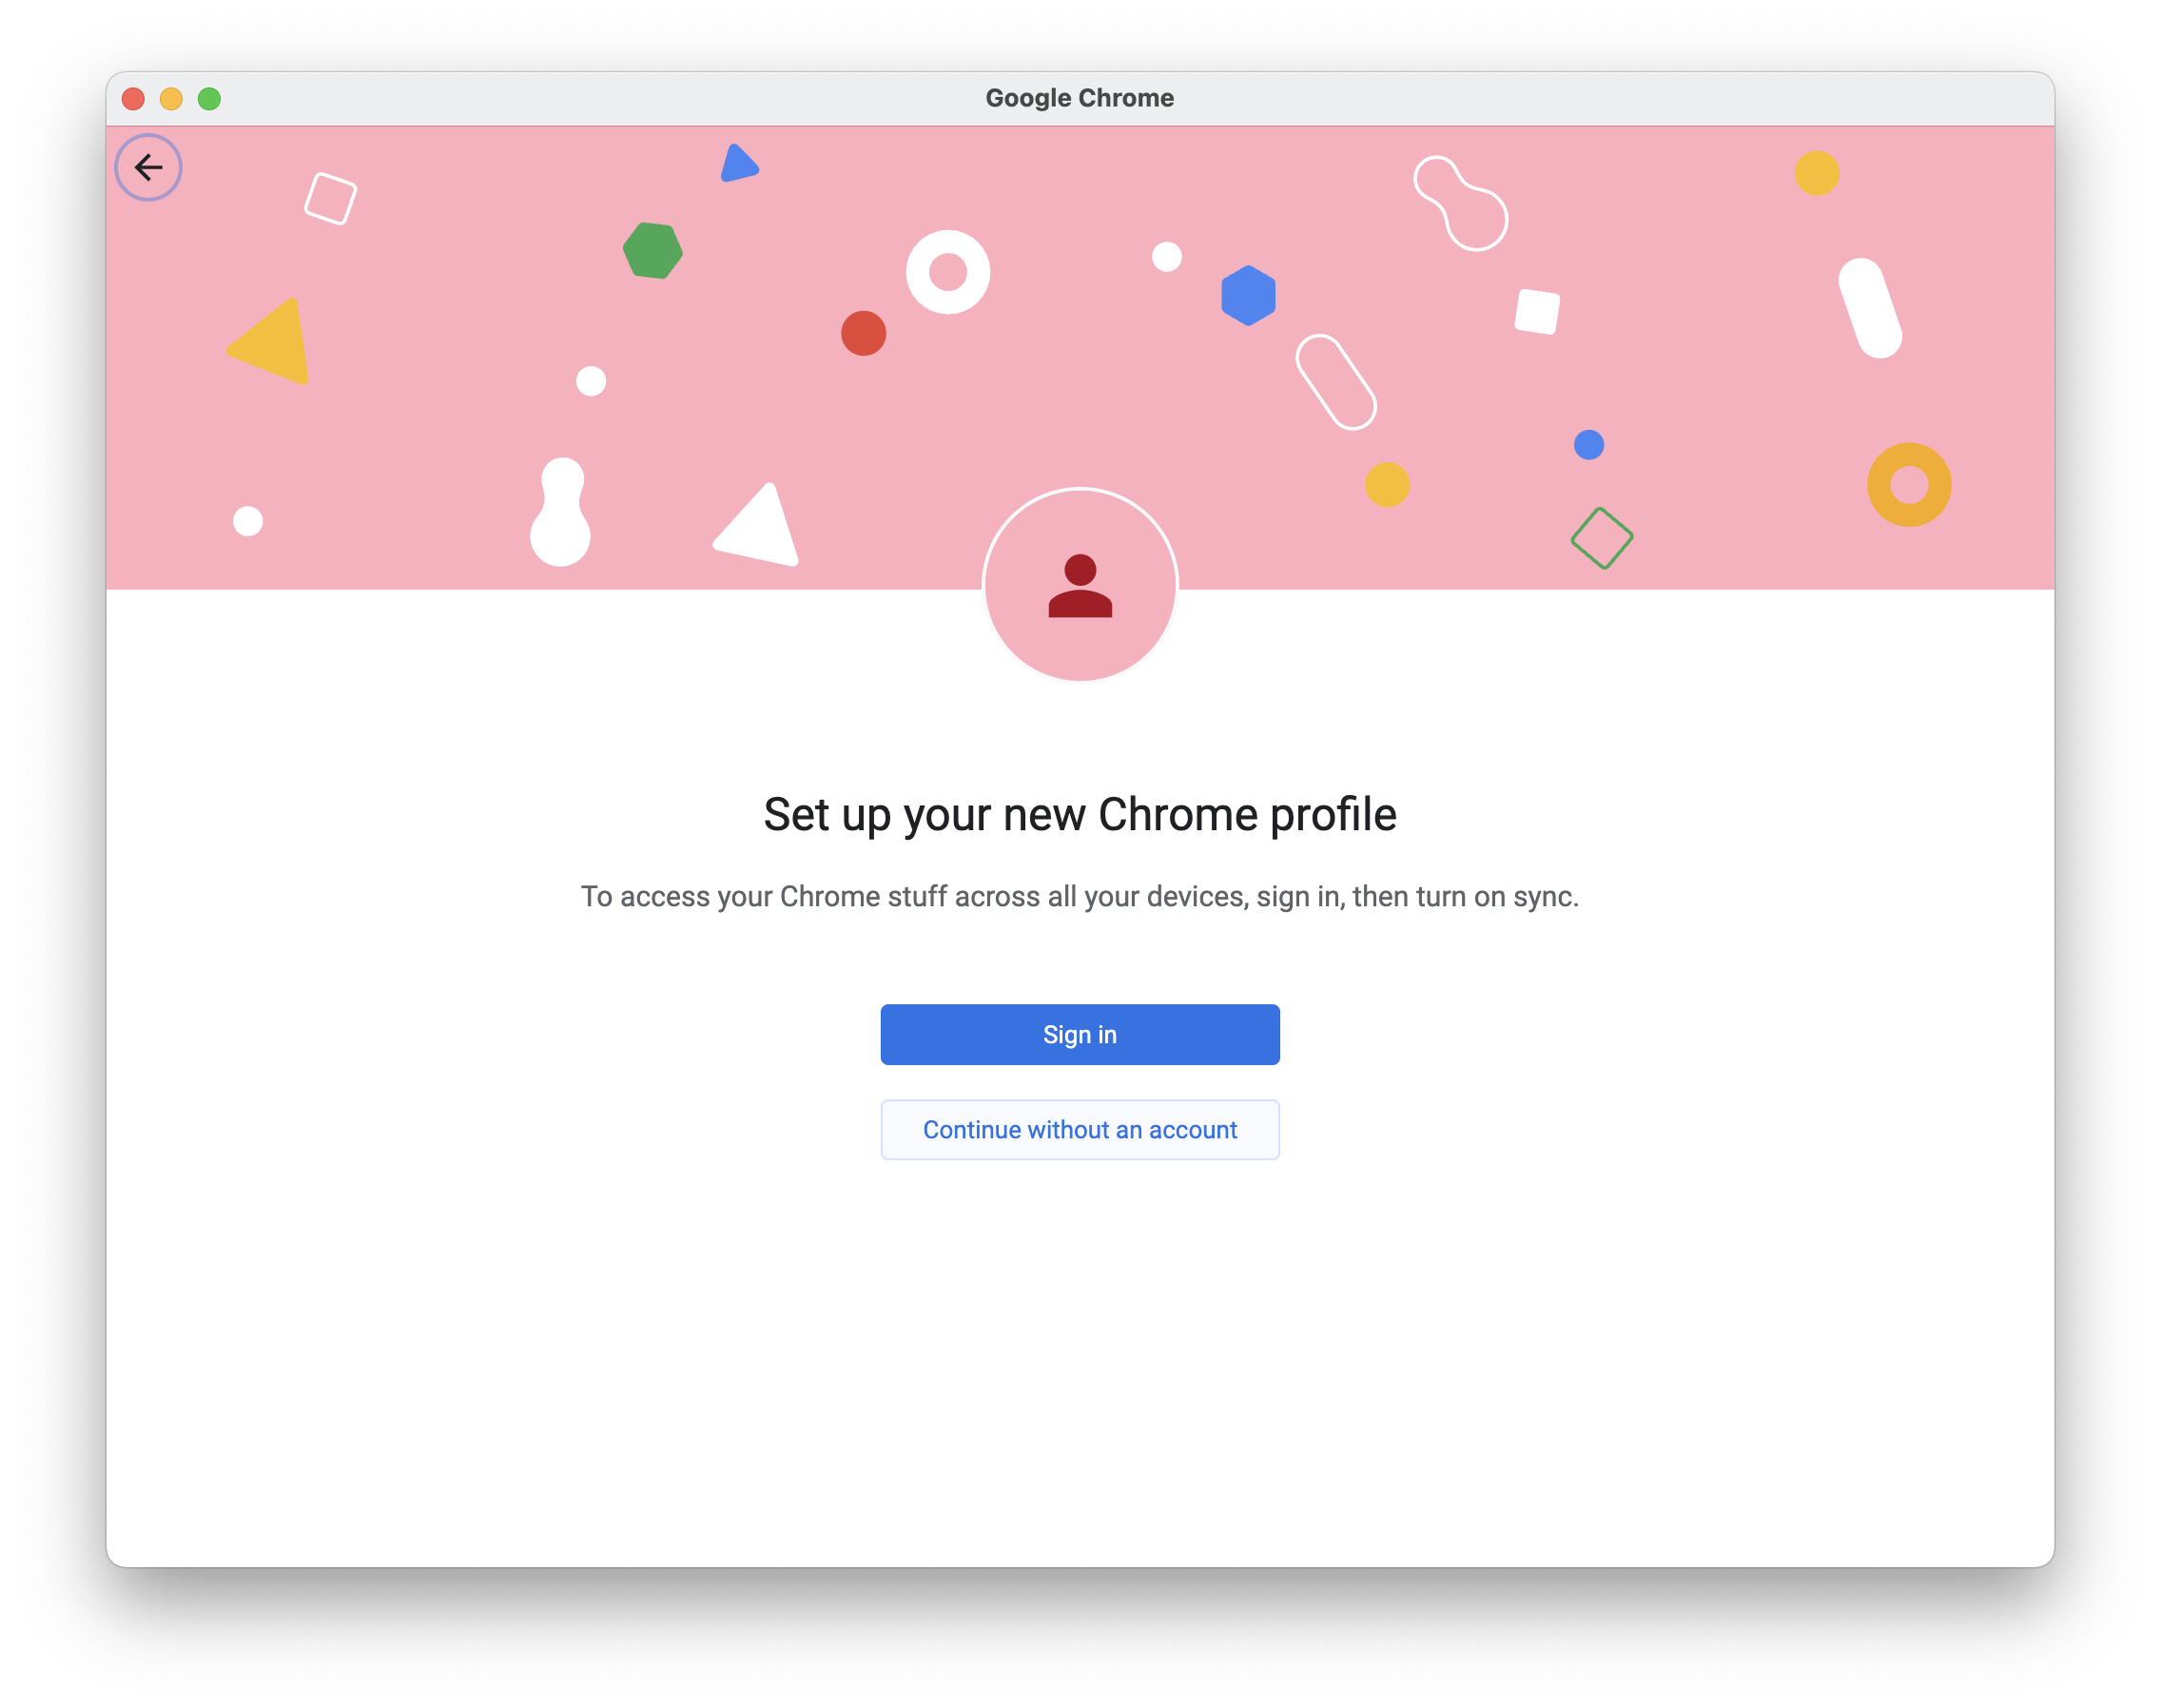
Click Continue without an account.
Assign the profile a name and click Done.
Launch Tests
To run multiple tests in parallel from Chrome:
- launch Chrome
- Select Profile
- Install UI Vision and give all access required
- Startup UI Vision and run macro
- Open a new browser window and change profile and repeat steps 3-4
From Command Line
Generate Autostart HTML Page
From the UI Vision plugin, click on the gear icon in the top right corner and select the API tab on the Settings page.
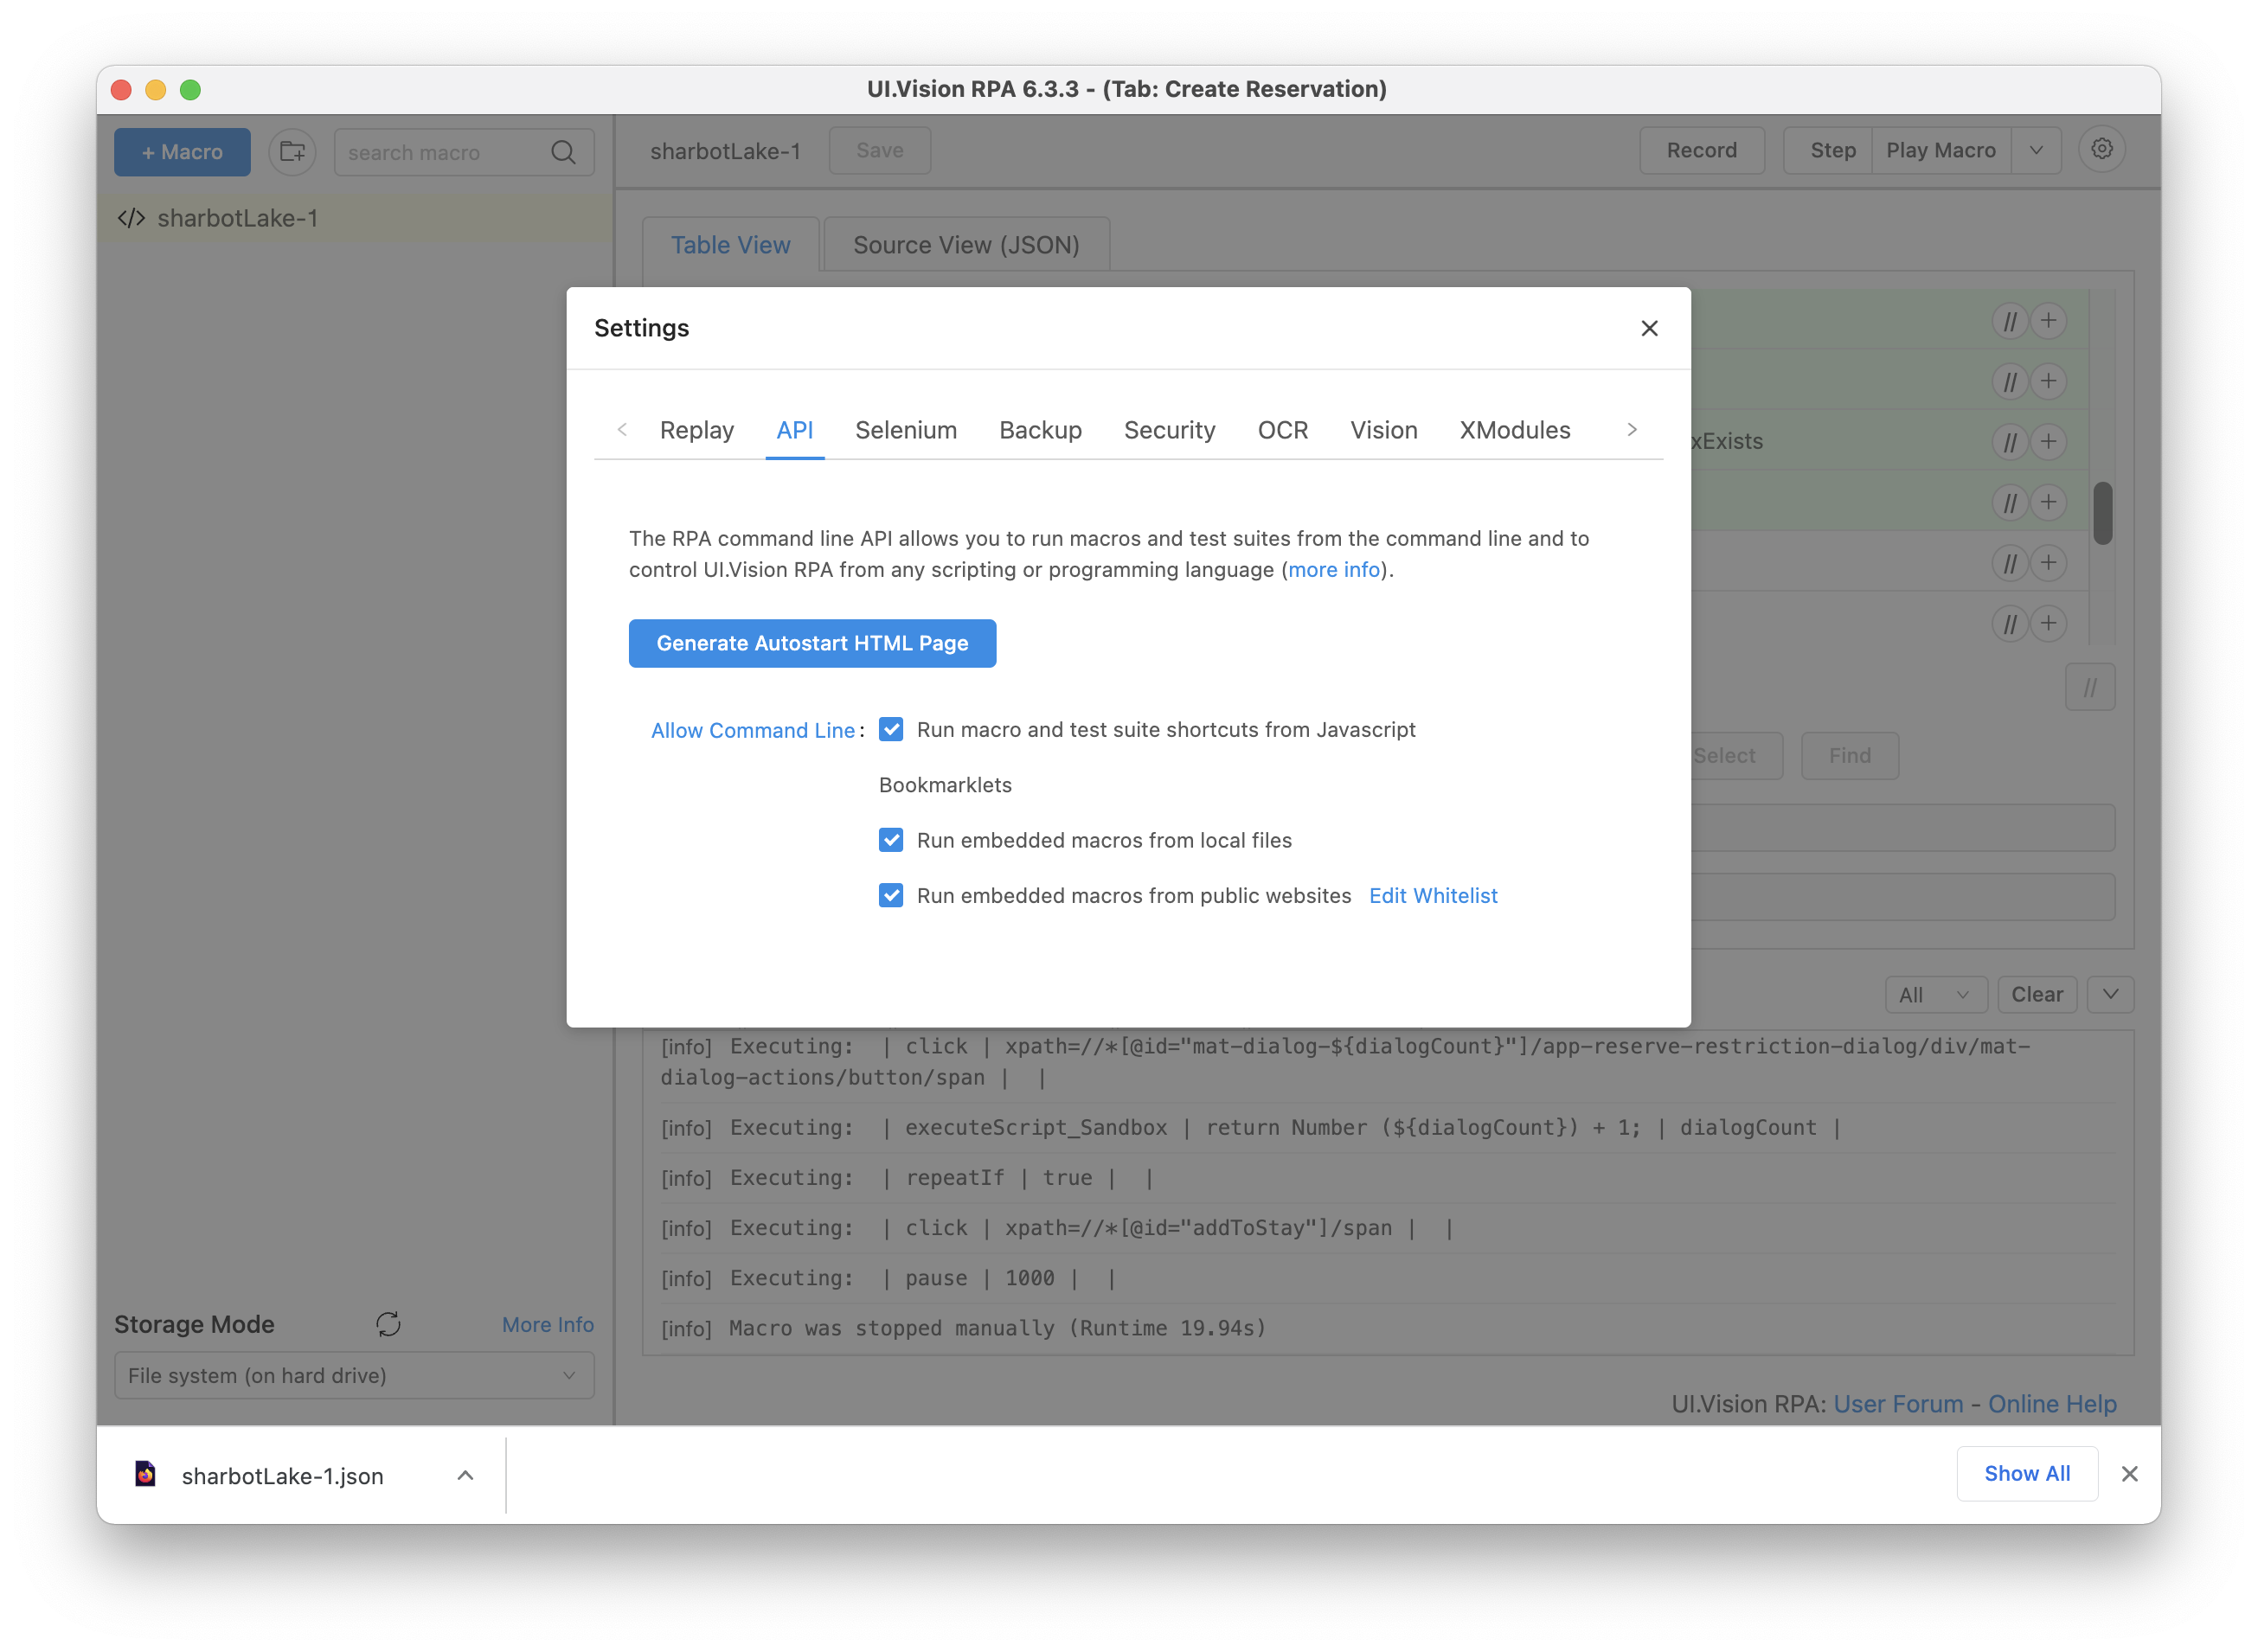
Click the Generate Autostart HTML Page button. Save or move this file ui.vision.html to a working folder.
Run Command
On Mac:
open -a "Google Chrome" --args --profile-directory="Default" "file:///Users/john/Desktop/ui.vision.html?macro=myMacro&direct=1&close=1&savelog=log1.txt"

open -a "Google Chrome" --args --profile-directory="Profile 1" "file:///Users/john/Desktop/ui.vision.html?macro=myMacro&direct=1&close=1&savelog=log1.txt"

open -a "Google Chrome" --args --profile-directory="Profile 2" "file:///Users/john/Desktop/ui.vision.html?macro=myMacro&direct=1&close=1&savelog=log1.txt"
References
| Reference | URL |
|---|---|
| Home Page | https://ui.vision/rpa |
| Running multiple tests at the same Time | https://forum.ui.vision/t/running-multiple-tests-at-the-same-time/379/3 |