Installation
We will run pi-hole in docker.
Script: buildDocker.sh
CONTAINER=pihole
IMAGE=pihole/pihole:latest
DIR=`pwd -P`

docker stop $CONTAINER
docker rm $CONTAINER

# Note: ServerIP should be replaced with your external ip.
docker run -d \
    --name $CONTAINER \
    -p 53:53/tcp -p 53:53/udp \
    -p 8080:80 \
    --dns=127.0.0.1 --dns=8.8.8.8 \
    -v $DIR/data/pihole/:/etc/pihole/ \
    -v $DIR/data/dnsmasq.d/:/etc/dnsmasq.d/ \
    --restart=unless-stopped \
    --hostname pi.hole \
    -e TZ="America/Toronto" \
    -e VIRTUAL_HOST="pi.hole" \
    -e PROXY_LOCATION="pi.hole" \
    -e ServerIP="192.168.1.xx" \
    -e WEBPASSWORD="xxx" \
    --cap-add NET_ADMIN \
    $IMAGE

docker logs -f $CONTAINER
Setup
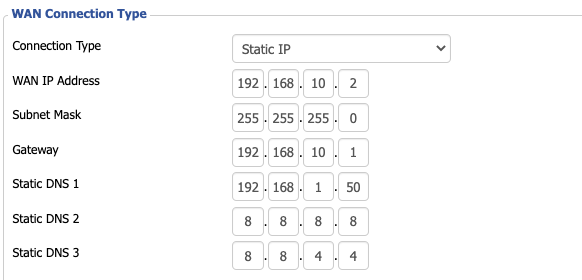
Configure Router to use pi-hole DNS server
Specify the pi-hole IP address in the list of DNS servers on your router.
Monitoring
Connecting to the Web UI:
http://192.168.1.50:8080/admin/

Enabling DHCP
I have not been able to get this to work yet... More to follow.
Go to Settings → DHCP
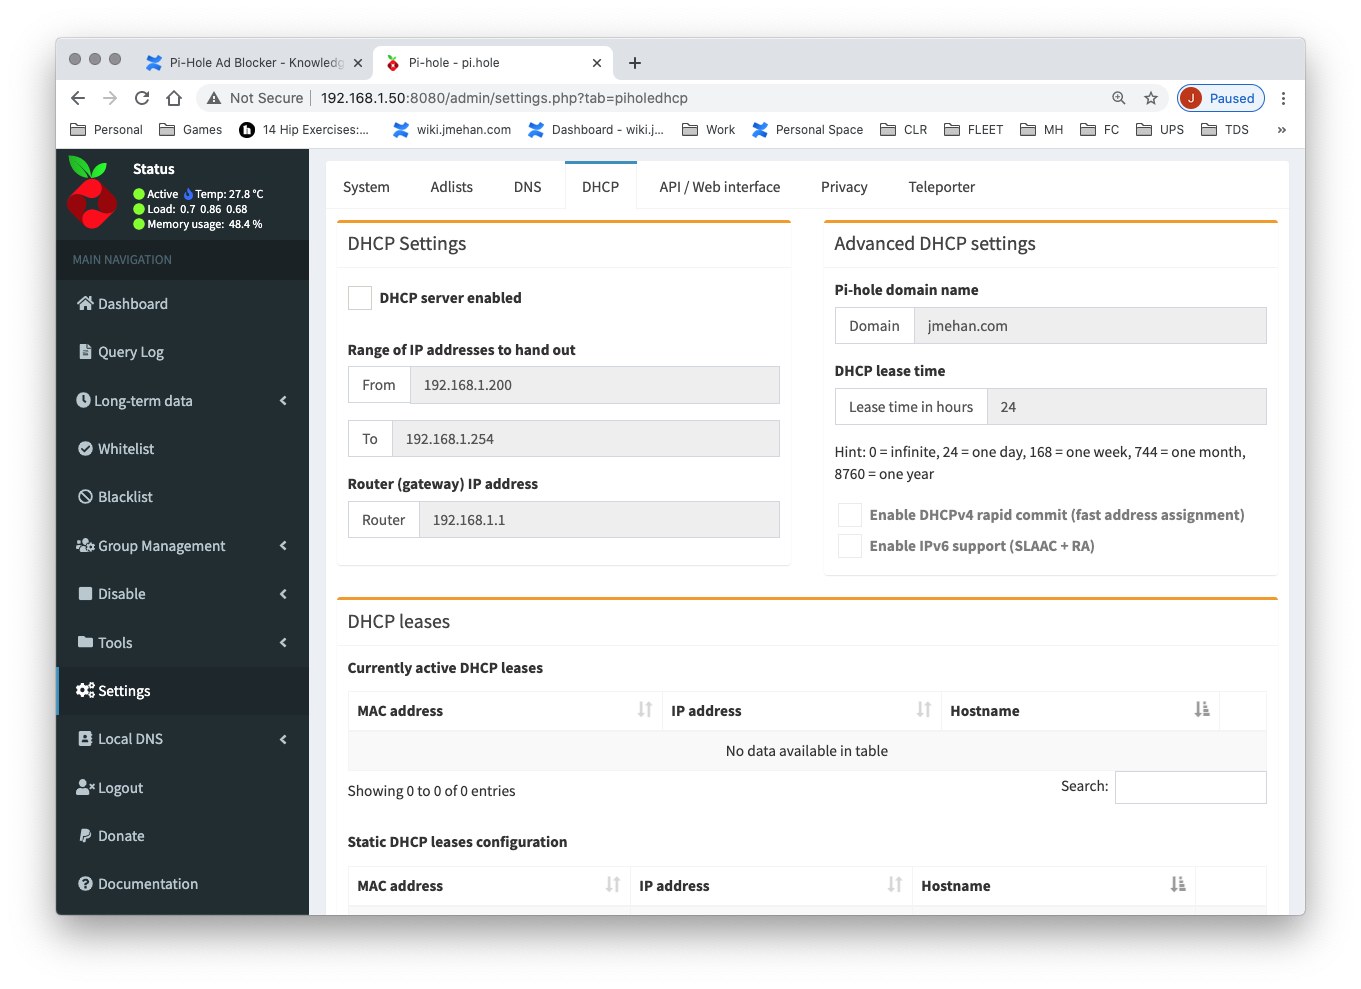
Here you can enable DHCP and specify static leases.
Testing DHCP Service
sudo nmap --script broadcast-dhcp-discover -e en0
Sample Output:
Password:
Starting Nmap 7.91 ( https://nmap.org ) at 2020-12-27 12:35 EST
Pre-scan script results:
| broadcast-dhcp-discover:
|   Response 1 of 1:
|     Interface: en0
|     IP Offered: 192.168.1.249
|     DHCP Message Type: DHCPOFFER
|     Server Identifier: 192.168.1.1
|     IP Address Lease Time: 2m00s
|     Renewal Time Value: 1m00s
|     Rebinding Time Value: 1m45s
|     Subnet Mask: 255.255.255.0
|     Broadcast Address: 192.168.1.255
|     Domain Name: home
|     Domain Name Server: 192.168.1.50, 8.8.8.8, 8.8.4.4
|_    Router: 192.168.1.1
WARNING: No targets were specified, so 0 hosts scanned.
Nmap done: 0 IP addresses (0 hosts up) scanned in 10.23 seconds