| Table of Contents |
|---|
Installation
Visit the Microsoft Store and install Ubuntu.
...
| Code Block |
|---|
USER@HOST:~$ uname -a Linux N-CND1042RH7 5.4.72-microsoft-standard-WSL2 #1 SMP Wed Oct 28 23:40:43 UTC 2020 x86_64 x86_64 x86_64 GNU/Linux |
Common Tasks
Mount your windows home folder
| Code Block |
|---|
$ cd ~ $ ln -s /mnt/c/Users/mehan home |
Disable visual and audio bell/beep in WSL on Windows 10
| Code Block |
|---|
$ vi ~/inputrc |
Add the following
| Code Block |
|---|
set bell-style none |
Turn off Command Prompt Sounds
Open up Sound Settings
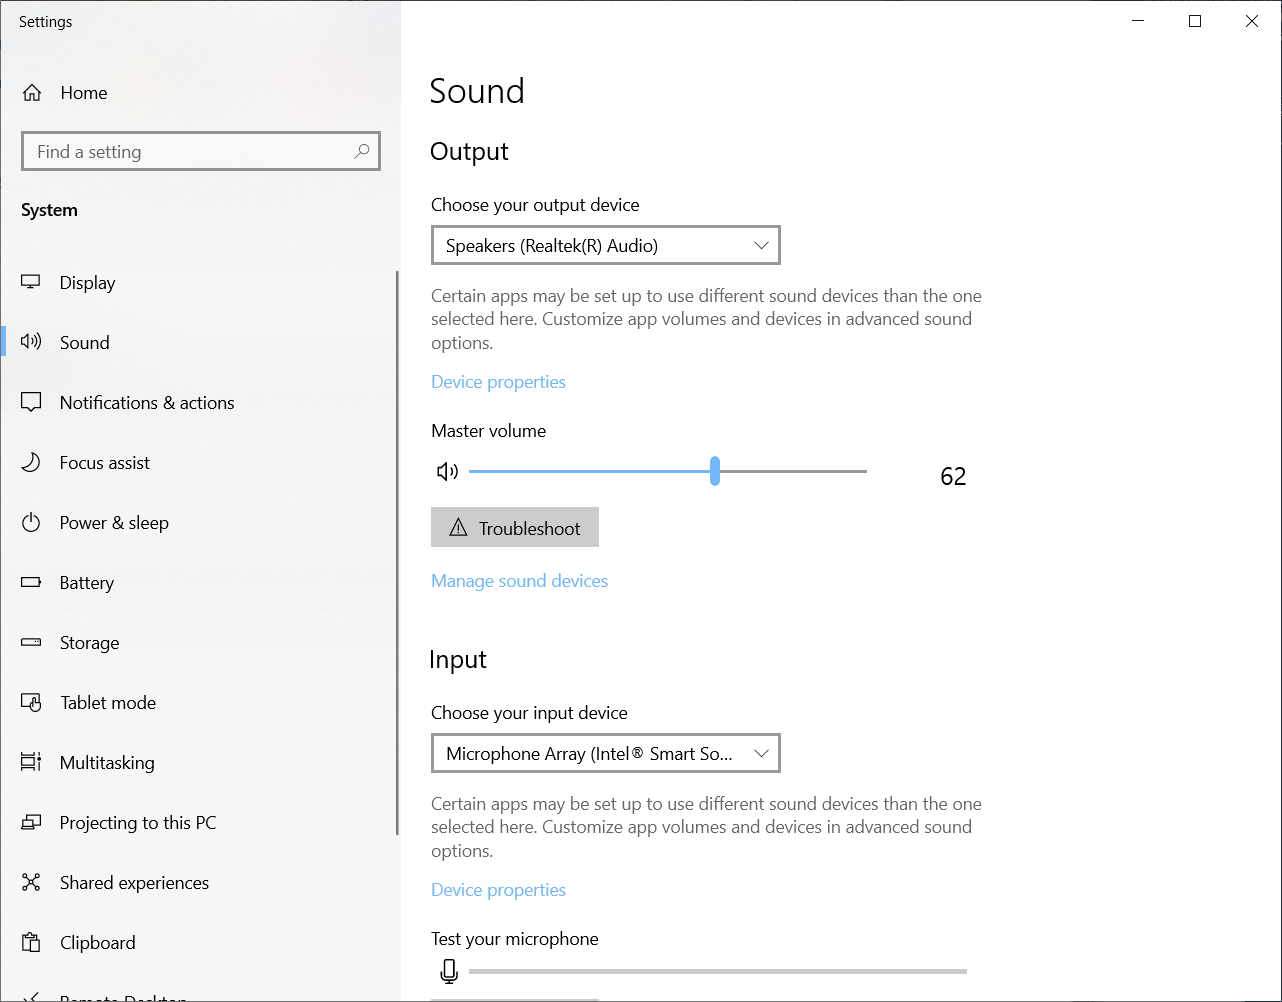
Scroll down to Advances Sound options and click it.
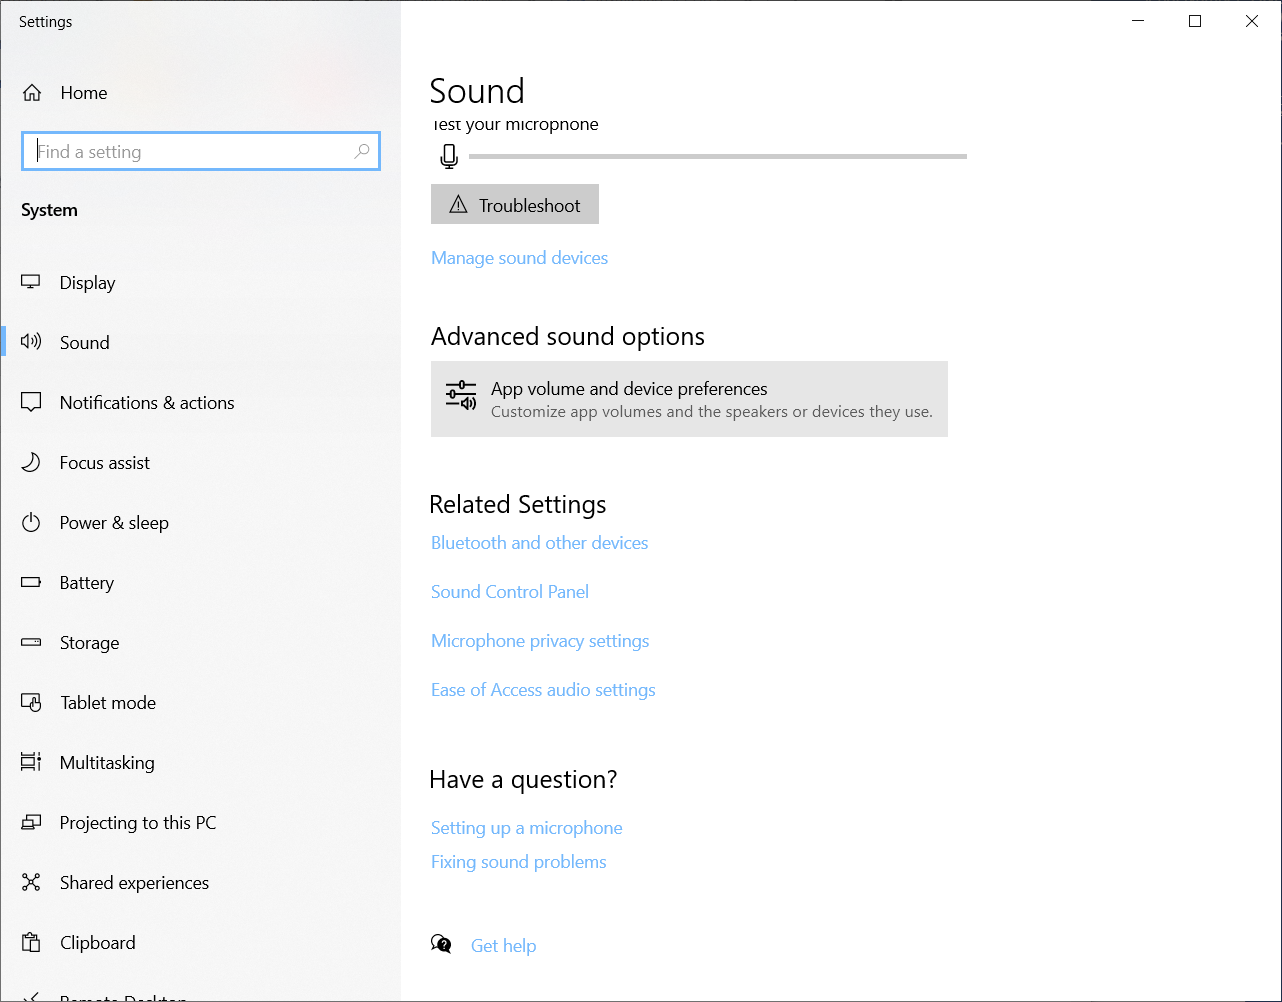
Set Console Window Host volume to 0

Advanced Tasks
Adding Docker Support
We can add our user to the docker user group by issuing the following command:
| Code Block |
|---|
$ sudo usermod -aG docker <USER> |
Update permissions on docker.sock
| Code Block |
|---|
$ sudo chmod 666 /var/run/docker.sock |
Adding Kubernetes Support
See https://kubernetes.io/docs/tasks/tools/install-kubectl-linux/
Install kubectl
| Code Block |
|---|
# download
$ curl -LO "https://dl.k8s.io/release/$(curl -L -s https://dl.k8s.io/release/stable.txt)/bin/linux/amd64/kubectl"

#install
$ sudo install -o root -g root -m 0755 kubectl /usr/local/bin/kubectl |
Adding VPN Support (AnyConnect)
These instructions assume that you are using Ubuntu.
Create a WSL configuration file
In your Ubuntu terminal, issue the following command:
| Code Block |
|---|
$ sudo vi /etc/wsl.conf |
Add the following:
| Code Block |
|---|
[network]
generateResolvConf = false |
Terminate your Linux instance
From a Windows Command Prompt issue the following command:
| Code Block |
|---|
> wsl --terminate Ubuntu |
Delete your existing resolfv.conf file
In your Ubuntu terminal, issue the following command:
| Code Block |
|---|
cd /etc
sudo rm -Rf resolv.conf |
Connect to your VPN
Connect to the VPN using your AnyConnect client.
Determine your VPN Connection DNS IP Addresses
From a Windows Command Prompt issue the following command:
| Code Block |
|---|
> ipconfig /all

   Connection-specific DNS Suffix  . : vpn.company.com
   Description . . . . . . . . . . . : Cisco AnyConnect Secure Mobility Client Virtual Miniport Adapter for Windows x64
   Physical Address. . . . . . . . . : 00-05-9A-3C-7A-00
   DHCP Enabled. . . . . . . . . . . : No
   Autoconfiguration Enabled . . . . : Yes
   Link-local IPv6 Address . . . . . : fe80::3d7f:b69b:dd71:28d1%25(Preferred)
   Link-local IPv6 Address . . . . . : fe80::cde5:6a02:e9d2:f284%25(Preferred)
   IPv4 Address. . . . . . . . . . . : 135.255.134.209(Preferred)
   Subnet Mask . . . . . . . . . . . : 255.255.240.0
   Default Gateway . . . . . . . . . : ::
                                       135.255.128.1
   DHCPv6 IAID . . . . . . . . . . . : 419431834
   DHCPv6 Client DUID. . . . . . . . : 00-01-00-01-28-25-22-A7-6C-02-E0-CD-FE-58
   DNS Servers . . . . . . . . . . . : 135.5.25.53
                                       135.239.25.53
   Primary WINS Server . . . . . . . : 135.5.8.20
   Secondary WINS Server . . . . . . : 135.5.136.20
NetBIOS over Tcpip. . . . . . . . : Enabled |
From the above output, we can see that the VPNs DNS IP addresses are: 135.5.25.53 and 135.239.25.53.
Update your Resolv.conf File
In your Ubuntu terminal, issue the following command:
| Code Block |
|---|
$ sudo vi /etc/resolve.cong |
Replace contents with the following
| Code Block |
|---|
nameserver <VPN_DNS_IP1>
nameserver <VPN_DNS_IP2>
nameserver 8.8.8.8 |
Terminate your Linux instance
From a Windows Command Prompt issue the following command:
| Code Block |
|---|
> wsl --terminate Ubuntu |
Lock the Resolv.conf file from Updates
In your Ubuntu terminal, issue the following command:
| Code Block |
|---|
$ sudo chattr +i /etc/resolv.conf |
Set the NET IP Interface for the VPN Connection
Open Windows Powershell with Administrative rights:
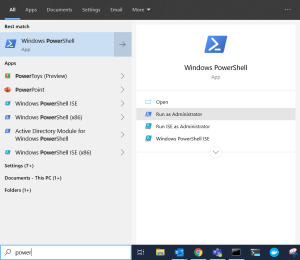
From this Windows Powershell instance, Issue the following command:
| Code Block |
|---|
Get-NetAdapter | Where-Object {$_.InterfaceDescription -Match "Cisco AnyConnect"} | Set-NetIPInterface -InterfaceMetric 6000 |
Create a Task to Apply Workaround on VPN Connect
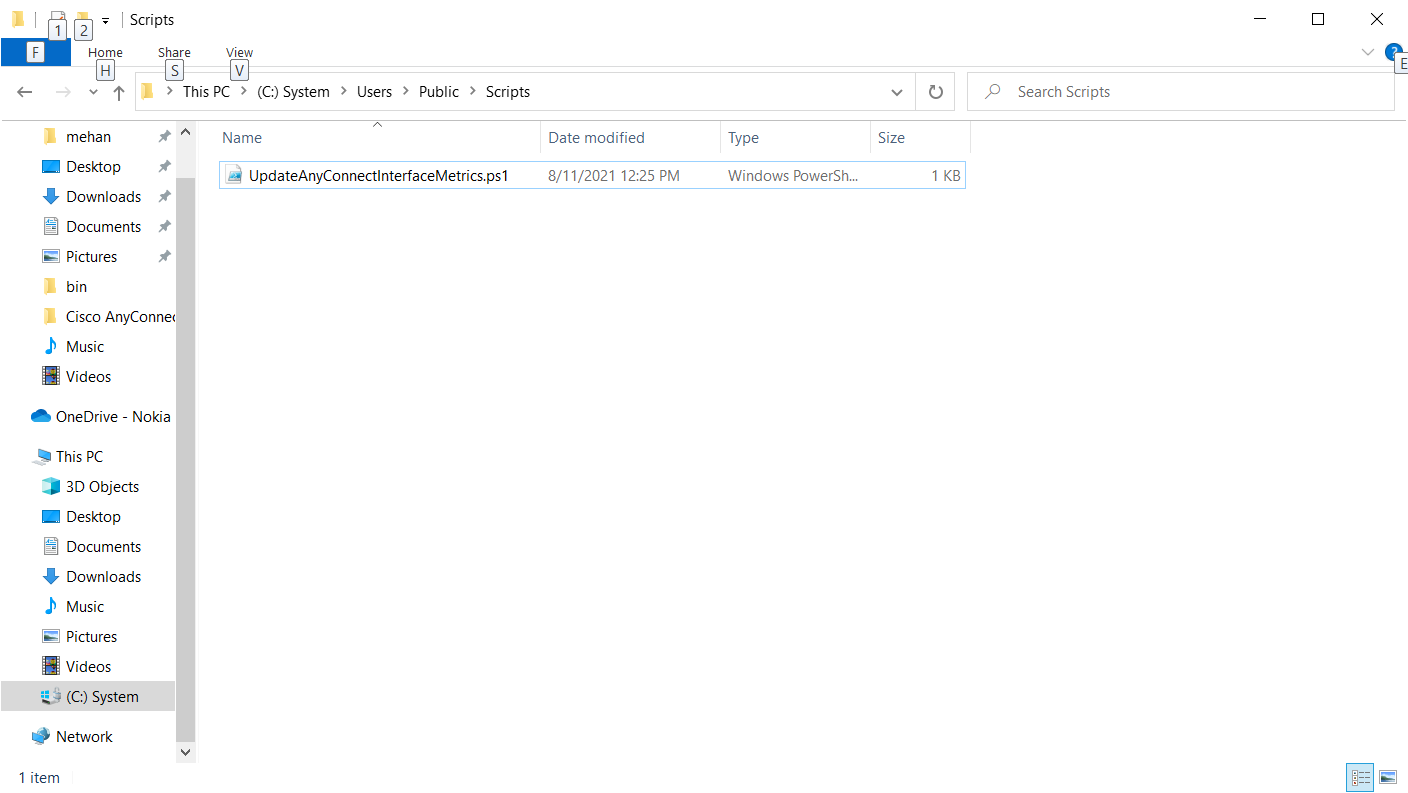
We can create an automatic Windows task which will automatically open the Powershell and run the command for us.
Create the script file anywhere, I created it in my Users\Public\Scripts\ folder and called it UpdateAnyConnectInterfaceMetrics.ps1. You can however create it where you want and name it what you want. Here is the content:
|
Now follow these instructions. Do not use quotes when entering file path.
- Open Task Scheduler
- Select Action → Click Create Task

- Name it Update Anyconnect Adapter Interface Metric for WSL2
- Check Run with highest privileges
- Select the Triggers Tab
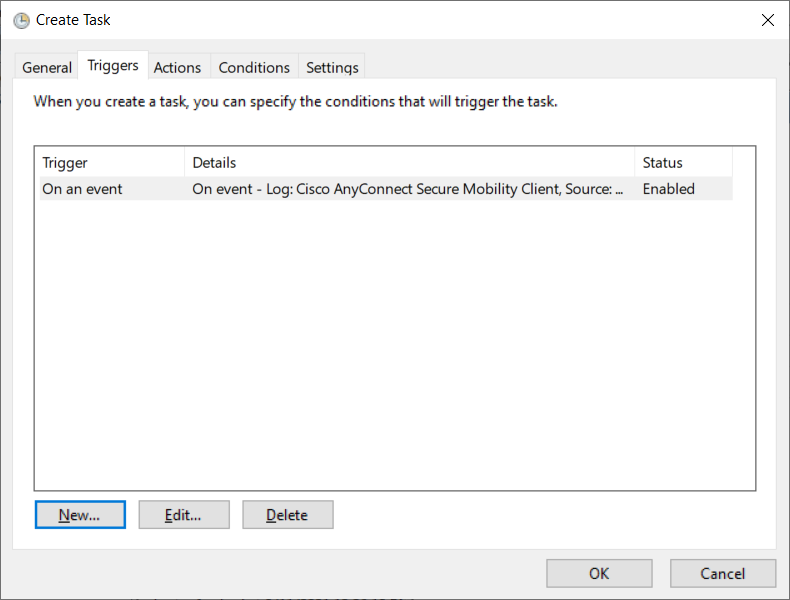
- Click the New Button
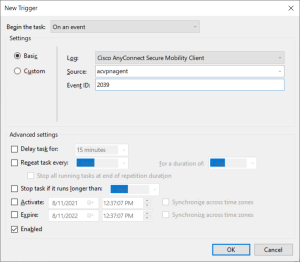
- Select On Event from the Begin the Task pull down.
- Select Cisco AnyConnect Secure Mobility Client from the Log.
- Select acvpnagent from the Source.
- Enter 2039 for the Event ID.
- Click OK
- Select the Action Tab
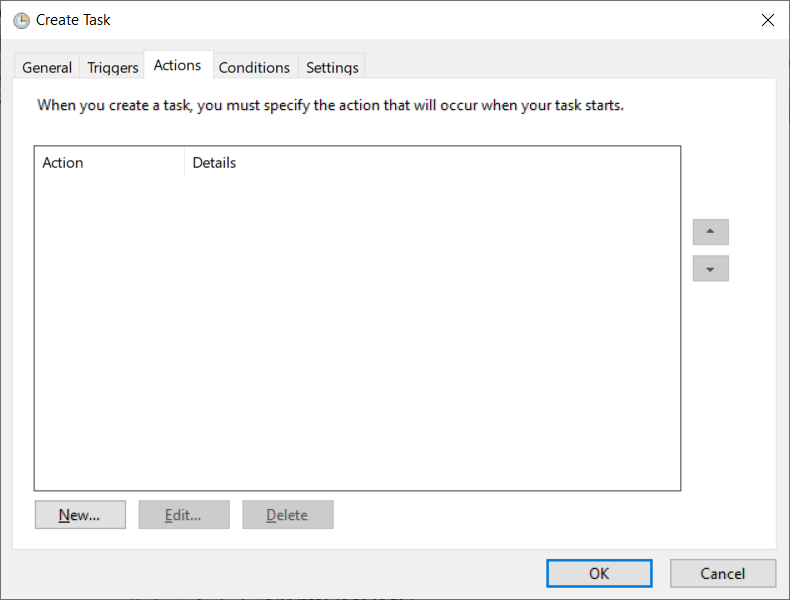
- Click New
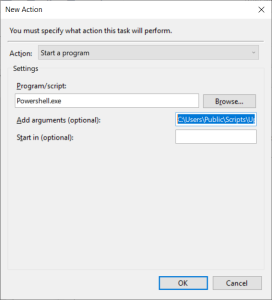
- Select Start a program from the Action pulldown.
- Enter Powershell.exe for the Program/script.
- Enter C:\Users\Public\Scripts\UpdateAnyConnectInterfaceMetrics.ps1 for the argument.
- Click OK
- Click the Conditions Tab
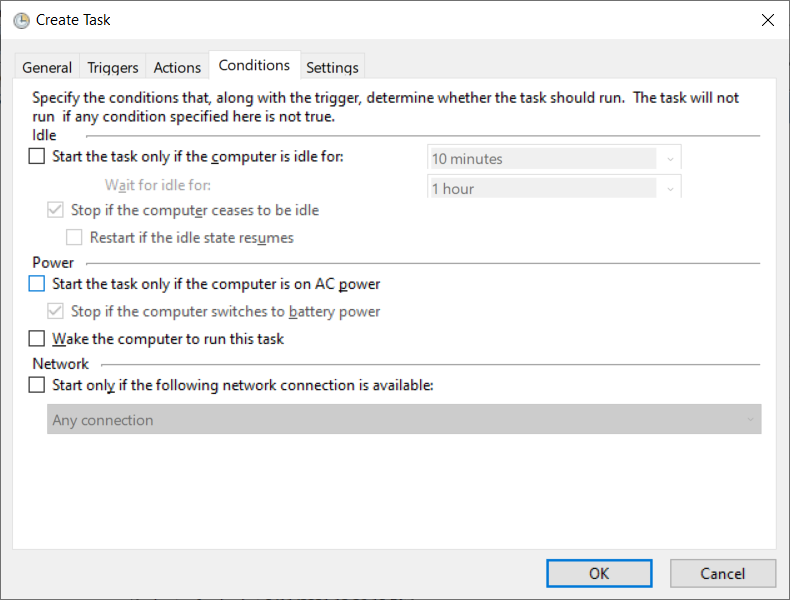
- Uncheck the option "Start the task only if the computer is on AC power".
- Click OK to Create the Task.
References
| Reference | URL |
|---|---|
| Fix DNS resolution in WSL2 | https://gist.github.com/coltenkrauter/608cfe02319ce60facd76373249b8ca6 |