Overview
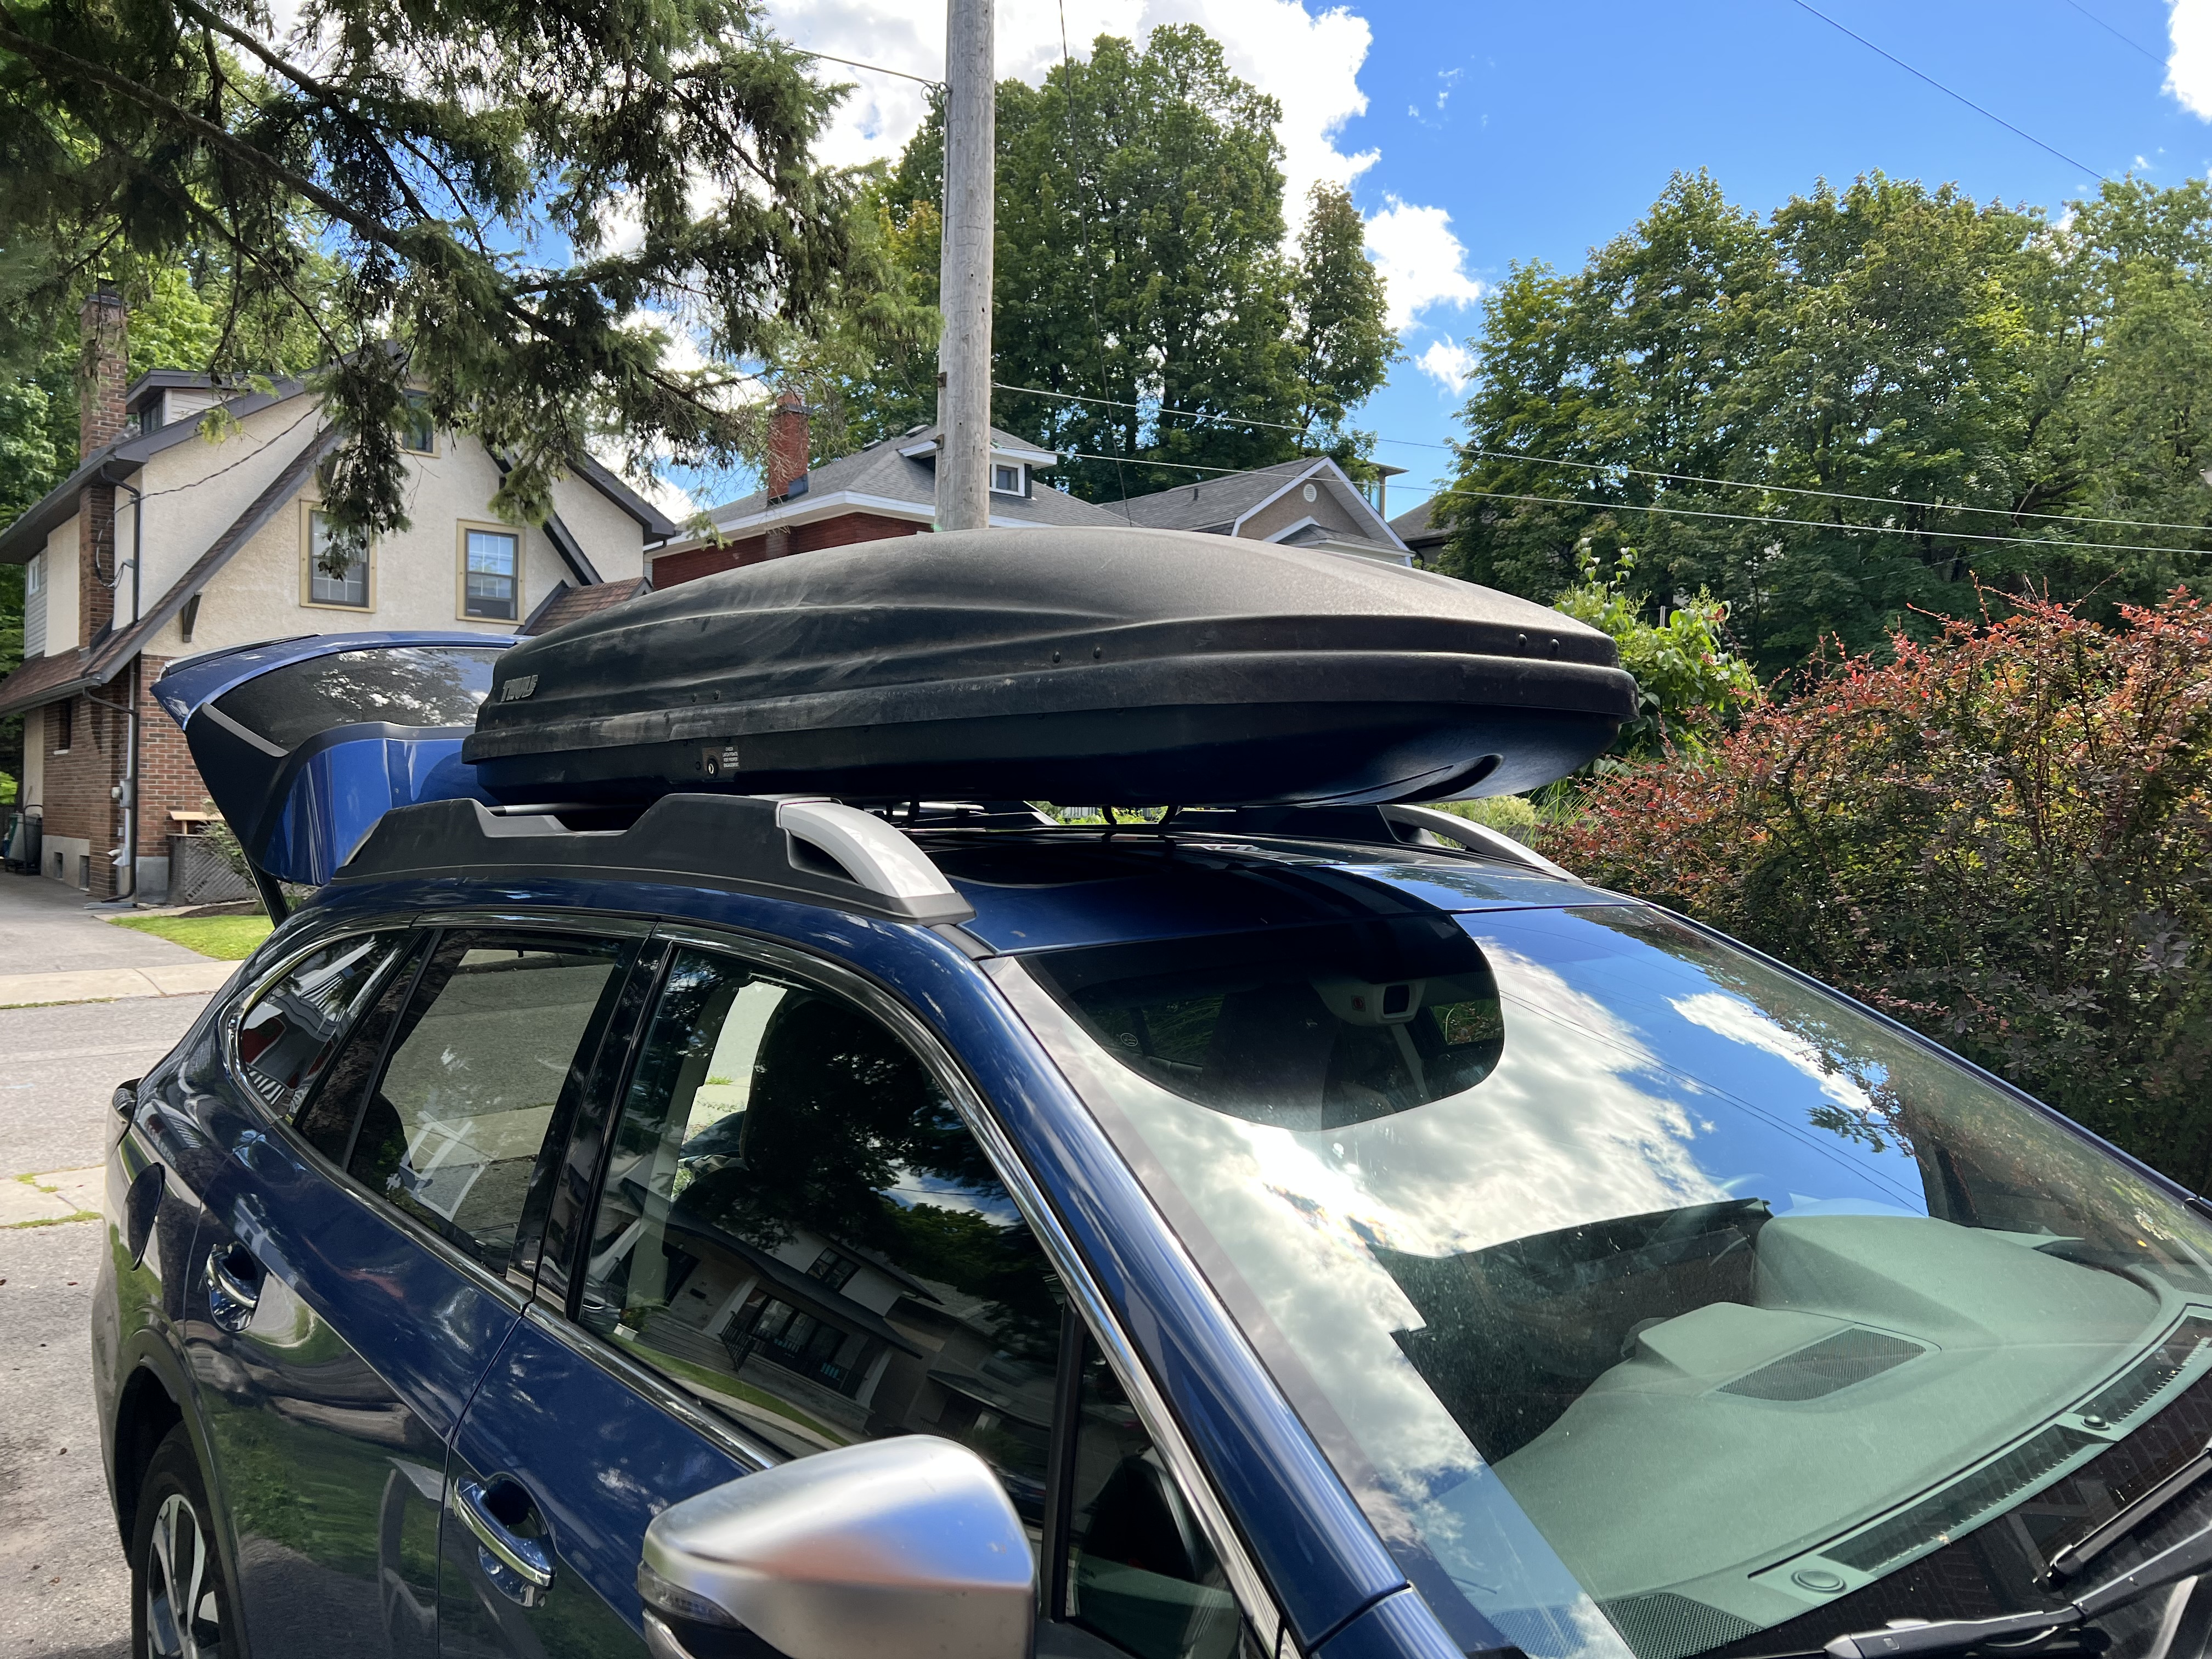
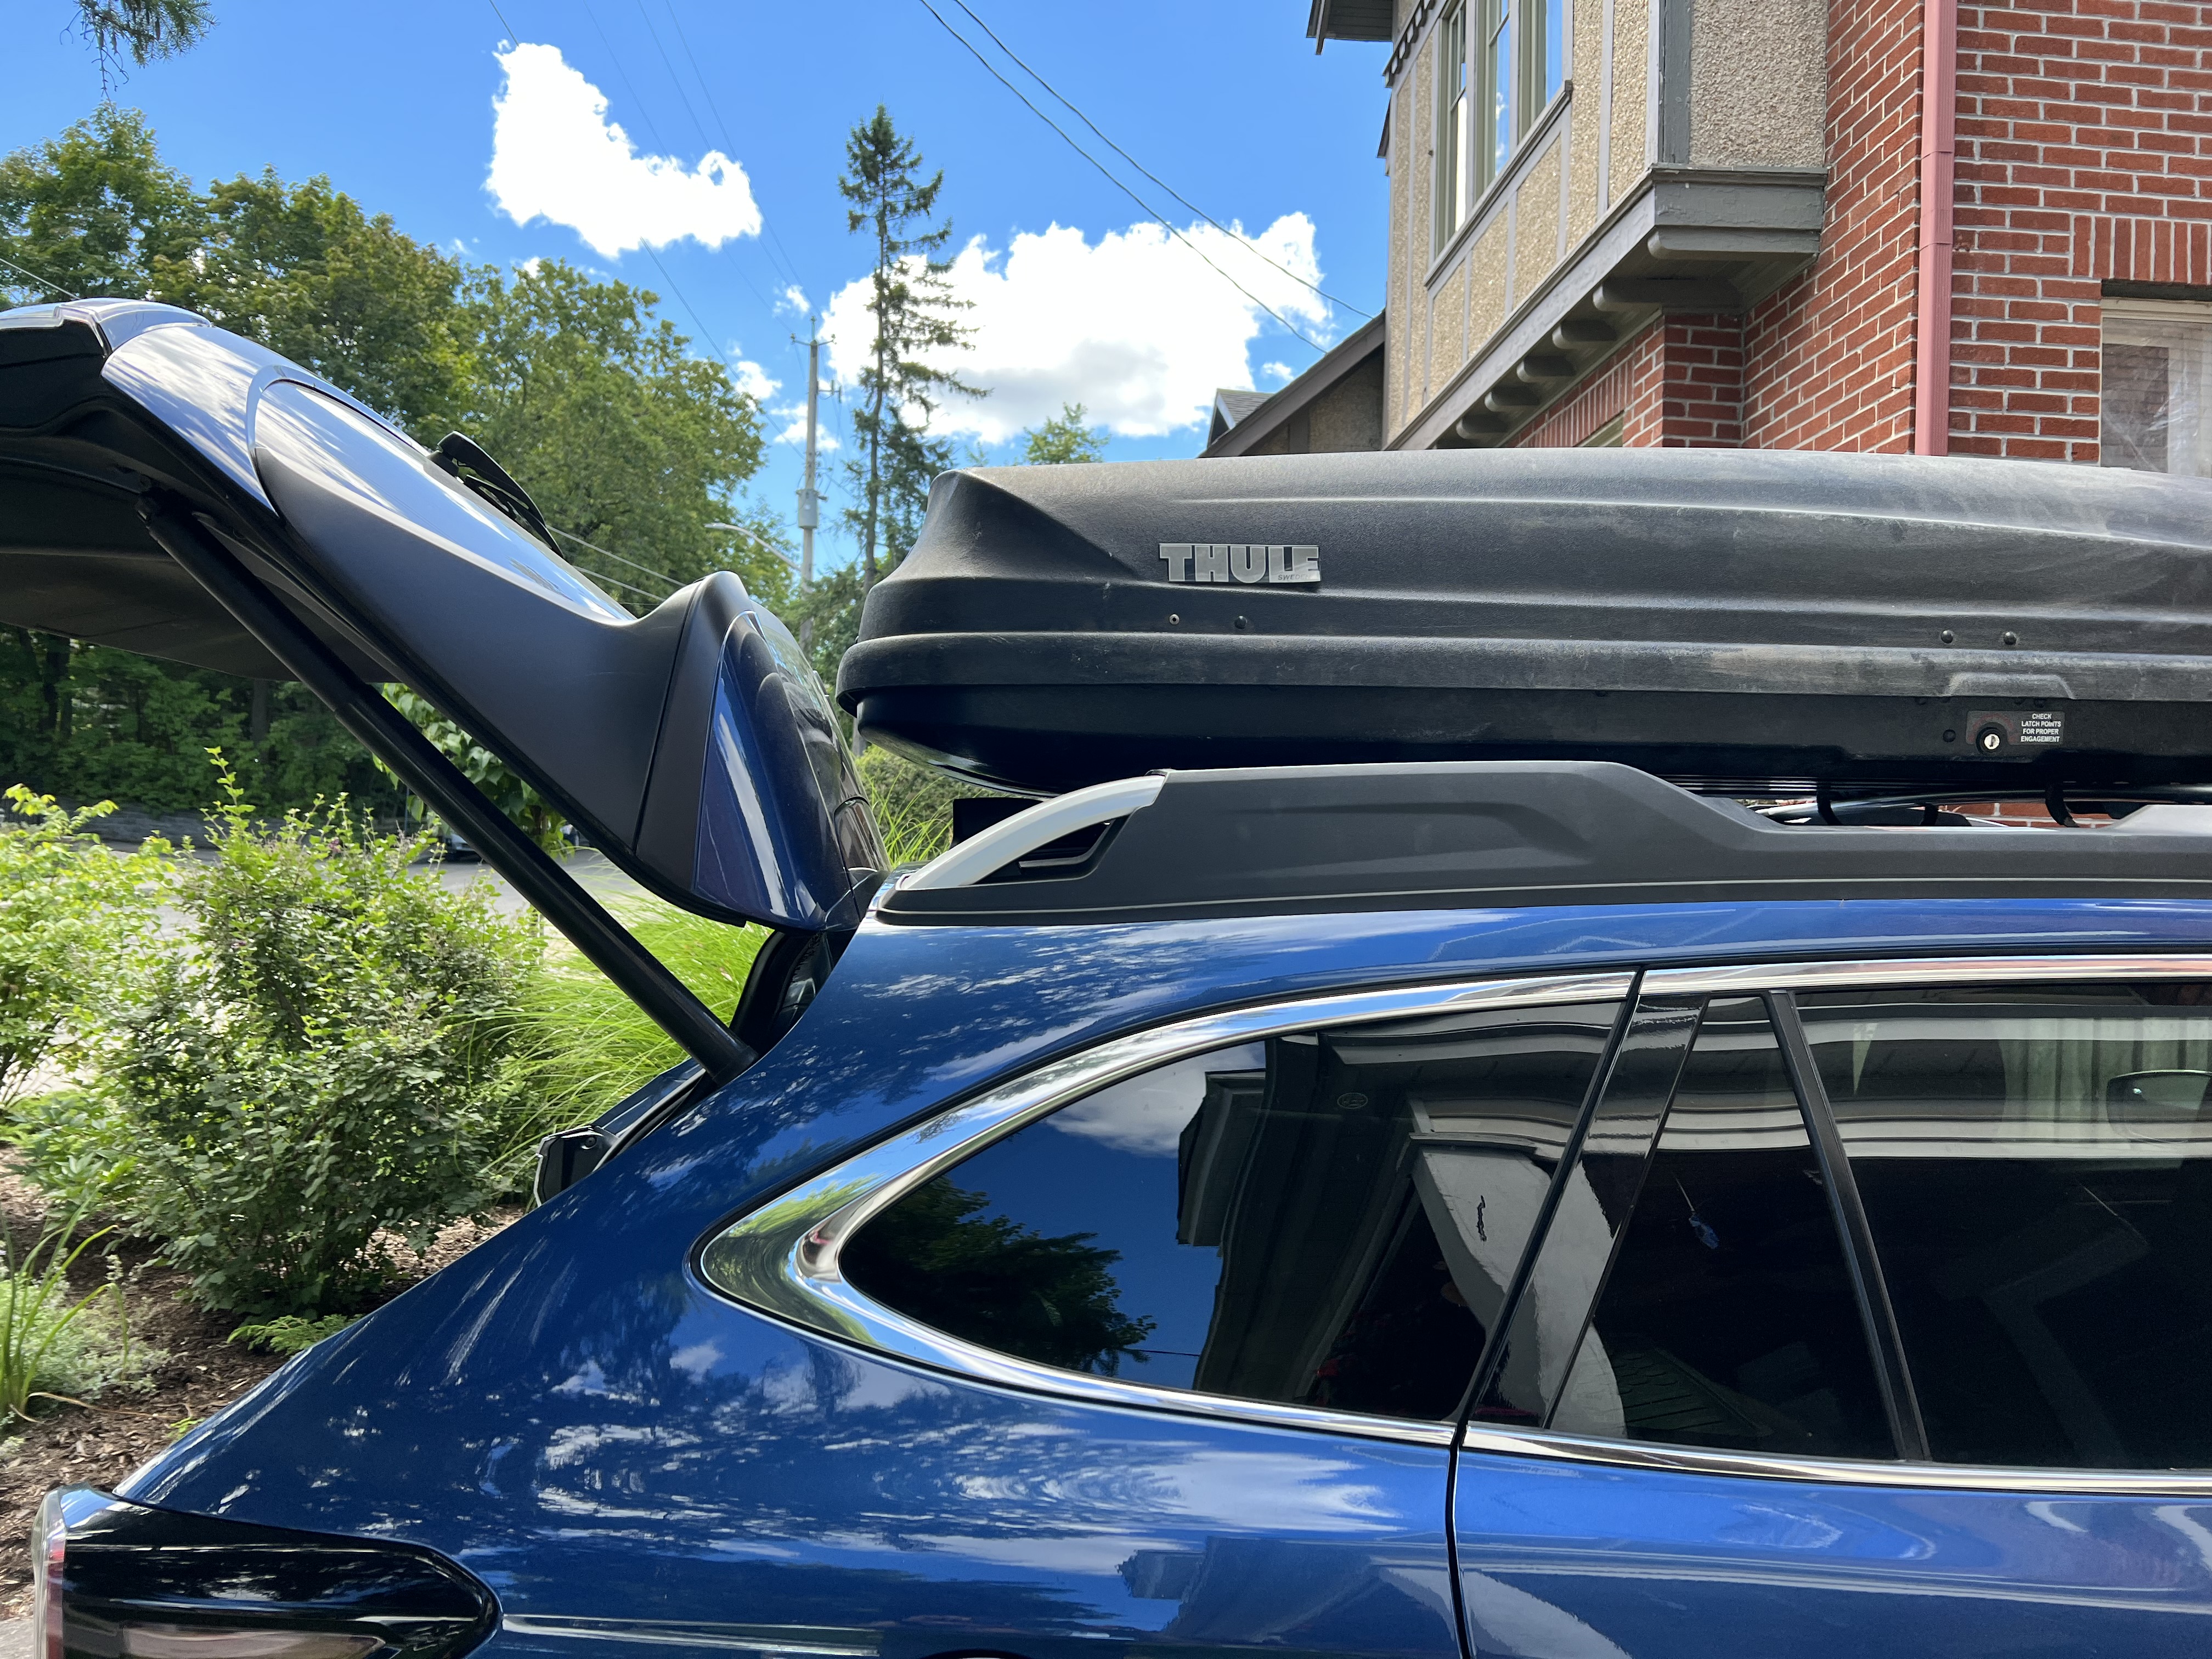
The objective of this modification was to allow the rear hatch to open without hitting the cargo carrier.
Cargo Carrier
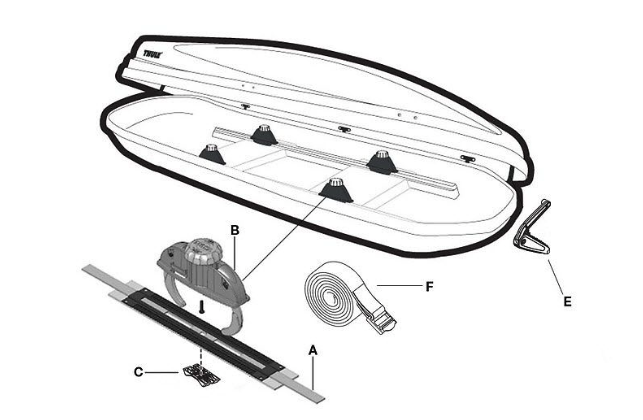
| Part | Description |
|---|---|
| A | Slide Strip |
| B | Quick Grip Assembly |
| C | Snapfit Cradle w/Screw |
| E | Lid Lifter |
| F | Tie-Down Strap |
Steps
- determine where you need to have your grips in order for the carrier to clear the rear hatch.
- remove the quick grip assembly by un-screwing the smapfit cradle from the underside of the carrier.
- remove the rivet caps from the underside for the slide strip
- drill out the rivets from the slid strip and remove.
- using a jigsaw, extend the hole for the slid strip.
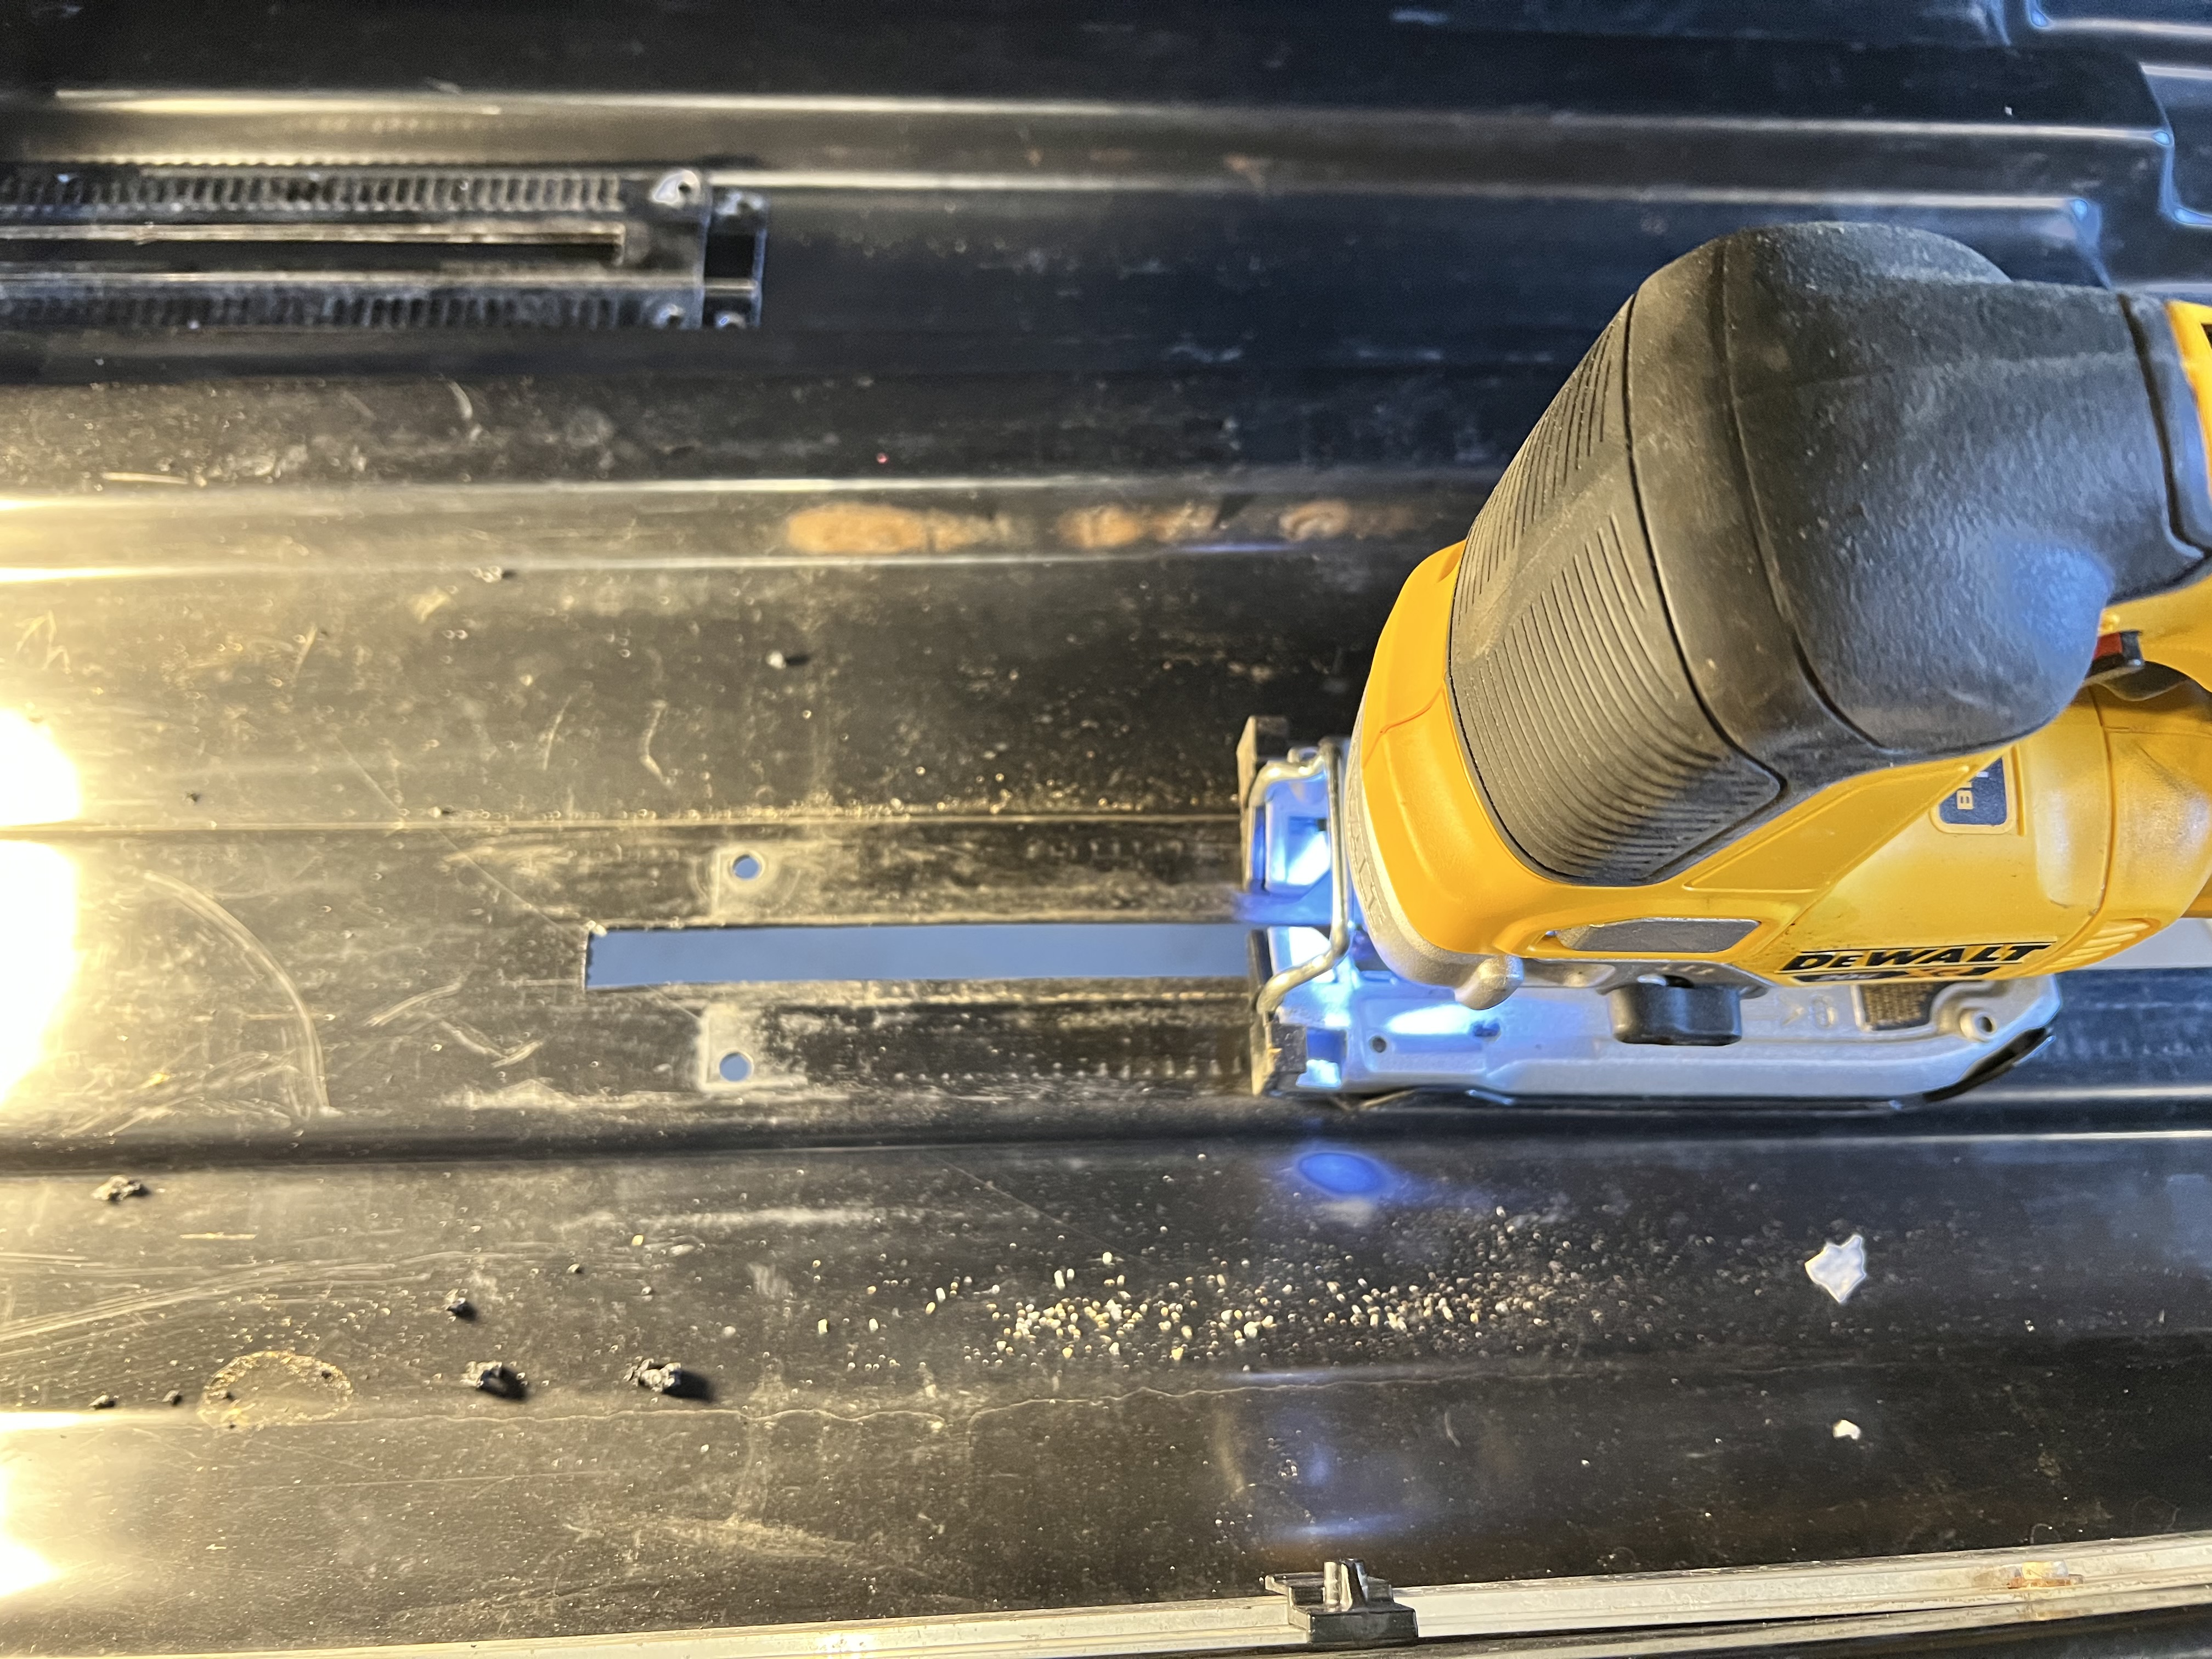
- place age slide strip in place and drill out the new holes using the slide strip as a guide.
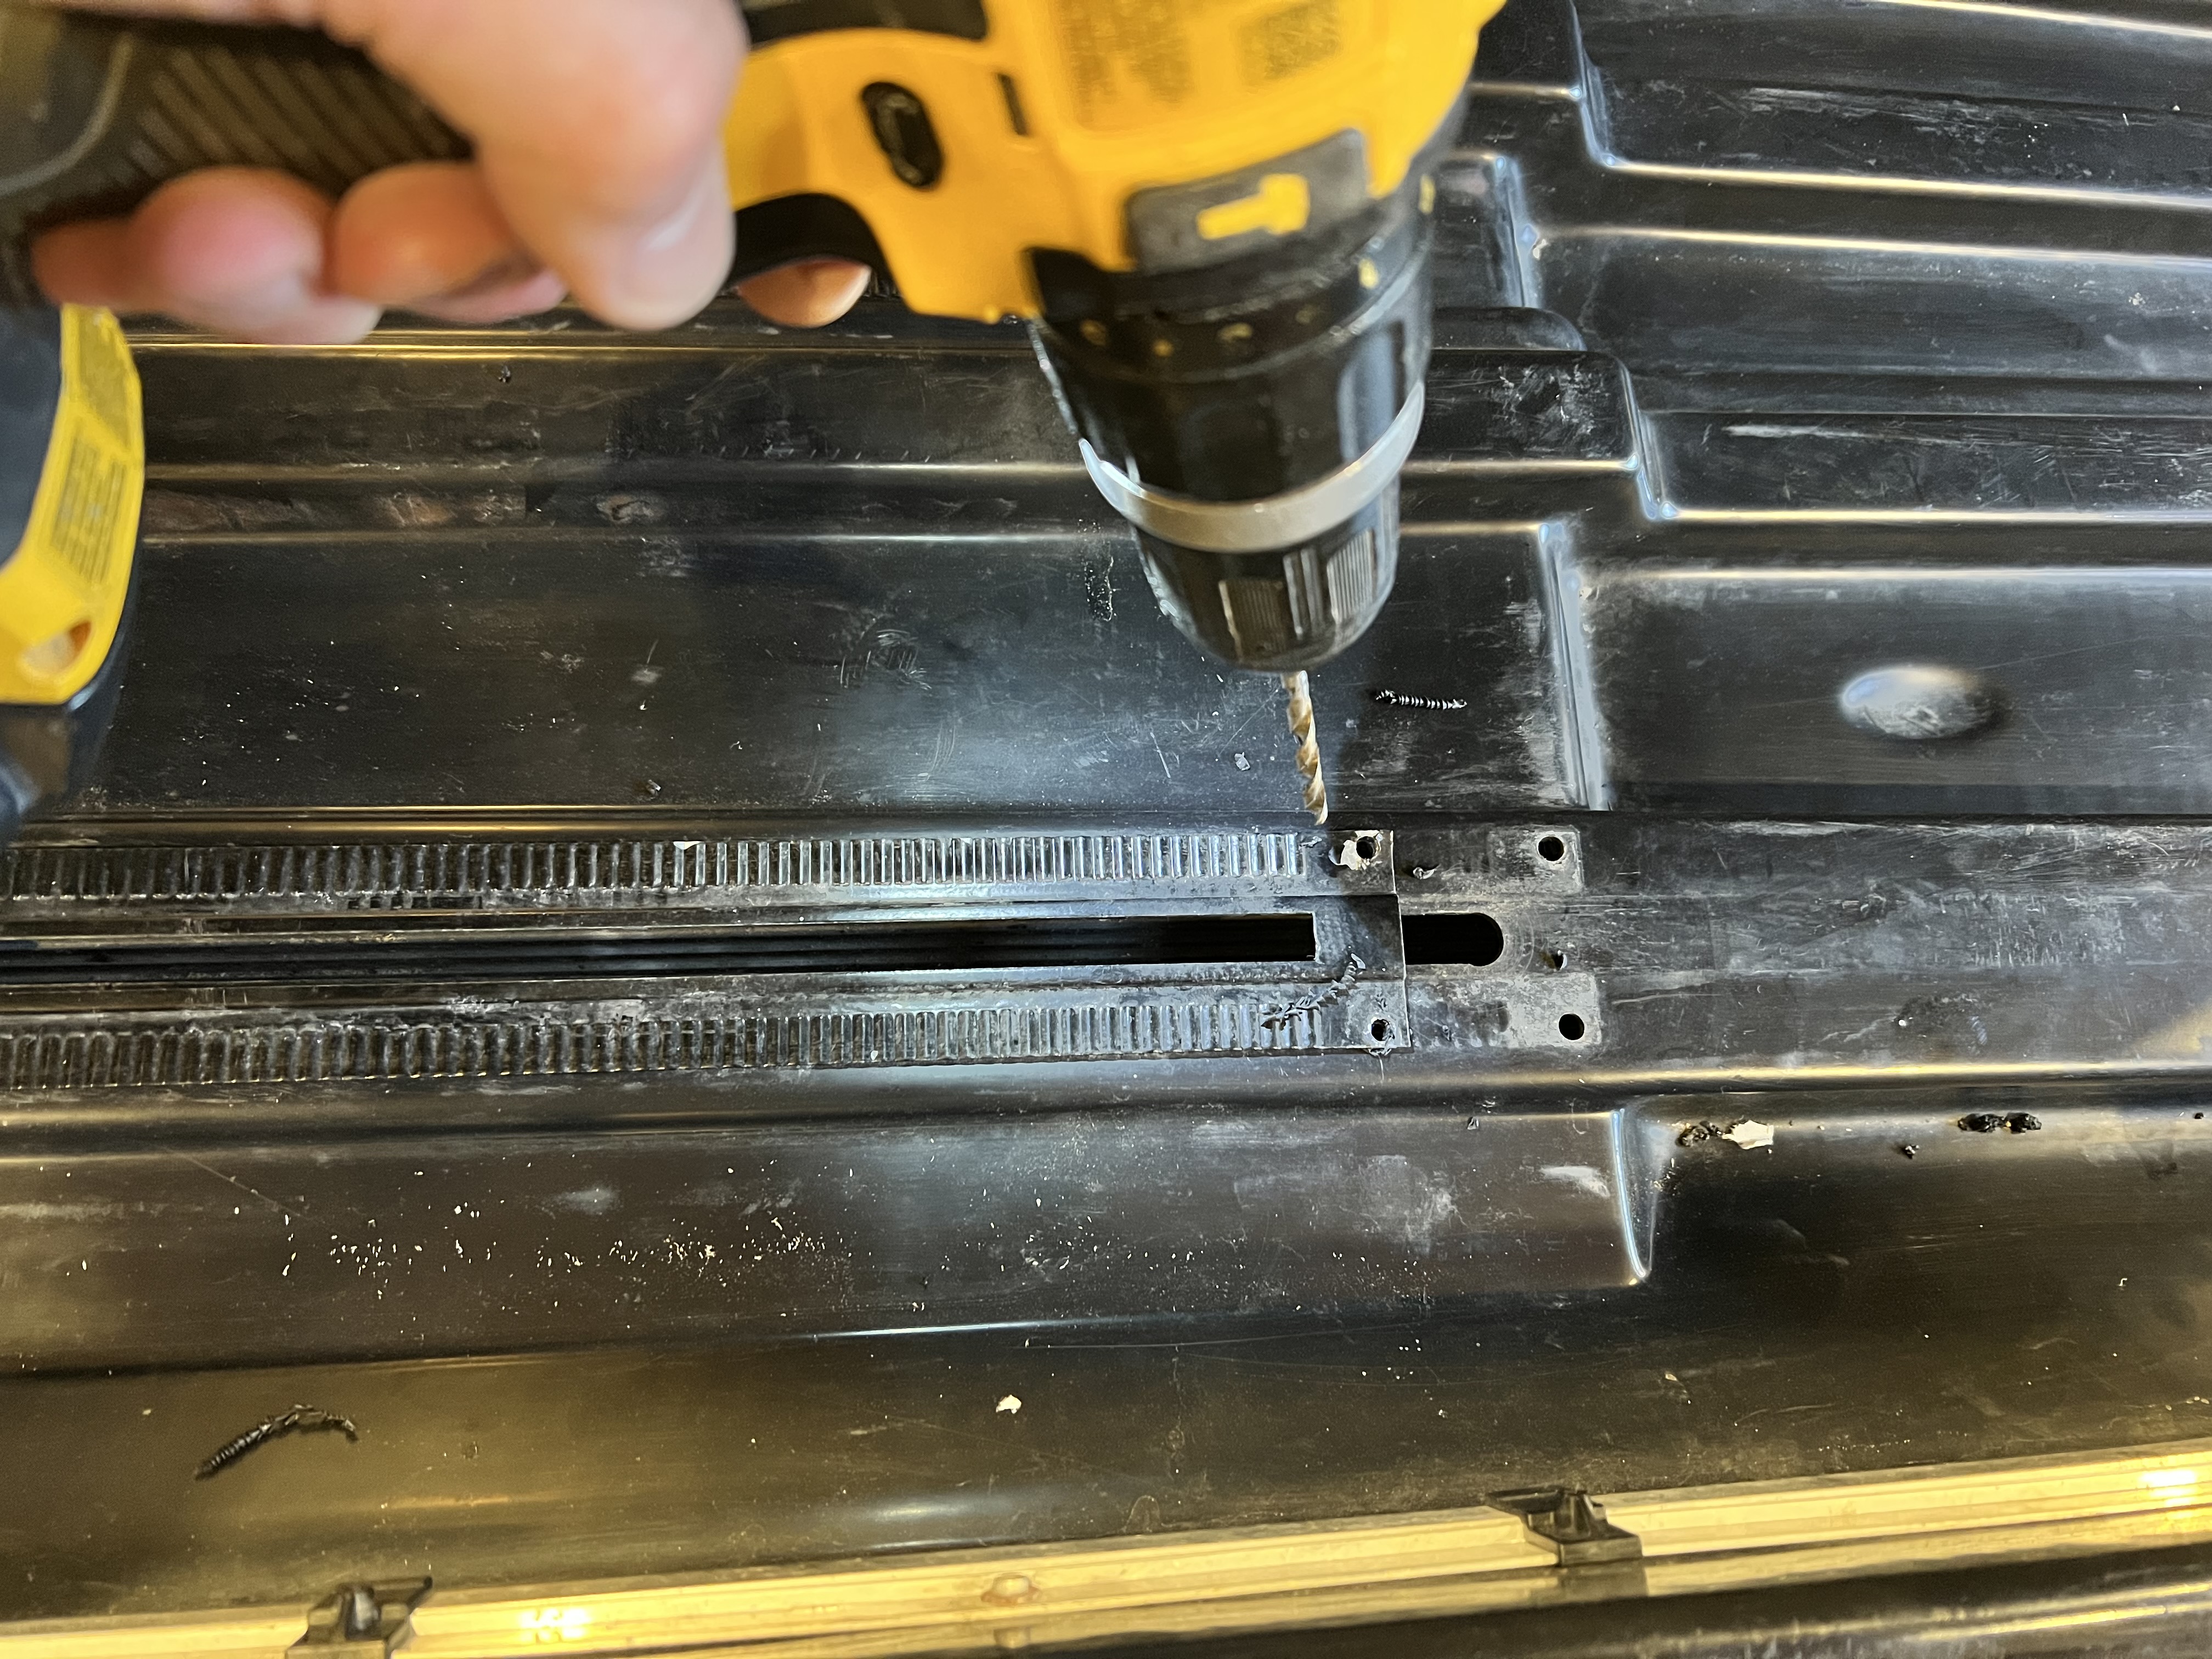
- tape up the old holes to prevent moisture from entering the cargo carrier. Here, I used aluminum tape.
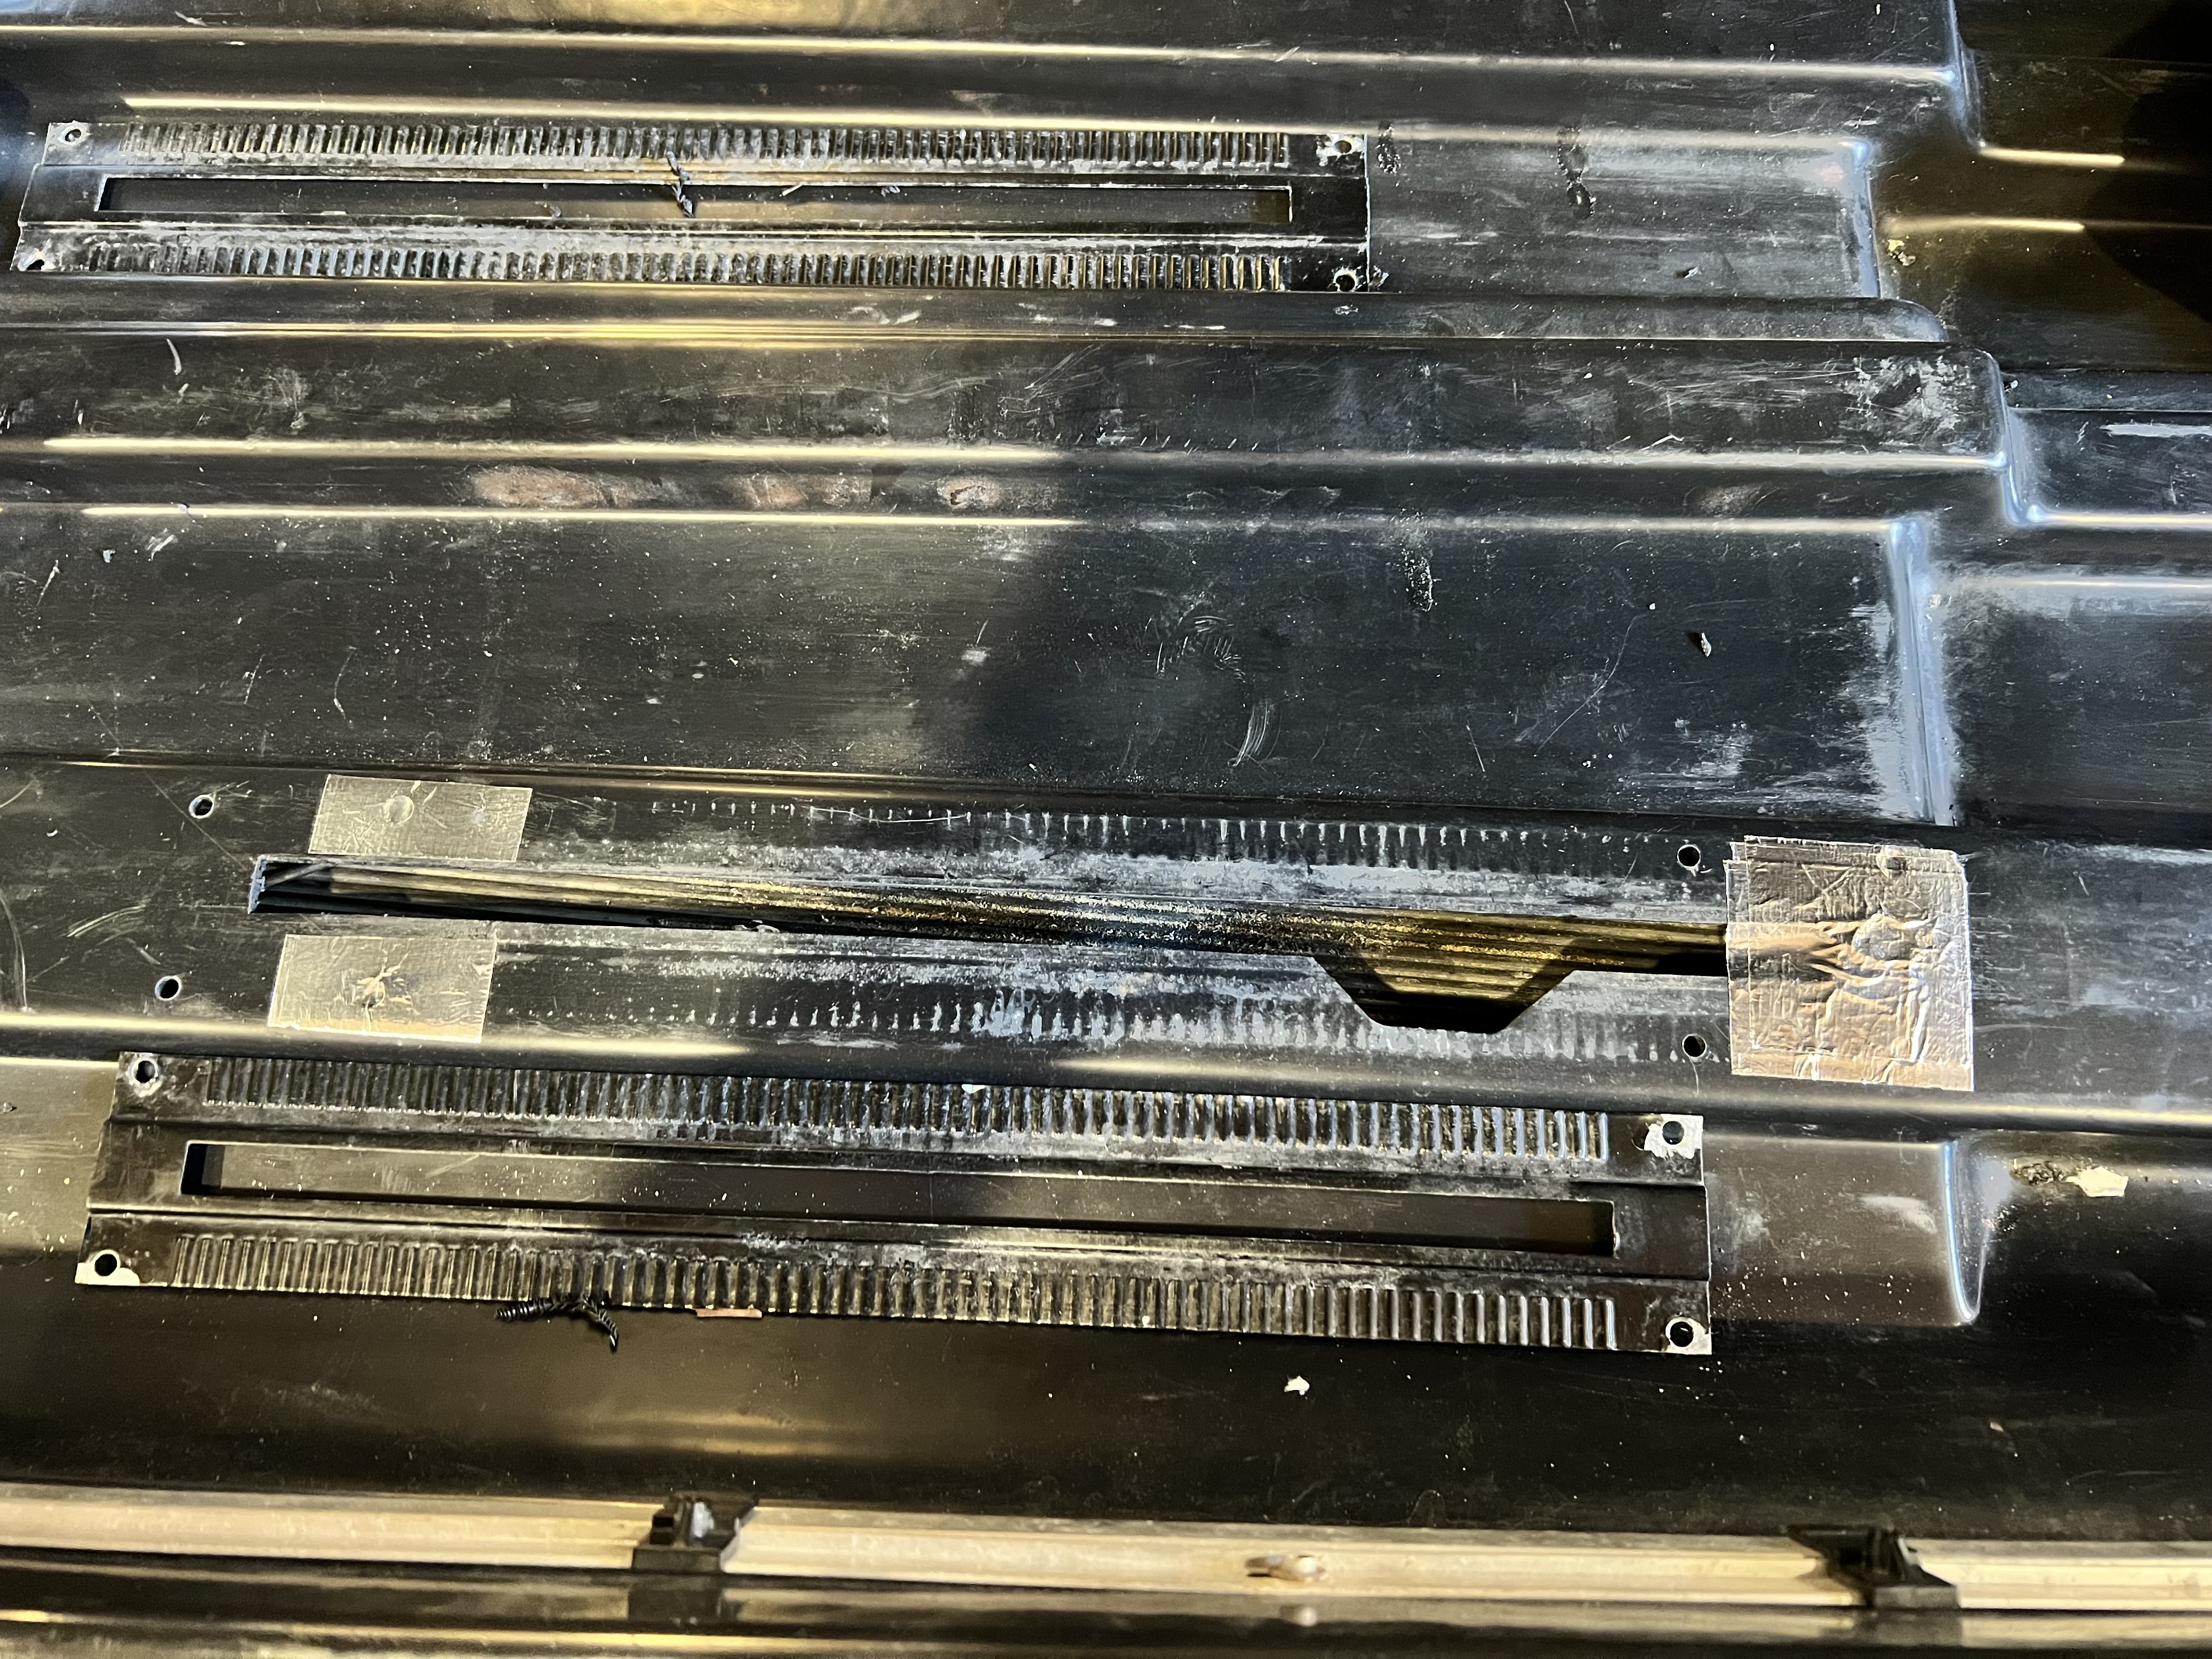
- tape the slider in place to facilitate riveting
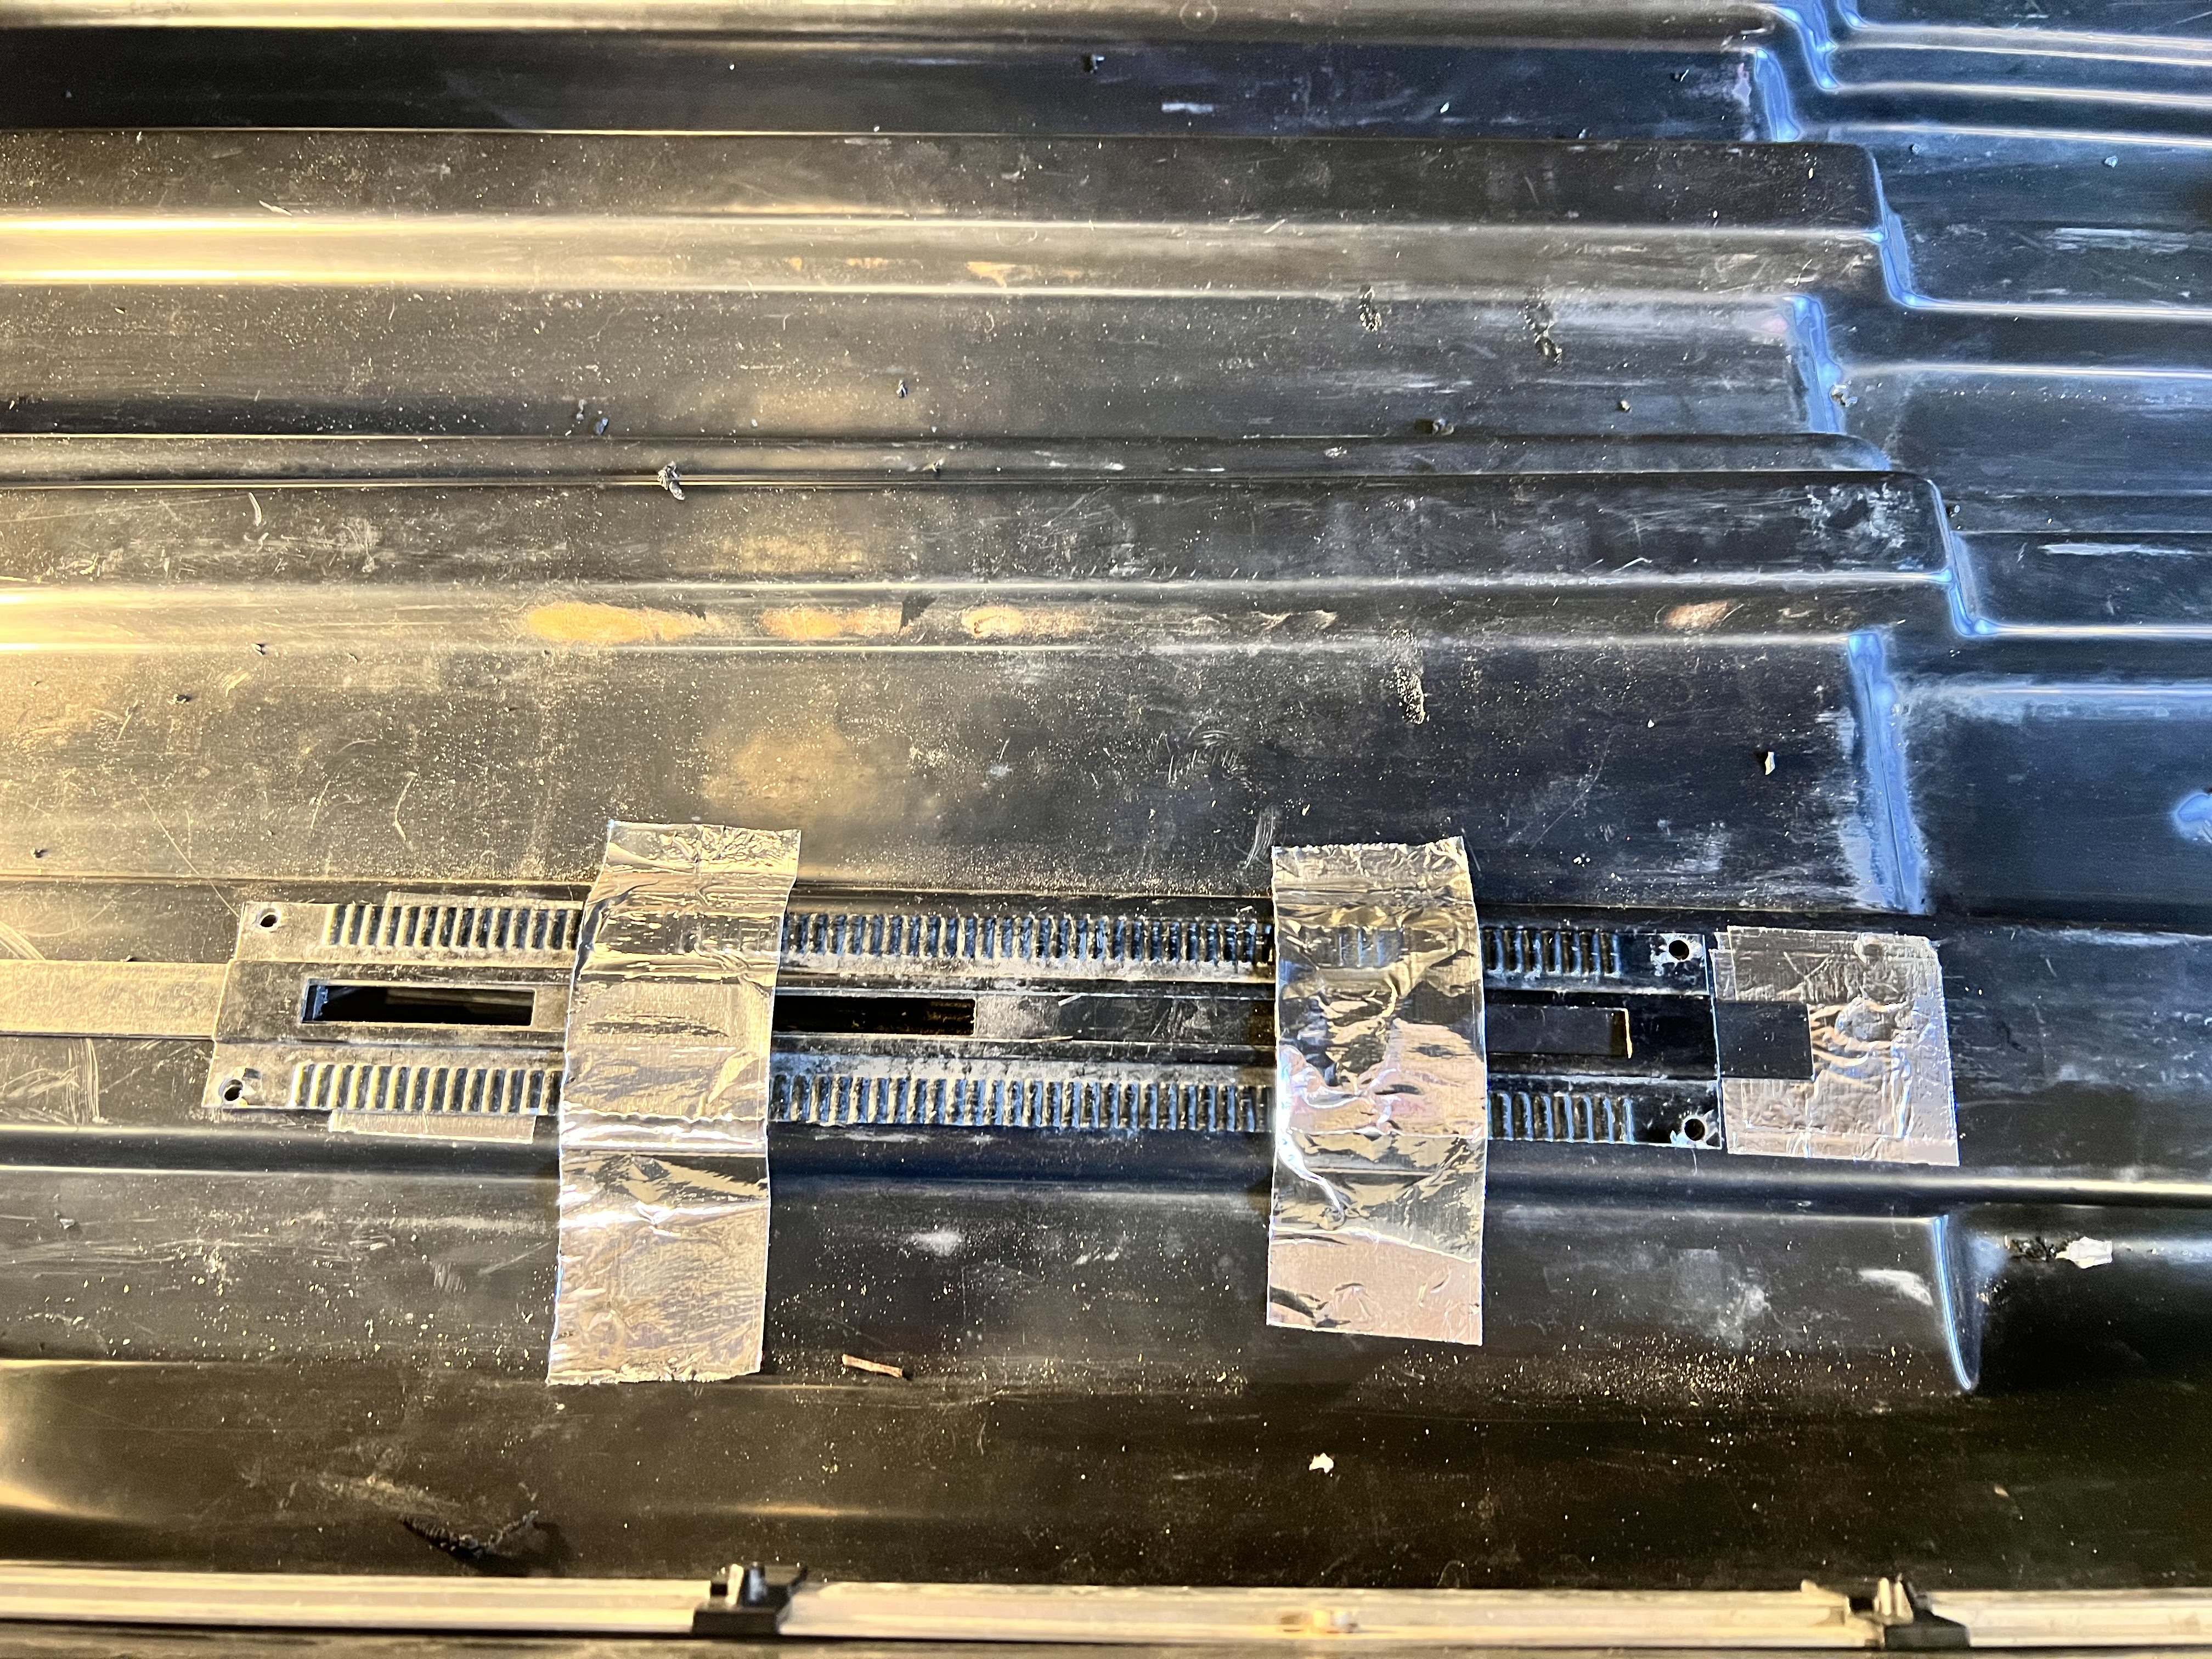
- rivet the slide strip in place.
- re-assemble
Results
The cargo carrier now clears the rear hatch!
References
| Reference | URL |
|---|---|
Manual | |
| Thule Parts | https://www.thule.com/en-ca/thule-support/spare-parts?c={1CD6D9DA-1776-4045-A495-7BC6DEEE541D}&sc={DB646D00-7ACC-48CC-A1F4-7156863EF55F}&q=29710 |